ROcto is the Remote Octo server. It is an implementation of the Postgres server, and receives SQL queries from any clients that can communicate with Postgres over the network. These queries are passed to Octo, which interacts with the database and passes results back through ROcto to the clients.
To terminate the ROcto instance, you may use CTRL+C. Note that the rocto instance may not exit immediately upon sending CTRL+C if there are still active client connections. In that case, rocto will gracefully exit once all client connections are closed.
Mandatory arguments for long options are also mandatory for short options.
-a, --allowschemachanges
Note
The -a/--allowschemachanges option is off by default and must be explicitly enabled since normal users will not need to change the schema. When using this option, implement security measures appropriate to the environment, e.g. network controls to restrict access to the listening TCP port to a specific host or subnet.
Allows ROcto to make changes to the schema (CREATE TABLE and DROP TABLE) and to modify existing tables (INSERT, UPDATE, and DELETE).
-c, --config-file=<filepath>
Note
Octo looks for configuration files in default locations, e.g. $ydb_dist/plugin/octo/octo.conf. If a configuration file is specified on the command line, this will override any configuration specified in files from the default locations.
Use specified configuration file instead of the default.
-e, --emulate=<db_name>
Specify the SQL database that Octo should emulate. Currently supported emulations are MYSQL and POSTGRES. If you wish to emulate MariaDB, choose MYSQL.
-h, --help
Display the help message and exit.
-p, --port=<number>
Listen on the specified port.
-v, --verbose=<number>
Specify amount of information to output when running commands specifying a numeric value from zero to five or adding additional 'v' characters. See Verbose Launching Option for more information on verbosity levels.
-r, --version
Display version information and exit.
-w, --readwrite
Allow users with read-write permissions to run INSERT, UPDATE, and DELETE.
ROcto can also be managed as a Systemd service by creating a rocto.service file in the appropriate directory, e.g. /lib/systemd/system/ on Ubuntu. For example:
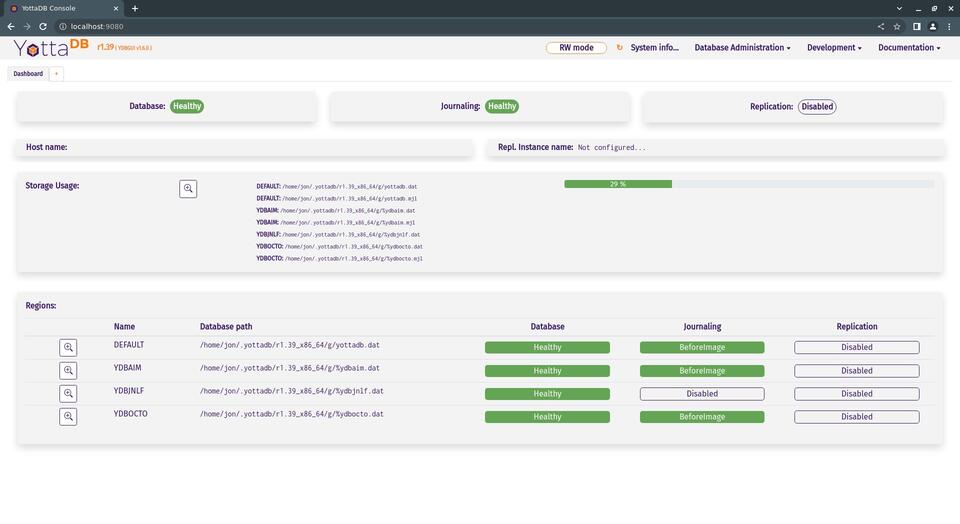
Octo queries can be written interactively using the YottaDB GUI. If you installed the GUI when you installed YottaDB, then you can start it by running:
yottadb-run%ydbgui--readwrite
You can then access the GUI by directing your browser to localhost:9080:
YottaDB GUI dashboard
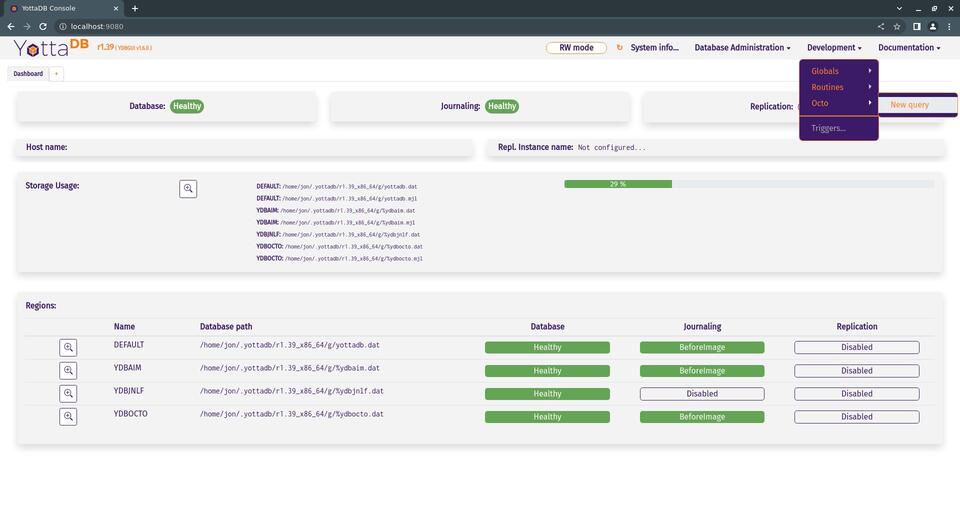
To write a new query, navigate to Development -> Octo -> New Query:
Navigating to the Octo query editor
Here, you can use the top text box to write SQL queries, then run them with the "play" button:
Writing an Octo query in the GUI query editor
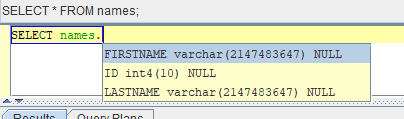
As seen in the above screenshot, you can also use the left hand tree to browse the SQL tables and functions. You can even also drag and drop tables and functions into the SQL editor.
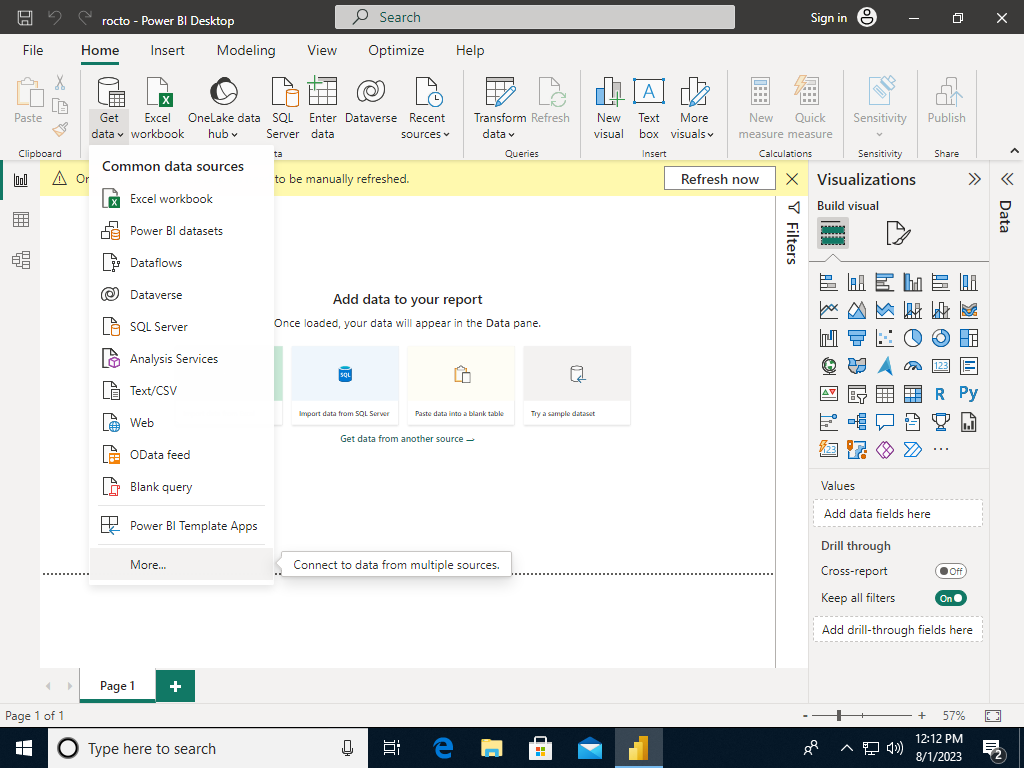
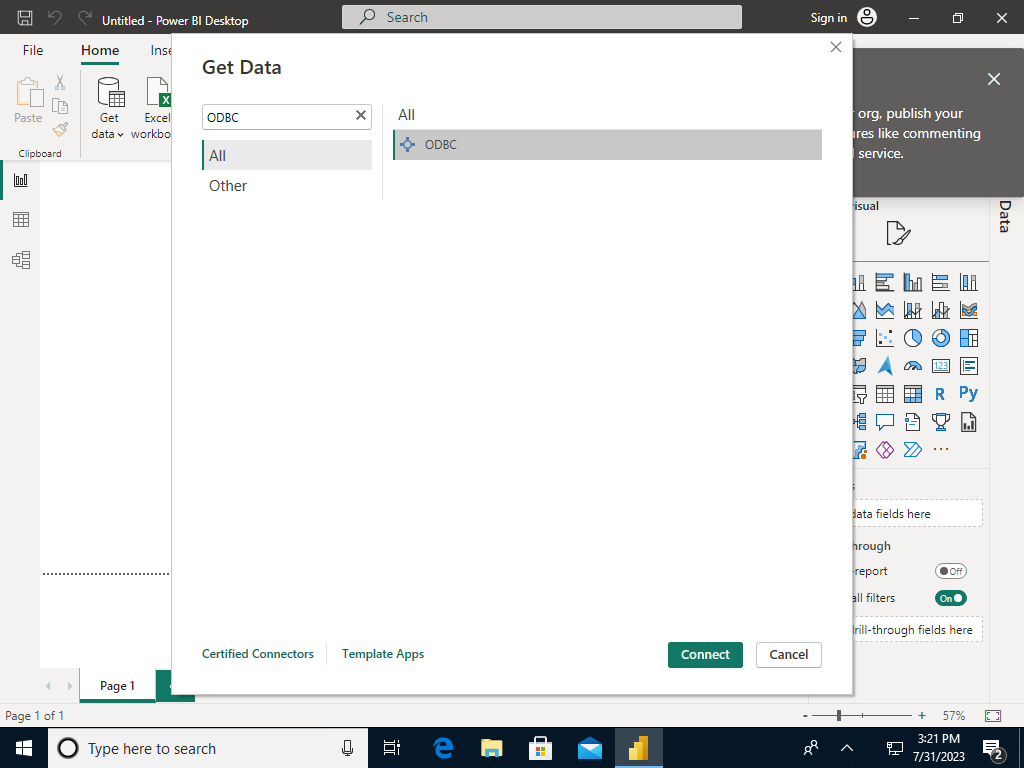
The easiest way to access ROcto using Microsoft tools is via the PostgreSQL ODBC driver. So, before demonstrating how to use ROcto with Excel and PowerBI, we'll show you how to setup the PostgreSQL ODBC driver for use with ROcto on Windows.
First, download an ODBC driver with at least version 13 from the PostgreSQL ODBC downloads page. Then, run the file you downloaded to open the install wizard, then click through to install the driver.
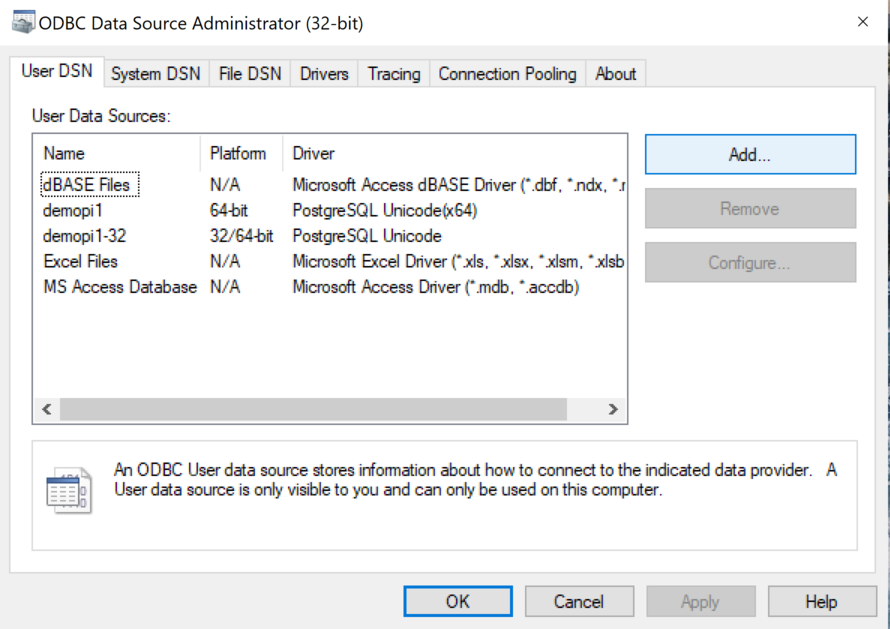
Once the ODBC driver is installed, run the ODBC Data Sources application (odbcad32.exe). In the application window, click Add... to add a new User DSN:
Running ODBC Data Sources
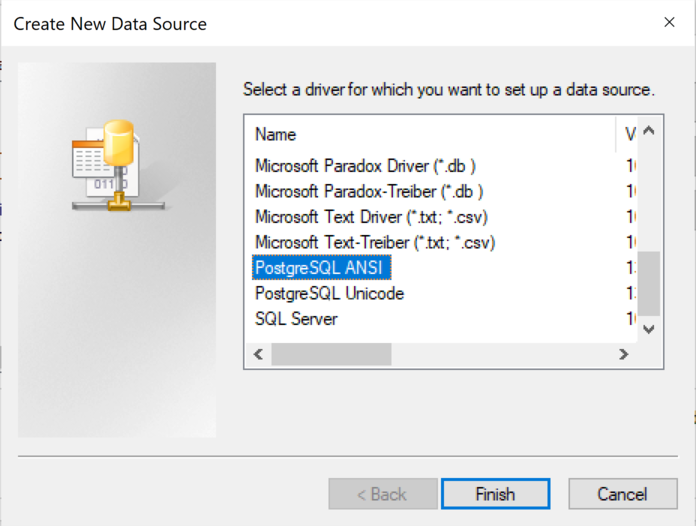
Then, in the CreateNewDataSource window, scroll down to the PostgreSQLANSI driver you just installed, select it, and click Finish:
Creating a new Data Source
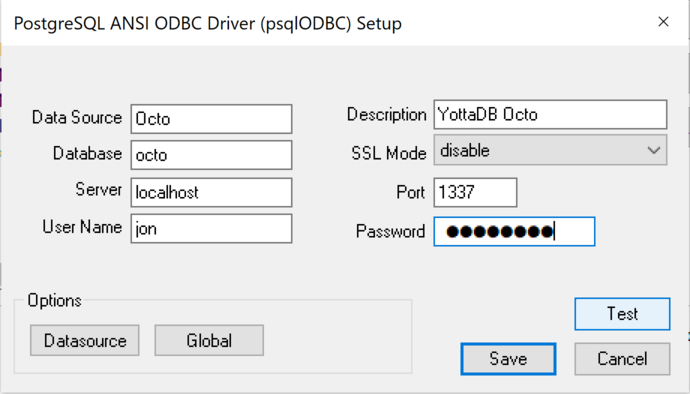
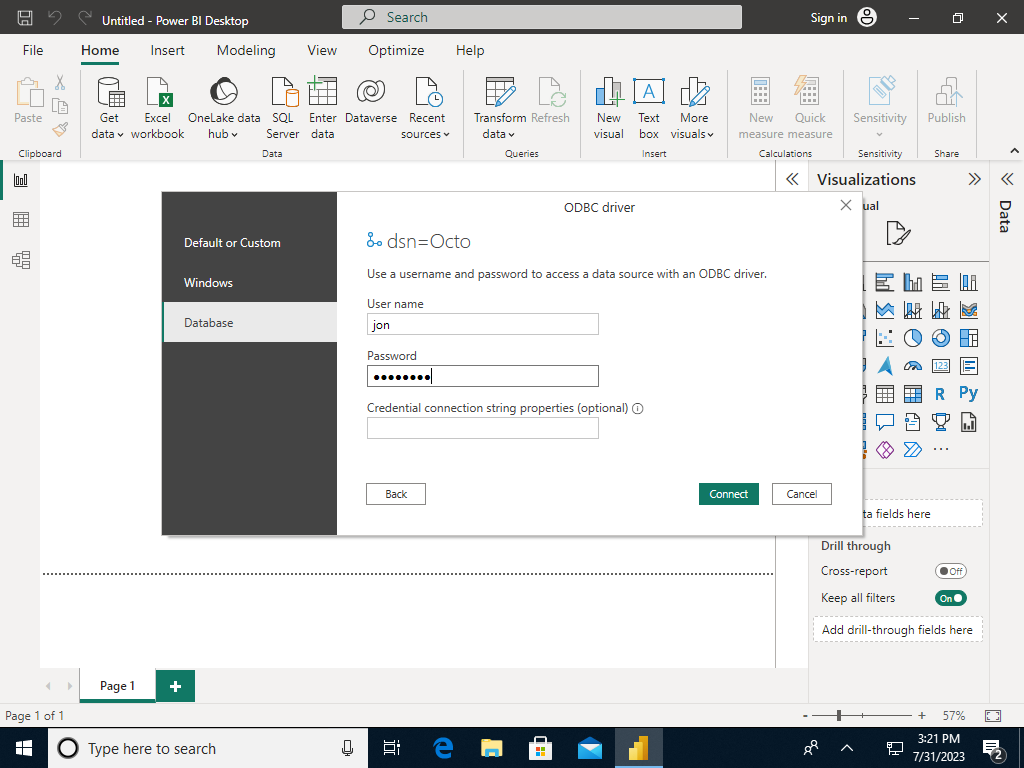
Next, in the PostgreSQLANSIODBCDriver(psqlODBC)Setup window, fill out the form with the connectivity information for your ROcto instance. For example, if accessing a ROcto instance running inside WSL2, your configuration will look similar to this:
Configuring the PostgreSQL ANSI ODBC Driver
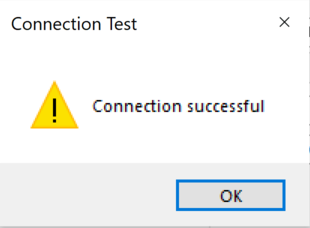
If you haven't yet started ROcto, then do so now. Then, click the Test button to test the connection; if everything is working, you should see a Connectionsuccessful message:
Testing the PostgreSQL ANSI ODBC Driver connection
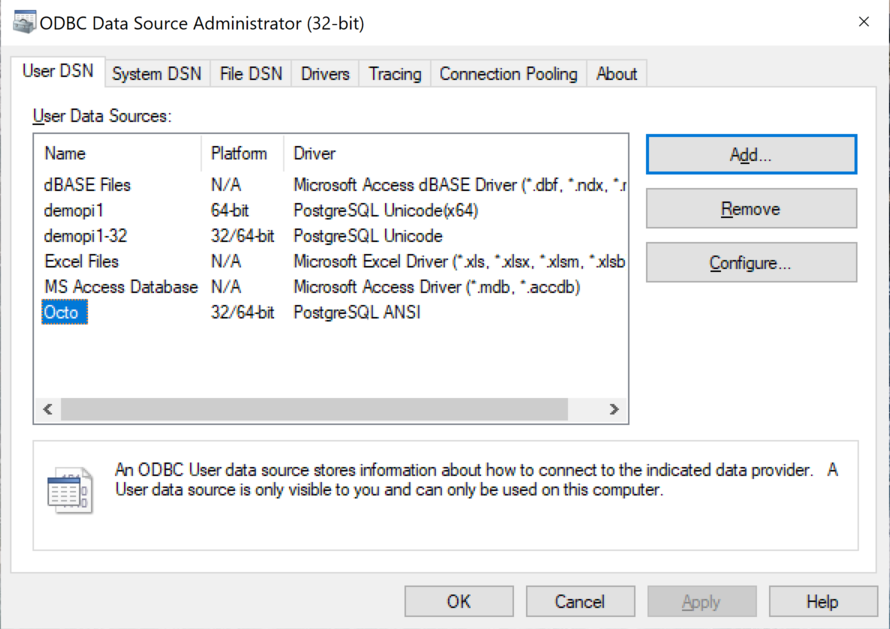
Press OK to go back to the main dialog.
Successful PostgreSQL ANSI ODBC Driver connection
You are now done. Press OK to close the ODBC Data Sources application.
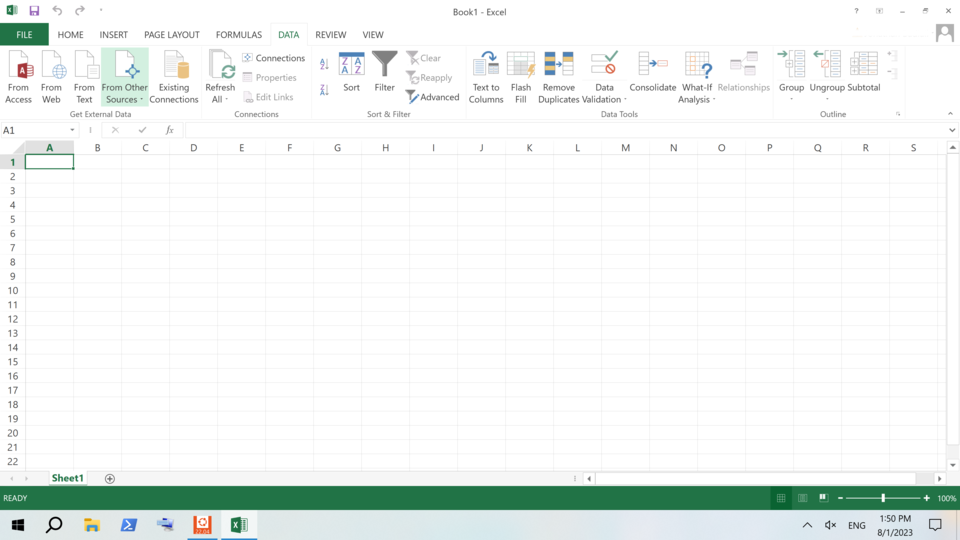
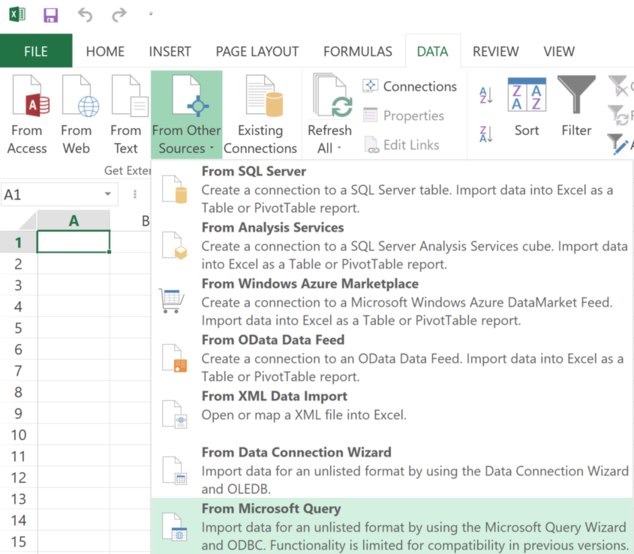
To import ROcto data into Microsoft Excel, start by opening up Excel. Then, navigate to the DATA tab and select FromOtherSources:
Getting data "From Other Sources" in Excel
In the drop down, select FromMicrosoftQuery:
Selecting "Microsoft Query" in Excel
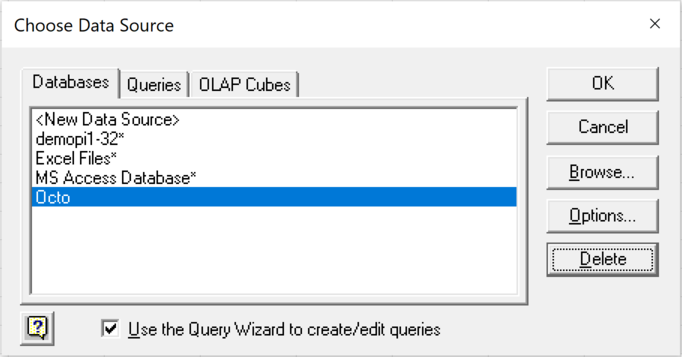
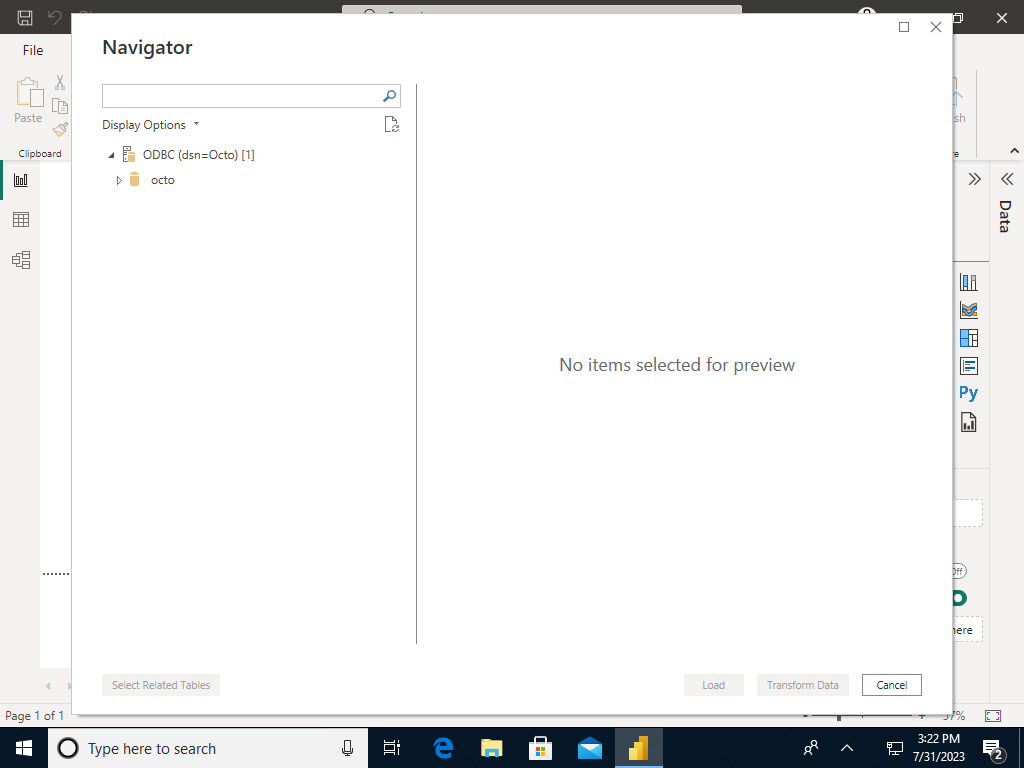
Select the previously set-up Octo data source:
Choosing a ROcto data source in Excel
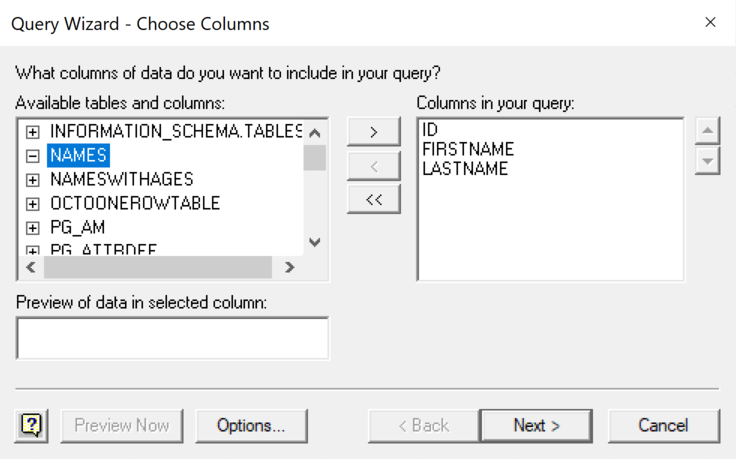
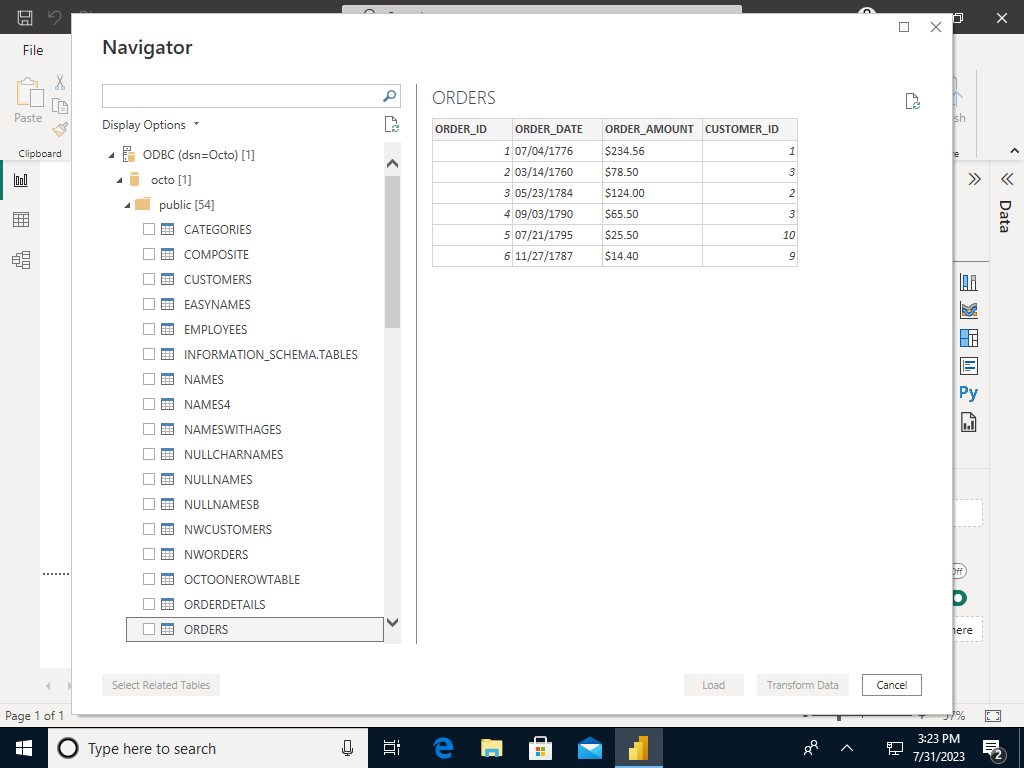
In the QueryWizard-ChooseColumns window, select which tables and/or columns you would like to include in your query, e.g.:
Choosing data columns using the Excel Query Wizard
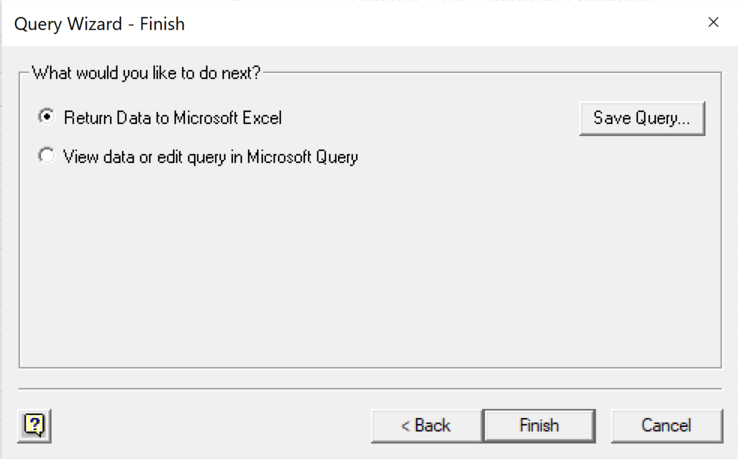
Then, click Next to move on, then click through the subsequent windows using the Next button until you get to the QueryWizard-Finish window. Then, click Finish:
Finishing the Excel Query Wizard
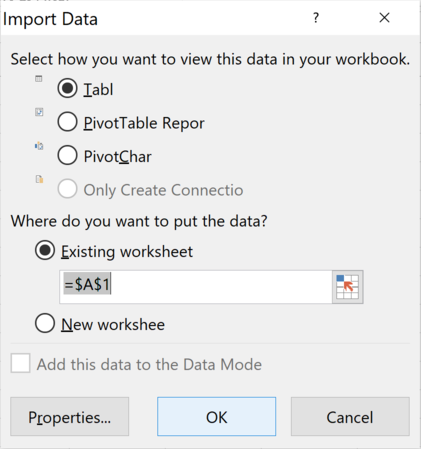
Finally, in the ImportData window, specify how you'd like to view the data and where you want to put it, e.g.:
Importing ROcto data into Excel
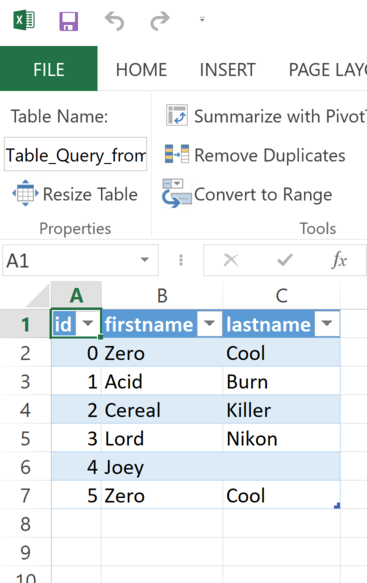
You should then see the data you selected in your Excel spreadsheet, e.g.:
With each of these products, you have to pick the exact Postgres JDBC driver to use. The procedure is described in detail in "Connecting using SQuirreL SQL" below; it's similar for the other Java clients. Note that if the Java client gives you the option to use SQL transactions, you need to disable that as Octo does not yet support SQL transactions.
Not all JDBC versions listed at JDBC driver website work with Rocto. Here are the versions tested and whether they work or not:
Version
Works?
Notes
42.2.*
Yes
42.3.*
No
Requires SQL transactions which
are not yet supported in Octo
SQuirreL SQL is an open-source Java SQL Client program for any JDBC compliant database. This documentation will describe in detail how to connect it to ROcto.
Pre-requisite steps:
Make sure you know the IP address/port for your ROcto server. The port can be configured for ROcto in the config file.
ROcto requires the creation of a user name and password. Follow the directions given in the Octo Administration Guide to add a new user.
Note that users must be created with adequate permissions to run certain types of SQL statements, i.e. CREATE, DROP, INSERT, UPDATE, and DELETE. See the Octo Administration Guide for more information on user permissions.
The overall steps are as follows:
Install Java on your computer.
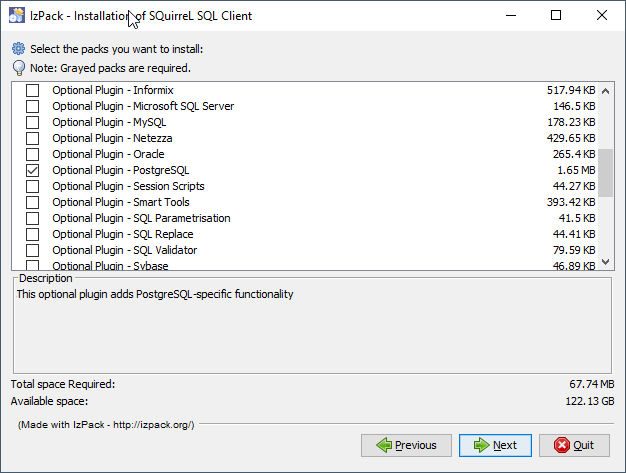
Install Squirrel SQL with the PostgreSQL driver
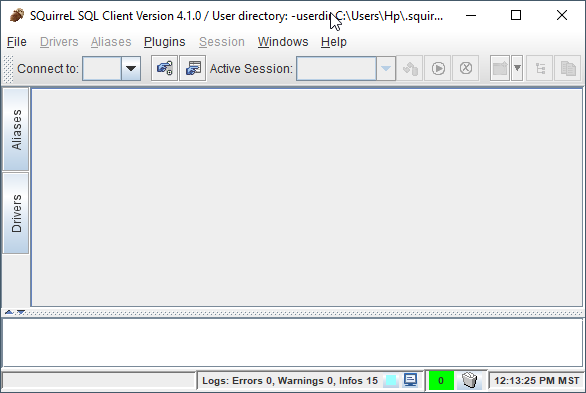
Launch Squirrel SQL
Configure the PostgreSQL driver to use the installed driver files.
Create a connection (called an Alias) using the PostgreSQL driver.
Connect using the Alias
Keep in mind that an Alias in Squirrel really means a connection, or more properly, a type of connection using a specific driver.
Java is required to be installed in order to use SQuirrel SQL. Install Java if not already installed. Note that the Oracle version has some licensing limitations, but OpenJDK does not; but the OpenJDK version does not include auto-updating capabilities on some platforms.
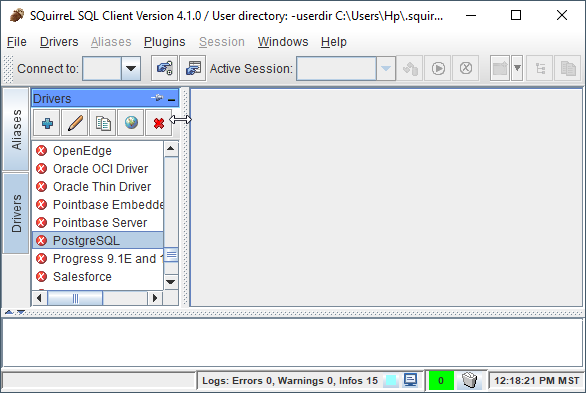
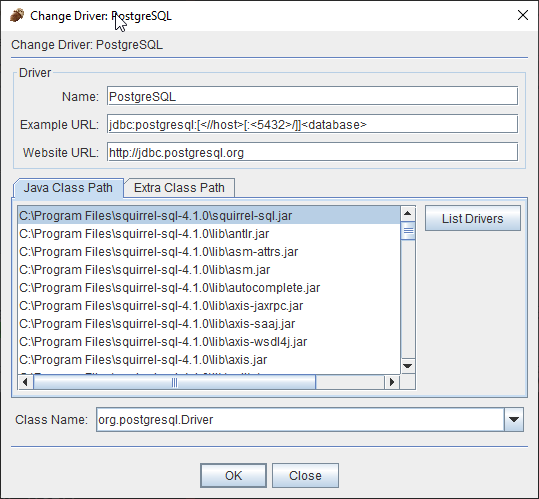
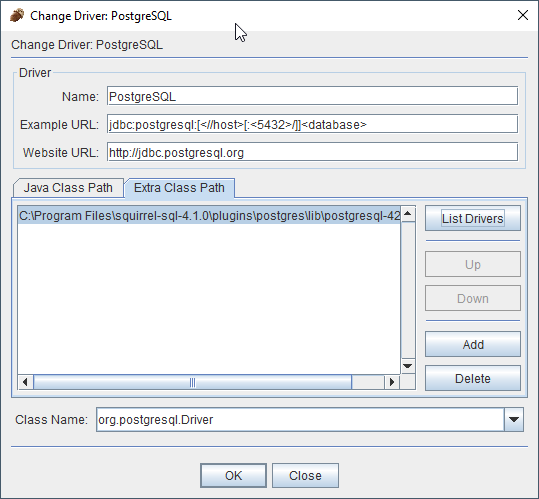
Remember the SquirrelSQL install path you were asked to note down? We need it now. Navigate to that install path, then to "plugins", then to "postgres", then to "lib".
SquirrelSQL Modify Postgres Driver - Navigation
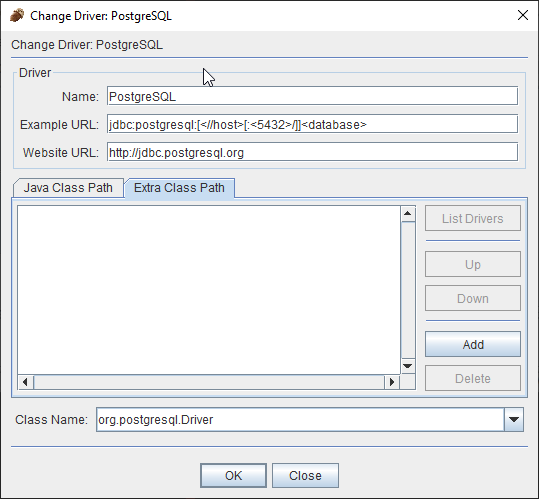
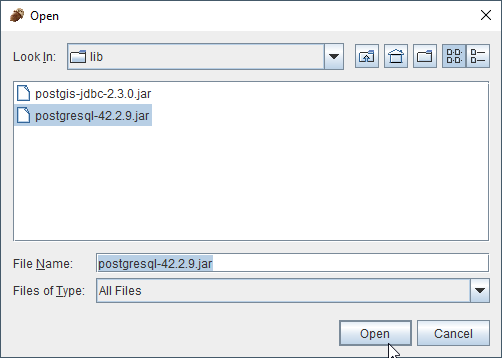
Within the "lib" directory, you will find two files. We want the one called "postgresql-nn.n.n.jar". Click on that.
SquirrelSQL Modify Postgres Driver - Select
Press "open".
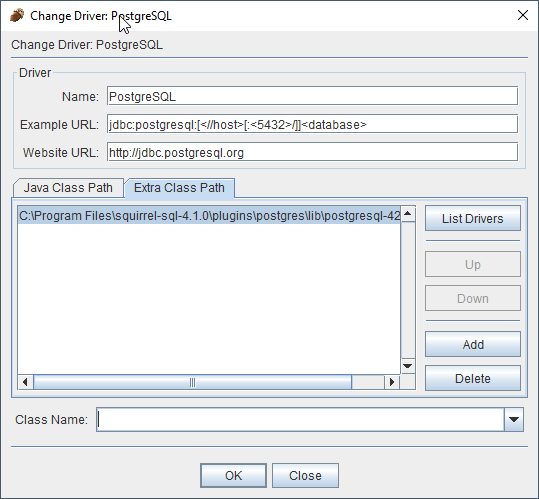
SquirrelSQL Modify Postgres Driver - After Open
Next, press "List Drivers". You will see the "Class Name" fill out.
SquirrelSQL Modify Postgres Driver - List Drivers
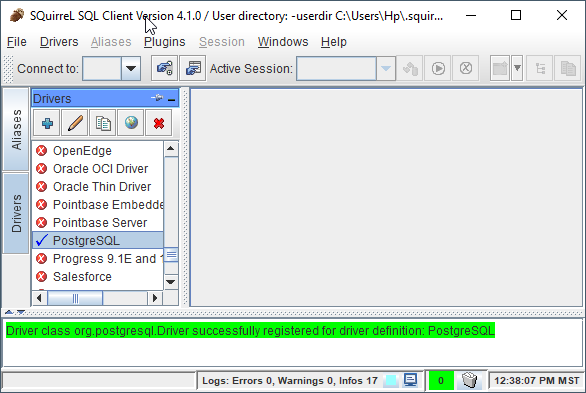
Then, you will see this after you press OK. Notice the check mark next to the driver. That's what we want to see.
SquirrelSQL Modify Postgres Driver - Completion
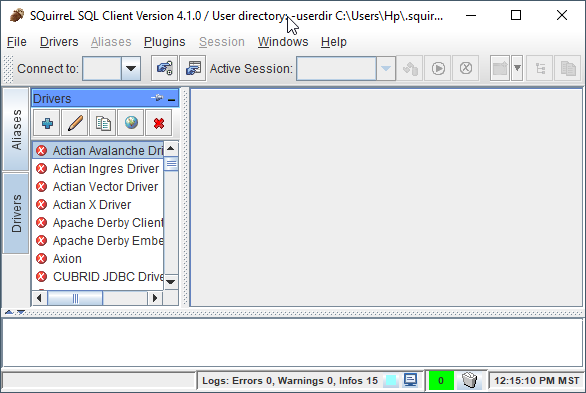
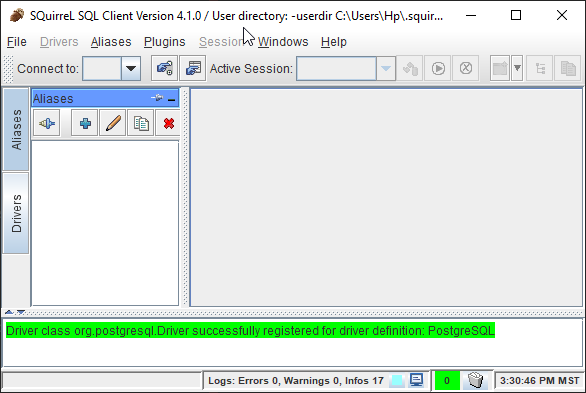
Next, create an alias for your ROcto server, including the server IP address and port number. First, click on the Windows menu > Aliases.
SquirrelSQL Add Alias - Side Bar
Then, click on Aliases, new Alias.
SquirrelSQL Add Alias - Main Screen
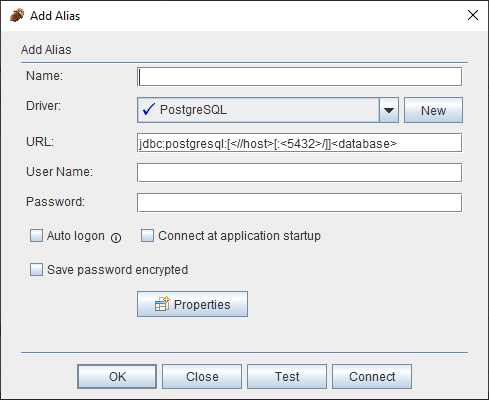
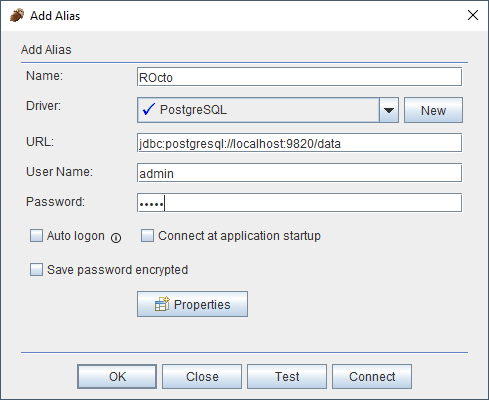
In here, fill the fields as follows:
Name: Any name will do. ROcto for now.
Driver: Should be pre-selected to PostgreSQL.
URL: Should be in the format jdbc:postgresql://{ip_address}:{port}/{db_name}. Replace ip_address and port with proper values. Octo does not currently support multiple databases exposed from a single ROcto process, so db_name can be anything.
Username: ROcto username set-up in pre-requisites section.
Password: ROcto password set-up in pre-requisites section.
Here's a sample fully filled out dialog:
SquirrelSQL Add Alias - Main Screen Filled Out
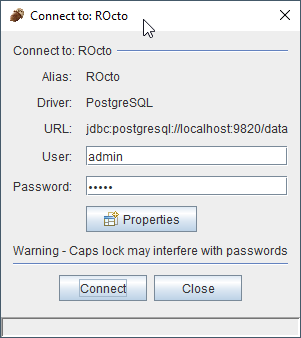
You should press "Test" and then "Connect" on the Test Dialog to test your connection. Once you are done, press OK. Once you do that, you will be immediately presented with another dialog to connect to ROcto:
SquirrelSQL ROcto Connection Prompt
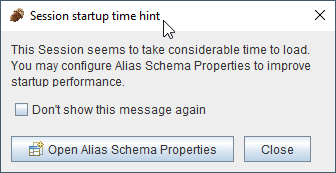
Now press "Connect". If you have a big schema, you will get this warning that it's taking too long to load. It's okay to ignore this warning. Press "Close".
SquirrelSQL ROcto Load Time Warning
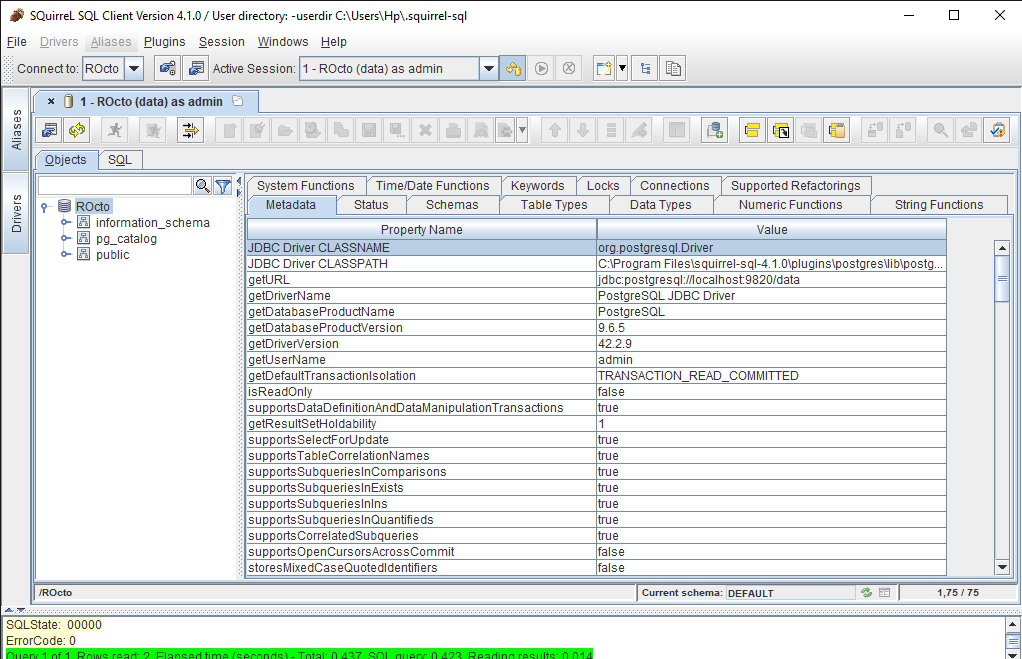
At this point, you will see the main screen. In this screen, you can explore the schema for the tables in Octo.
SquirrelSQL ROcto Connected At Last!
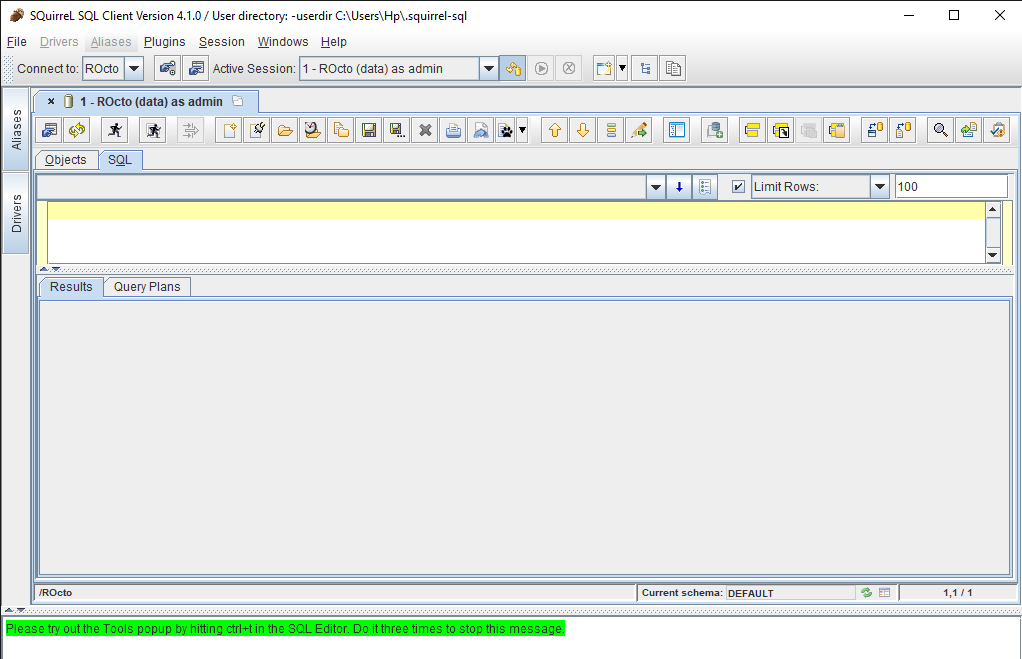
To write SQL statements, switch to the SQL tab. Drag down the divider to give yourself more editing space.
SquirrelSQL ROcto SQL Tab
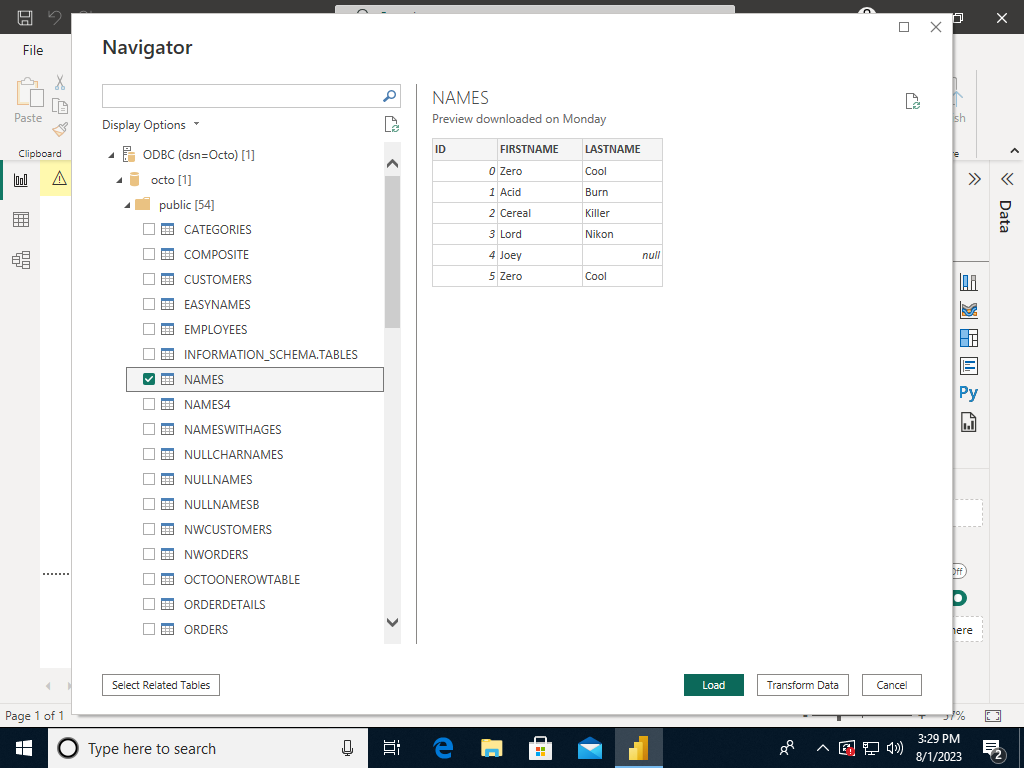
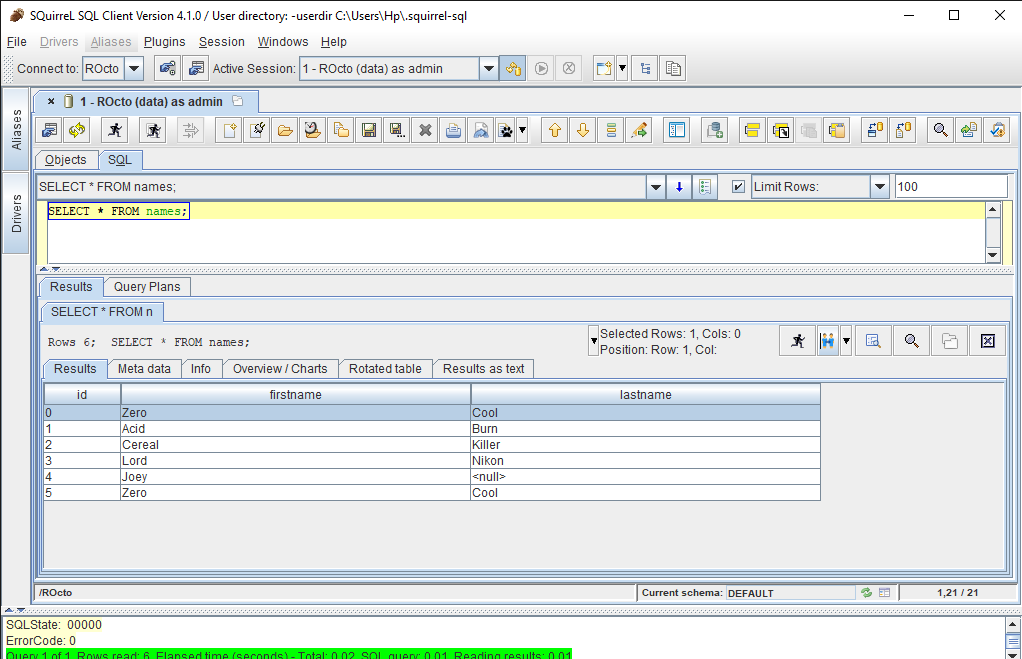
Suppose there is a table "names" with records in it:
R is a free software environment for statistical computing and graphics. To connect R to Octo data, you can either use the JDBC driver or the Postgres driver.
The following are the steps for each one. Note that in the examples ROcto is listening at the localhost on port 1337 with user ydb with password ydbrocks.
Consult the R Website for specific install instructions for your platform. Type R to start R.
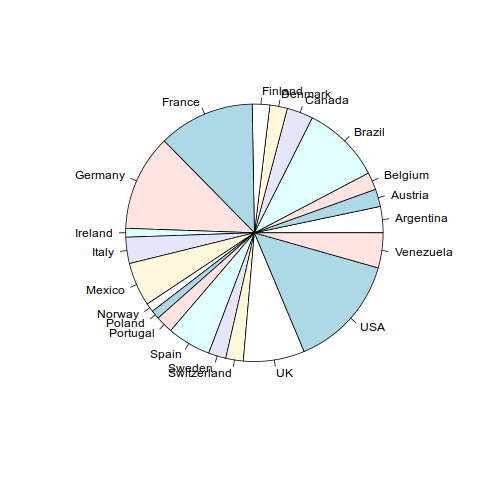
# Install and Use RJDBC packageinstall.packages('RJDBC')library(RJDBC)drv<-JDBC("org.postgresql.Driver",/path/to/postgresJDBC.jar)# Connect to databaseconn<-dbConnect(drv,"jdbc:postgresql://localhost:1337/helloR","ydb","ydbrocks")# Load, summarize, create a pie chart into a pdfcustomers<-dbGetQuery(conn,"select * from nwcustomers")summary(customers)country_table<-table(customers$country)pdf('customers.pdf')pie(country_table)dev.off()
# Install and use RPostgres Packageinstall.packages('RPostgres')library(DBI)# Connect to databasecon<-dbConnect(RPostgres::Postgres(),dbname='helloR',host='localhost',port=1337,user='ydb',password='ydbrocks')# Load, summarize, create a pie chart into a pdfquery<-dbSendQuery(con,"SELECT * FROM nwcustomers")customers<-dbFetch(query)summary(customers)country_table<-table(customers$country)pdf('customers.pdf')pie(country_table)dev.off()
Sample output as an image (generated using the png() function):