YDBApron
YDBApron is a simple recipe management application that can be used to create recipes, track food costs, and plan production schedules. By the end of the following tutorial, you should have a fully-functional recipe management application and a solid grasp of how YottaDB can be used to develop Python applications.
YDBApron uses the YottaDB Python API, YDBPython, in conjuction with the Flask web development framework and the Bootstrap frontend toolkit.
Accordingly, the tutorial assumes a working knowledge of Python and passing familiarity with Flask and the Jinja2 templating engine it uses.
In particular, this tutorial assumes you are familiar the following Python concepts:
And the following Flask concepts:
Tutorial
YDBApron can be considered as a combination of frontend and backend components. Since these components depend on each other we'll develop them incrementally, side-by-side to show how everything fits together. By the end of the tutorial, we'll have a fully-functional application comprised of both frontend and backend components, using YottaDB for the application data store.
1. Set up a development environment
Before building YDBApron, you'll need a suitable development environment. For this tutorial, a simple Python virtual environment will do.
To set up a Python venv, first make sure you have the Python venv module installed, then use it to create a new virtual environment in a new directory:
sudo apt install python3-venv
mkdir ydbapron && cd ydbapron
python3 -m venv .venv
This will create a new ydbapron directory and create a Python virtual environment there.
Next, activate the virtual environment and install the Python packages required by YDBApron:
source .venv/bin/activate
pip install flask yottadb flask_cors WTForms
Lastly, create the YDBApron directory structure to put application files in:
mkdir -p YDBApron/templates
2. Configure the application
Now, you're ready to start building the application. To start with, you'll create a Flask application factory per the approach used in the Flask documentation.
This is done by defining a create_app() function that returns a Flask object that acts as the application instance.
Do this by creating a new __init__.py file in the YDBApron directory:
└── YDBApron
    └── __init__.py
Then write this code in it:
import os

from flask import Flask
from flask_cors import CORS


# Create signal handler for SIGINT so that CTRL-C can be used to terminate the application
def handle_sigint(sig, frame):
    sys.exit(0)


signal.signal(signal.SIGINT, handle_sigint)


def create_app(config=None):
    # Create a new application instance
    app = Flask(__name__, instance_relative_config=True)
    app.config.from_mapping(
        SECRET_KEY='dev',
    )

    # Enable CORS
    CORS(app, resources={r'/*': {'origins': '*'}})

    if config is None:
        # Load application configuration from file
        app.config.from_pyfile('config.py', silent=True)
    else:
        # Load configuration from argument
        app.config.from_mapping(config)

    # Ensure app folder exists
    try:
        os.makedirs(app.instance_path)
    except OSError:
        pass

    # Application routes go here...

    return app
Most of this is boilerplate taken from the Flask documentation, so we won't expound on it here.
Next, create a new globals.py file to hold a handful of variables used across various modules in YDBApron and add these lines to it:
GRAMS_PER_OUNCE = 28  # Approximate number of grams in an ounce
OUNCES_PER_POUND = 16  # Number of ounces in a pound
GRAMS_PER_MILLILITER = 1  # Number of grams in a milliliter. May be inaccurate for liquids other than water
MAX_PRODUCT_SPECS = 6  # Maximum number of product specifications that can be defined for a single recipe
MAX_INGREDIENTS = 200  # Maximum number of ingredients that can be stored. Needed for pre-allocation of form fields
MAX_RECIPES = 100  # Maximum number of recipes that can be stored. Needed for pre-allocation of form fields
With __init__.py and globals.py in place, now it's time to start laying the real groundwork to build out YDBApron.
3. Stub out application routes
With the application setup out of the way, you can start stubbing out the routes used for mapping URLs to application behaviors.
These stubs will give us a roadmap of how to build up YDBApron incrementally. They will also allow us to build the application's navigation bar, giving us a working, but mostly useless, application.
Using the code below, you'll create three groups of routes, reflecting the three main high-level data objects of YDBApron: ingredients, recipes, and production schedules.
Each of these data objects will get a route for each of the following behaviors: add, list, edit, and delete. In other words, each data object supports Create, Read, Update, and Delete (CRUD) operations.
First, create a route for the application homepage by replacing the # Application routes go here... line from the previous section with the following:
def create_app(config=None):
    ...

    # Application routes
    @app.route('/')
    def home():
        return "<h1>Welcome to YDBApron!</h1>"
Next, import the Flask redirect method and add some routes for managing ingredients:
...
from flask import Flask, redirect
...

def create_app(config=None):
    # Application routes
    ...

    # Ingredients
    @app.route("/ingredients/list", methods=("GET",))
    def list_ingredients():
        return "<h1>Ingredients</h1>"

    @app.route("/ingredients/add", methods=("GET", "POST"))
    def add_ingredient():
        return "<h1>Add Ingredient</h1>"

    @app.route("/ingredients/edit/<category>/<ingredient_name>", methods=("GET", "POST"))
    def edit_ingredient(category, ingredient_name):
        return "<h1>Edit Ingredient</h1>"

    @app.route("/ingredients/delete", methods=("POST",))
    def delete_ingredient():
        return redirect("/ingredients/list")
Now, check to see whether application runs by running it with:
FLASK_APP=YDBApron flask run
You should receive a message like the following:
* Serving Flask app 'YDBApron'
 * Debug mode: off
WARNING: This is a development server. Do not use it in a production deployment. Use a production WSGI server instead.
 * Running on http://127.0.0.1:5000
Press CTRL+C to quit
Then, using your browser, manually navigate to each of the URLs defined above to confirm the routes are working as expected, i.e.:
localhost:5000/:
localhost:5000/ingredients/list:
localhost:5000/ingredients/add:
localhost:5000/ingredients/edit/flour/rye(The route expects two URL parameters, so we add "flour" and "rye" here to satisfy it. More on this later.):
localhost:5000/ingredients/delete: Just redirects tolocalhost:5000/ingredients/list.
Once the ingredient routes are working, go ahead and add the routes for recipes and production schedules:
...

def create_app(config=None):
    ...

    # Application routes
    ...

    # Ingredients
    ...

    # Recipes
    @app.route("/recipes/list", methods=("GET",))
    def list_recipes():
        return "<h1>Recipes</h1>"

    @app.route("/recipes/<category>/<recipe_name>", methods=("GET",))
    def show_recipe(category, recipe_name):
        return f"<h1>{category}: {recipe_name}</h1>"

    @app.route("/recipes/add", methods=("GET", "POST"))
    def add_recipe():
        return "<h1>Add Recipe</h1>"

    @app.route("/recipes/edit/<category>/<recipe_name>", methods=("GET", "POST"))
    def edit_recipe(category, recipe_name):
        return f"<h1>Edit Recipe: {category}: {recipe_name}</h1>"

    @app.route("/recipes/delete", methods=("POST", "GET"))
    def delete_recipe():
        return redirect("/recipes/list")

    # Production Schedules
    @app.route("/schedules/list", methods=("GET",))
    def list_schedules():
        return "<h1>Schedules</h1>"

    @app.route("/schedules/<schedule_name>", methods=("GET",))
    def show_schedule(schedule_name):
        return f"<h1>{schedule_name}</h1>"

    @app.route("/schedules/add", methods=("GET", "POST"))
    def add_schedule():
        return "<h1>Add Schedule</h1>"

    @app.route("/schedules/edit/<schedule_name>", methods=("GET", "POST"))
    def edit_schedule(schedule_name):
        return f"<h1>Edit Schedule: {schedule_name}</h1>"

    @app.route("/schedules/delete", methods=("POST", "GET"))
    def delete_schedule():
        return redirect("/schedules/list")

    ...
Now, again try running the application with flask --app YDBApron run and manually validating the new URL routes, i.e.:
localhost:5000/recipes/list:
localhost:5000/recipes/add:
localhost:5000/recipes/edit/bread/rye(The route expects two URL parameters, so we add "flour" and "rye" here to satisfy it. More on this later.):
localhost:5000/recipes/delete: Just redirects tolocalhost:5000/recipes/list.localhost:5000/schedules/list:
localhost:5000/schedules/add:
localhost:5000/schedules/edit/Wednesday(The route expects one URL parameter, so we add "Wednesday" here to satisfy it. More on this later.):
localhost:5000/schedules/delete: Just redirects tolocalhost:5000/schedules/list.
Once all the routes are working, it's time to stub out the matching HTML templates and build the navigation bar.
4. Define form classes for accepting user input
In order to accept user input, you'll need some HTML forms to capture it. You can create these forms programmatically using the WTForms Python library that you installed with pip during the setup instructions above.
YDBApron keeps all form classes in a single forms.py file, and imports them into other files as needed.
Start by creating a new forms.py in the YDBApron module directory, i.e.:
- └── YDBApron
└── forms.py
Then, add the necessary imports at the top of the file:
import yottadb

from wtforms import Form, FieldList, FormField, StringField, IntegerField, DecimalField, SelectField, TextAreaField
from wtforms.validators import InputRequired, Length, Optional

from YDBApron.globals import MAX_PRODUCT_SPECS, MAX_INGREDIENTS, MAX_RECIPES
Now, you can start adding form classes for each type of YDBApron data: ingredients, recipes, and production schedules.
For ingredients, define an IngredientForm class in forms.py below the imports:
# Imports...

 class IngredientForm(Form):
     ingredient_name = StringField("Name", [Length(min=2, max=100, message="Name must be between 4 and 100 characters long.")], render_kw={"placeholder": "e.g. whole wheat flour"})
     ingredient_category = StringField("Category", [Length(min=2, max=100, message="Category must be between 4 and 100 characters long.")], render_kw={"placeholder": "e.g. flour"})
     ingredient_amount = DecimalField("Amount", default=0, render_kw={"placeholder": "0"})
     ingredient_unit = SelectField("Unit", choices=[("g", "grams"), ("kg", "kilograms"), ("oz", "ounces"), ("lb", "pounds"), ("floz", "fluid ounces"), ("mL", "milliliters"), ("L", "liters"), ("one", "single item")])
     ingredient_price = DecimalField("Price", default=0, render_kw={"placeholder": "0"})
     ingredient_manufacturer = StringField("Manufacturer", [Length(min=2, max=100, message="Manufacturer must be between 4 and 100 characters long.")], render_kw={"placeholder": "e.g. King Arthur"})
     ingredient_vendor = StringField("Vendor", [Optional(), Length(min=2, max=100, message="Vendor must be between 4 and 100 characters long.")], render_kw={"placeholder": "e.g. Amazon"})
The IngredientForm class defines a number of fields for storing all ingredient-related information:
ingredient_name: The name of the ingredient, e.g. "rye flour"ingredient_category: The type of ingredient, e.g. "flour"ingredient_amount: The amount of the ingredient purchased at a time, e.g. "50"ingredient_unit: The unit measure associated with the amount, e.g. "lb"ingredient_price: The cost of the purchase amount, e.g. "32.99"ingredient_manufacturer: The manufacturer of the given ingredientingredient_vendor: The vendor of the given ingredient
Next, define a series of classes for accepting recipe input from the user:
class RecipeIngredientForm(Form):
    ingredient_name = StringField("Name", [Optional(), Length(min=4, max=100)], render_kw={"placeholder": "e.g. whole wheat flour"})
    ingredient_category = StringField("Category", [Optional(), Length(min=4, max=100)], render_kw={"placeholder": "e.g. flour"})
    ingredient_amount = DecimalField("Weight/Volume", [Optional()], render_kw={"placeholder": "0"})
    ingredient_unit = SelectField("Unit", [Optional()], choices=[("g", "grams"), ("kg", "kilograms"), ("oz", "ounces"), ("lb", "pounds"), ("floz", "fluid ounces"), ("mL", "milliliters"), ("L", "liters"), ("one", "single item")])


class ProductSpecificationForm(Form):
    specification_format = StringField("Format Type", [Optional(), Length(min=4, max=100)], render_kw={"placeholder": "e.g. loaf, roll, etc."})
    specification_format_size = StringField("Format Size", [Optional()], render_kw={"placeholder": "e.g. large, small, etc."})
    specification_size = DecimalField("Size", [Optional()], render_kw={"placeholder": "0"})
    specification_unit = SelectField("Unit", [Optional()], choices=[("g", "grams"), ("kg", "kilograms"), ("oz", "ounces"), ("lb", "pounds"), ("floz", "fluid ounces"), ("mL", "milliliters"), ("L", "liters"), ("it", "single item")])


class RecipeForm(Form):
    recipe_name = StringField("Name", [Length(min=4, max=100), InputRequired()], render_kw={"placeholder": "e.g. Rustic Wheat Bread"})
    recipe_category = StringField("Category", [Length(min=4, max=100), InputRequired()], render_kw={"placeholder": "e.g. bread"})
    ingredients = FieldList(FormField(RecipeIngredientForm, [Optional()]), min_entries=MAX_INGREDIENTS)
    specifications = FieldList(FormField(ProductSpecificationForm, [Optional()]), min_entries=MAX_PRODUCT_SPECS)
    procedure = TextAreaField("Procedure", [Length(min=4, max=2000), InputRequired()], render_kw={"placeholder": "e.g. Step 1: ..."})
These classes together define a single recipe form composed of two subforms. RecipeForm acts as the main form, and contains two subforms: RecipeIngredientForm and ProductSpecificationForm.
The subforms are represented by the ingredients and specifications fields of the RecipeForm class:
ingredients: A list ofRecipeIngredientFormobjects representing the ingredients in the recipespecifications: A list ofProductSpecificationFormobjects representing the product specifications for the recipe
Finally, define a series of fields for accepting production schedule information:
class ScheduleSpecificationForm(Form):
    specification_name = StringField("Specification Name", [Optional()])
    specification_size = StringField("Specification Size", [Optional()])
    specification_volume = DecimalField("Specification Volume", [Optional()], places=2, render_kw={"placeholder": 0})


class ScheduleRecipeForm(Form):
    recipe_name = StringField("Recipe Name", [Optional()])
    recipe_category = StringField("Recipe Category", [Optional()])
    specifications = FieldList(FormField(ScheduleSpecificationForm, [Optional()]), min_entries=6)
    supplementary_yield = IntegerField("Gross Yield", [Optional()], render_kw={"placeholder": 0})
    gross_yield = IntegerField("Gross Yield", [Optional()], render_kw={"placeholder": 0})
    gross_cost = DecimalField("Gross Yield", [Optional()], places=2, render_kw={"placeholder": 0})


class ScheduleForm(Form):
    schedule_name = StringField("Schedule Name", [Length(min=4, max=100), InputRequired()], render_kw={"placeholder": "e.g. Wednesday"})
    recipes = FieldList(FormField(ScheduleRecipeForm, [Optional()]), min_entries=MAX_RECIPES)
ScheduleForm defines a single schedule form and its recipes field contains a list of ScheduleRecipeForm subforms. Each ScheduleRecipeForm also has a specifications field that contains a list of ScheduleSpecificationForm objects.
When you're done, your forms.py file should look like forms.py.
Now that you've got form classes for every kind of data in the application, you can build out the application logic.
5. Add application logic
Now that you've got the application routes stubbed out, you can fill them in with application logic. By adding the application logic now, you'll later be able to test the templates and see results as you build them out in subsequent sections.
ingredients.py
Let's start with ingredients.py. In the previous section, you created four routes for handling ingredient-related database operations: /list, /add, /edit, and /delete.
Each of these routes relies on one or more supporting functions that contain most of the actual route logic. So, before filling out the routes themselves, you'll need to write the supporting functions: total_ingredients(), save_ingredient(), list_ingredients(), and get_ingredient().
Begin by creating ingredients.py and adding these import lines at the top:
import yottadb

from typing import AnyStr

from YDBApron.forms import RecipeForm, IngredientForm
Now, you can start adding the supporting functions.
total_ingredients()
First, add total_ingredients():
def total_ingredients() -> int:
    total = 0
    for category in yottadb.subscripts("^YDBApron", ("ingredients", "")):
        for ingredient in yottadb.subscripts("^YDBApron", ("ingredients", category, "")):
            total += 1
    return total
total_ingredients() simply tallies the total number of ingredients in the database. This is done using the subscripts() function of the YottaDB Python API to loop through each ingredient category, then each ingredient in each category.
Each subscripts() call is composed by passing a YottaDB global variable name along with a tuple of subscript names. The function returns an iterator containing all the subscripts at the level of the last subscript in the tuple.
For example, the subscripts() call in the outermost loop of total_ingredients() returns an iterator with every subscript at the next level under the database node at ^YDBApron("ingredients").
In other words, it returns an iterator with every possible value of category at ^YDBApron("ingredients",category).
For example, if there are two ingredient categories, "wet" and "dry", then this subscripts() loop twice and return the values "wet" and "dry", successively.
Similarly, the subscripts() call in the innermost loop will return an iterator for looping over every ingredient name within the given category.
That is, it returns every possible value of ingredient at ^YDBApron("ingredients",category,ingredient).
Putting these two subscripts() calls together, we can loop over every possible ingredient and ingredient category in the database using just two lines of code.
In this case, we just want to see how many ingredients there are, so we just increment the total variable by 1 for each iteration of the inner loop.
Once all the ingredients are tallied, the total is returned to the caller.
Note
Both Python tuples and lists can be passed to subscripts().
save_ingredient()
Next, add the save_ingredient() function:
def save_ingredient(form: IngredientForm):
    ingredient_name = form.ingredient_name.data
    ingredient_category = form.ingredient_category.data
    amount = form.ingredient_amount.data
    unit = form.ingredient_unit.data
    price = form.ingredient_price.data
    manufacturer = form.ingredient_manufacturer.data
    vendor = form.ingredient_vendor.data
    yottadb.set("^YDBApron", ("ingredients", ingredient_category, ingredient_name), f"{amount}|{unit}|{price}|{manufacturer}|{vendor}")
save_ingredient() is really just a wrapper around the set() function of the YottaDB Python API.
First, save_ingredient() extracts form data from the passed IngredientForm and stores each field value in a local variable. This is done simply for readability.
Then, these variables are used to construct a call to set(). The call is composed by passing a YottaDB global variable name, then a tuple of subscripts, and finally a string value.
In this case, the value is a series of values delimited by the pipe (|) character. The value is stored on the node at ^YDBApron("ingredients",ingredient_category,ingredient_name).
Note
Numeric values can also be passed to set().
delete_ingredient()
Now, add the delete_ingredient() function:
def delete_ingredient(category: AnyStr, ingredient: AnyStr):
    yottadb.delete_node("^YDBApron", ("ingredients", category, ingredient))
delete_ingredient() is simply a wrapper around the delete_node() function of the YottaDB Python API. The call is constructed by passing the name of the global variable used to store YDBApron data, ^YDBApron, followed by a tuple of subscripts defining the node to be deleted.
In this case, given values for category and ingredient, the database value at ^YDBApron("ingredients",category,ingredient) will be deleted, thus deleting the ingredient from the database.
Note that delete_tree() is not necessary in this case, since YDBApron doesn't create any subtrees under ^YDBApron("ingredients",category,ingredient). Rather, it just stores all ingredient information as a node value. So, there are no trees to delete, and it's okay to just delete the node here.
list_ingredient()
Next, add the list_ingredients() function:
def list_ingredients() -> dict:
    ydbapron = yottadb.Key("^YDBApron")
    ingredients = {}
    for category in ydbapron["ingredients"].subscripts:
        category = category.decode("utf-8")
        ingredients[category] = {}
        for ingredient in ydbapron["ingredients"][category].subscripts:
            ingredient = ingredient.decode("utf-8")
            spec = ydbapron["ingredients"][category][ingredient].value.decode("utf-8").split("|")
            ingredients[category][ingredient] = {}
            ingredients[category][ingredient]["amount"] = spec[0]
            ingredients[category][ingredient]["unit"] = spec[1]
            ingredients[category][ingredient]["price"] = spec[2]
            ingredients[category][ingredient]["manufacturer"] = spec[3]
            ingredients[category][ingredient]["vendor"] = spec[4]
            ingredients[category][ingredient]["dependencies"] = []
            for recipe_category in ydbapron["recipes"].subscripts:
                for recipe in ydbapron["recipes"][recipe_category].subscripts:
                    recipe = recipe.decode("utf-8")
                    if ydbapron["recipes"][recipe_category][recipe]["ingredients"][category][ingredient].data > 0:
                        ingredients[category][ingredient]["dependencies"].append({"category": recipe_category, "name": recipe})

    return ingredients
The purpose of this function is to build up a dictionary containing a list of all ingredients and ingredient data. This dictionary will later be used to populate the ingredients list page.
Unlike the previous functions you've defined, list_ingredients() doesn't use any YottaDB Python API functions. Rather, it uses the Key class from the API.
The Key class allows a YottaDB local or global variable name to be bound to a set of subscripts for ease of use and readability.
In this case, for example, we start by creating a new Key object that represents the YDBApron global variable, ^YDBApron on its own:
ydbapron = yottadb.Key("^YDBApron")
The new Key object can now be used to perform database objects through its attributes and methods. Additionally, it can itself be subscripted, allowing database operations to be performed on child nodes of the global variable.
For example, the first loop in this function loops over all the subscripts representing ingredient categories under ^YDBApron("ingredients"):
for category in ydbapron["ingredients"].subscripts:
    ...
These subscripts can then used to construct another loop, this time over every ingredient in the given category:
for ingredient in ydbapron["ingredients"][category].subscripts:
    ...
Key objects can also be used to access node values using the .value attribute, as is done in this second loop:
spec = ydbapron["ingredients"][category][ingredient].value.decode("utf-8").split("|")
This line uses the subscripts from the two previous loops to index the value at ^YDBApron("ingredients",category,ingredient), then parse the data stored there using the Python string .split() method.
After extracting the parsed data into the return dictionary, list_ingredients() then uses the same Key object to loop over recipe categories and recipes:
for recipe_category in ydbapron["recipes"].subscripts:
    for recipe in ydbapron["recipes"][recipe_category].subscripts:
        ...
These loops work the same as those above, but instead target a different subtree of the ^YDBApron global variable. This time, it loops over the subscripts under ^YDBApron("recipes") and ^YDBApron("recipes",category), respectively.
Finally, the .data. method of the Key class is used to check whether a given recipe references the given ingredient:
if ydbapron["recipes"][recipe_category][recipe]["ingredients"][category][ingredient].data > 0:
    ingredients[category][ingredient]["dependencies"].append({"category": recipe_category, "name": recipe})
If any recipe depends on an ingredient, that ingredient is noted down and later used to prohibit the user deleting that ingredient.
get_ingredient()
Now, add the get_ingredient() function:
def get_ingredient(category: AnyStr, ingredient_name: AnyStr) -> dict:
    ingredient = {}
    ingredient_spec = yottadb.get("^YDBApron", ("ingredients", category, ingredient_name)).decode("utf-8")
    ingredient["amount"] = ingredient_spec.split("|")[0]
    ingredient["unit"] = ingredient_spec.split("|")[1]
    ingredient["cost"] = ingredient_spec.split("|")[2]
    ingredient["manufacturer"] = ingredient_spec.split("|")[3]
    ingredient["vendor"] = ingredient_spec.split("|")[4]

    return ingredient
get_ingredient() retrieves all the data for the specified ingredient, parses it into a dictionary, and returns it to the caller.
This function uses the get() YottaDB API function without a Key object. No Key object is used for simplicity, since only one database operation is performed.
get_ingredients()
Finally, add the get_ingredients() function:
def get_ingredients(form: RecipeForm = None) -> dict:
    ydbapron = yottadb.Key("^YDBApron")
    ingredients = {}
    ingredient_forms = iter(form.ingredients) if form is not None else None
    for category in ydbapron["ingredients"].subscripts:
        category = category.decode("utf-8")
        ingredients[category] = {}
        for ingredient in ydbapron["ingredients"][category].subscripts:
            ingredient = ingredient.decode("utf-8")
            ingredients[category][ingredient] = get_ingredient(category, ingredient)
            ingredients[category][ingredient]["form"] = next(ingredient_forms)

    return ingredients
get_ingredients() retrieves all ingredients from the database and maps them to a corresponding RecipeIngredientForm from the received RecipeForm.
This function again uses a Key object instead of API functions in order to reduce code duplication and improve readablity.
That's it for the main application logic in ingredients.py.
recipes.py
Now let's write the logic for handling recipe data in recipes.py. Start by creating the file in the YDBApron directory and adding these import lines at the top:
import yottadb

from typing import AnyStr

from YDBApron.globals import GRAMS_PER_OUNCE, OUNCES_PER_POUND, GRAMS_PER_MILLILITER
from YDBApron.forms import RecipeForm, ScheduleForm
total_recipes()
First, write the total_recipes() function in YDBApron/recipes.py:
def total_recipes() -> int:
    total = 0
    for category in yottadb.subscripts("^YDBApron", ("recipes", "")):
        for recipe in yottadb.subscripts("^YDBApron", ("recipes", category, "")):
            total += 1

    return total
Much like total_ingredients(), total_recipes() uses the subscripts() API function to iterate over all the recipes in the database and take a tally of them.
total_in_grams()
Next, write the total_in_grams() function:
def total_in_grams(amount: float, unit: AnyStr) -> float:
    if unit == "g":
        return amount
    elif unit == "oz":
        return amount * GRAMS_PER_OUNCE
    elif unit == "lb":
        return amount * GRAMS_PER_OUNCE * OUNCES_PER_POUND
    elif unit == "ml":
        return amount * GRAMS_PER_MILLILITER
    else:
        assert(False)
        return amount
total_in_grams() is a simple utility function that converts a measurement from the given unit into grams.
add_recipe()
Now, write the add_recipe() function:
def add_recipe(recipe_form: RecipeForm):
    ydbapron = yottadb.Key("^YDBApron")
    recipe_name = recipe_form.recipe_name.data
    recipe_category = recipe_form.recipe_category.data
    gross_yield = 0
    # Get the gross yield first in order calculate ingredient proportions below
    for ingredient in recipe_form.ingredients:
        if ingredient.ingredient_name.data and ingredient.ingredient_category.data and ingredient.ingredient_amount.data:
            gross_yield += float(ingredient.ingredient_amount.data)
    for ingredient in recipe_form.ingredients:
        ingredient_name = ingredient.ingredient_name.data
        ingredient_category = ingredient.ingredient_category.data
        ingredient_amount = ingredient.ingredient_amount.data
        ingredient_unit = ingredient.ingredient_unit.data
        if ingredient_amount and ingredient_unit:
            # Only add fully defined ingredients to the database
            ingredient_proportion = float(ingredient.ingredient_amount.data) / gross_yield
            ydbapron["recipes"][recipe_category][recipe_name]["ingredients"][ingredient_category][ingredient_name].value = f"{ingredient_amount}|{ingredient_unit}|{ingredient_proportion}"
        else:
            print("WARNING: Incomplete ingredient information received. Omitting entry from database.")

    for specification in recipe_form.specifications:
        specification_format = specification.specification_format.data
        specification_format_size = specification.specification_format_size.data
        specification_size = specification.specification_size.data
        specification_unit = specification.specification_unit.data
        if specification_format and specification_format_size and specification_size and specification_unit:
            # Only add fully defined product specifications to the database
            ydbapron["recipes"][recipe_category][recipe_name]["specifications"][specification_format][specification_format_size].value = f"{specification_size}|{specification_unit}"
        else:
            print("WARNING: Incomplete specification information received. Omitting entry from database.")
    ydbapron["recipes"][recipe_category][recipe_name]["procedure"].value = recipe_form.procedure.data.encode("utf-8")

    return
add_recipe() processes a RecipeForm and uses a Key object to store the form data in the database.
The first loop in this function simply goes through all the ingredients in the form and sums their total weight or volume to get the gross yield of the recipe.
The second loop again loops through all the ingredients in the form, this time storing all the relevant ingredient information in the database.
The database update is done by indexing the Key object in the ydbapron variable and setting its .value member using the = operator. This syntax does the same thing as the set() API function, but in a more readable and reusable way.
Similarly, the third loop loops over all the product specifications defined in the form and adds the to the database. This is also done by setting the .value method on the ydbapron Key object.
Finally, the recipe's procedure is stored in the database in the same way.
delete_recipe()
Next, add delete_recipe():
def delete_recipe(category: AnyStr, name: AnyStr):
    yottadb.delete_tree("^YDBApron", ("recipes", category, name))

    return
Like delete_ingredient(), delete_recipe() simply wraps a YottaDB API function to delete data from the database.
In this case, however, delete_recipe() calls delete_tree() instead of delete_node() in order to delete all nodes and subtrees under the recipe node at ^YDBApron("recipes",category,name).
list_recipes()
Now, add list_recipes():
def list_recipes() -> dict:
    recipes = {}
    for category in yottadb.subscripts("^YDBApron", ("recipes", "")):
        category = category.decode("utf-8")
        recipes[category] = []
        for recipe in yottadb.subscripts("^YDBApron", ("recipes", category, "")):
            recipes[category].append(recipe.decode("utf-8"))

    return recipes
list_recipes(), like list_ingredients(), uses the subscripts() API method to retrieve a list of recipe names and categories by looping through all the categories and recipes in the database.
get_recipe()
Next, write the get_recipe() function:
def get_recipe(category: AnyStr, recipe_name: AnyStr) -> dict:
    ydbapron = yottadb.Key("^YDBApron")
    recipe = {}
    recipe["name"] = recipe_name
    recipe["category"] = category
    recipe["ingredients"] = {}
    recipe["gross_cost"] = 0
    recipe["yield"] = 0
    # Retrieve recipe ingredient information
    for ingredient_category in ydbapron["recipes"][category][recipe_name]["ingredients"].subscripts:
        ingredient_category = ingredient_category.decode("utf-8")
        recipe["ingredients"][ingredient_category] = {}
        for ingredient in ydbapron["recipes"][category][recipe_name]["ingredients"][ingredient_category].subscripts:
            # Get amount of each ingredient used in the recipe
            ingredient_unit = ydbapron["recipes"][category][recipe_name]["ingredients"][ingredient_category][ingredient].value.decode("utf-8")
            ingredient = ingredient.decode("utf-8")
            recipe["ingredients"][ingredient_category][ingredient] = {}
            recipe["ingredients"][ingredient_category][ingredient]["amount"] = float(ingredient_unit.split("|")[0])
            recipe["ingredients"][ingredient_category][ingredient]["unit"] = ingredient_unit.split("|")[1]
            recipe["ingredients"][ingredient_category][ingredient]["proportion"] = float(ingredient_unit.split("|")[2])
            recipe["yield"] += total_in_grams(recipe["ingredients"][ingredient_category][ingredient]["amount"], recipe["ingredients"][ingredient_category][ingredient]["unit"])
            # Cross-reference the ingredient(s) used in the recipe with the specifications
            # recorded for the given ingredient to calculate recipe costs.
            ingredient_spec = ydbapron["ingredients"][ingredient_category][ingredient].value.decode("utf-8")
            # Ensure ingredient specification and recipe use same unit measure
            assert(recipe["ingredients"][ingredient_category][ingredient]["unit"] == ingredient_spec.split("|")[1])
            # Calculate cost of each unit of the given ingredient, e.g. $/g
            cost_per_unit = float(ingredient_spec.split("|")[2]) / float(ingredient_spec.split("|")[0])
            # Calculate total cost of the given ingredient in the given recipe
            recipe["ingredients"][ingredient_category][ingredient]["cost"] = cost_per_unit * recipe["ingredients"][ingredient_category][ingredient]["amount"]
            recipe["gross_cost"] += recipe["ingredients"][ingredient_category][ingredient]["cost"]
    recipe["unit_cost"] = recipe["gross_cost"] / recipe["yield"]

    # Retrieve product specification, e.g. the "German Rye" comes in a loaf format, each weighing 800 grams.
    recipe["specifications"] = {}
    for product_format in ydbapron["recipes"][category][recipe_name]["specifications"].subscripts:
        product_format = product_format.decode("utf-8")
        recipe["specifications"][product_format] = {}
        for product_size in ydbapron["recipes"][category][recipe_name]["specifications"][product_format].subscripts:
            product_spec = ydbapron["recipes"][category][recipe_name]["specifications"][product_format][product_size].value.decode("utf-8")
            product_size = product_size.decode("utf-8")
            recipe["specifications"][product_format][product_size] = {}
            recipe["specifications"][product_format][product_size]["amount"] = float(product_spec.split("|")[0])
            recipe["specifications"][product_format][product_size]["unit"] = product_spec.split("|")[1]
            recipe["specifications"][product_format][product_size]["cost"] = recipe["unit_cost"] * recipe["specifications"][product_format][product_size]["amount"]

    recipe["schedules"] = []
    for schedule in ydbapron["schedules"].subscripts:
        if ydbapron["schedules"][schedule][category][recipe_name].data > 0:
            recipe["schedules"].append(schedule.decode("utf-8"))
    recipe["procedure"] = ydbapron["recipes"][category][recipe_name]["procedure"].value.decode("utf-8")

    return recipe
get_recipe() uses a Key object to retrieve all recipe information from the database.
First, it loops over each ingredient category and ingredient listed for the given recipe using the .subscripts attribute of the ydbapron Key object and extracting the data stored in the corresponding database node. Then, it loops over each product specification again using the .subscripts attribute.
The extracted data is stored in a Python dictionary that is then returned to the caller for use in template code.
Additionally, get_recipe() checks to make sure no schedules depend on the given recipe. If so, it notes them down so that recipe.html can prohibit recipe deletion in that case.
get_recipes()
Finally, add the get_recipes() function:
def get_recipes(form: ScheduleForm) -> dict:
    ydbapron = yottadb.Key("^YDBApron")
    recipes = {}
    recipe_forms = iter(form.recipes)
    for category in ydbapron["recipes"].subscripts:
        category = category.decode("utf-8")
        recipes[category] = {}
        for recipe in ydbapron["recipes"][category].subscripts:
            recipe = recipe.decode("utf-8")
            recipes[category][recipe] = get_recipe(category, recipe)
            try:
                recipe_form = next(recipe_forms)
            except StopIteration:
                break
            recipes[category][recipe]["form"] = recipe_form
            specification_forms = iter(recipe_form.specifications)
            for product_format in recipes[category][recipe]["specifications"]:
                for product_size in recipes[category][recipe]["specifications"][product_format]:
                    try:
                        recipes[category][recipe]["specifications"][product_format][product_size]["form"] = next(specification_forms)
                    except StopIteration:
                        break

    return recipes
get_recipes() uses a Key object to retrieve information for all recipes from the database using the object's .subscripts attribute.
For each recipe it stores the retrieved data on a Python dictionary, then assigns a RecipeForm for each recipe, and a ProductSpecificationForm for each product specification in each recipe.
The resulting dictionary is then returned to the caller for use in template code.
schedules.py
Lastly, let's add the application logic functions for handling production schedules to schedules.py.
Start by creating the file and adding these import lines at the top:
import yottadb

from typing import AnyStr

from YDBApron.recipes import get_recipe
from YDBApron.forms import ScheduleForm
list_schedules()
First, write the list_schedules() function:
def list_schedules() -> list:
    schedules = []
    for schedule in yottadb.subscripts("^YDBApron", ("schedules", "")):
        schedules.append(schedule.decode("utf-8"))

    return schedules
list_schedules() simply loops over all the schedule names under ^YDBApron("schedules") and adds them to a Python list for use in the schedules.html template.
get_schedule()
Next, add get_schedule():
def get_schedule(schedule_name: AnyStr) -> dict:
    ydbapron = yottadb.Key("^YDBApron")
    schedule = {}
    schedule["name"] = schedule_name
    schedule["recipes"] = {}
    for category in ydbapron["schedules"][schedule_name].subscripts:
        category = category.decode("utf-8")
        schedule["recipes"][category] = {}
        for recipe in ydbapron["schedules"][schedule_name][category].subscripts:
            recipe = recipe.decode("utf-8")
            schedule["recipes"][category][recipe] = get_recipe(category, recipe)
            schedule["recipes"][category][recipe]["gross_yield"] = 0
            for specification in ydbapron["schedules"][schedule_name][category][recipe]["specifications"].subscripts:
                specification = specification.decode("utf-8")
                schedule["recipes"][category][recipe][specification] = {}
                for size in ydbapron["schedules"][schedule_name][category][recipe]["specifications"][specification].subscripts:
                    size = size.decode("utf-8")
                    product_volume = float(ydbapron["schedules"][schedule_name][category][recipe]["specifications"][specification][size].value.decode("utf-8"))
                    schedule["recipes"][category][recipe][specification][size] = product_volume
                    product_size = float(ydbapron["recipes"][category][recipe]["specifications"][specification][size].value.decode("utf-8").split("|")[0])
                    schedule["recipes"][category][recipe]["gross_yield"] += product_volume * product_size
            schedule["recipes"][category][recipe]["supplementary_yield"] = float(ydbapron["schedules"][schedule_name][category][recipe]["supplementary"].value)
            schedule["recipes"][category][recipe]["gross_yield"] += schedule["recipes"][category][recipe]["supplementary_yield"]

            cost = schedule["recipes"][category][recipe]["unit_cost"]
            schedule["recipes"][category][recipe]["cost"] = cost
            schedule["recipes"][category][recipe]["cost_unit"] = "g"
            schedule["recipes"][category][recipe]["gross_cost"] = cost * schedule["recipes"][category][recipe]["gross_yield"]

            for ingredient_category in schedule["recipes"][category][recipe]["ingredients"]:
                for ingredient in schedule["recipes"][category][recipe]["ingredients"][ingredient_category]:
                    schedule["recipes"][category][recipe]["ingredients"][ingredient_category][ingredient]["amount"] = schedule["recipes"][category][recipe]["ingredients"][ingredient_category][ingredient]["proportion"] * schedule["recipes"][category][recipe]["gross_yield"]
                    schedule["recipes"][category][recipe]["ingredients"][ingredient_category][ingredient]["cost"] = schedule["recipes"][category][recipe]["ingredients"][ingredient_category][ingredient]["amount"] * cost
    return schedule
get_schedule() retrieves all information for the given production schedule, as specified by schedule_name.
Like get_recipe(), get_schedule() does this using a YottaDB Key object to perform database operations.
Specifically, it uses the .subscripts attribute to loop through a variety of database nodes and uses the .value attribute to access them.
The first pair of nested loops iterate over each recipe category and recipe. Then, for each recipe, another pair of loops iterates over every product size and specification.
Finally, another pair of loops is used to iterate over every ingredient in the recipe and retrieve its information.
All retrieved information is stored in the schedule Python dictionary, which is then returned to the caller.
add_schedule()
Now, write the add_schedule() function:
def add_schedule(schedule_form: ScheduleForm):
    ydbapron = yottadb.Key("^YDBApron")
    schedule_name = schedule_form.schedule_name.data
    for recipe_form in schedule_form.recipes:
        recipe_name = recipe_form.recipe_name.data
        recipe_category = recipe_form.recipe_category.data
        if recipe_name is None or recipe_category is None:
            break
        supplementary_yield = recipe_form.supplementary_yield.data if recipe_form.supplementary_yield.data is not None else 0
        for specification_form in recipe_form.specifications:
            specification_name = specification_form.specification_name.data
            specification_size = specification_form.specification_size.data
            specification_volume = specification_form.specification_volume.data
            # Confirm the form was filled out. Blank forms will be present when the number
            # of recipe specifications in the database is fewer than the maximum allowed.
            if specification_name and specification_size and specification_volume:
                ydbapron["schedules"][schedule_name][recipe_category][recipe_name]["specifications"][specification_name][specification_size].value = str(specification_volume)
            else:
                # No more completed forms are present, so just break here
                # and ignore any remaining blank forms.
                break
        if supplementary_yield > 0 or ydbapron["schedules"][schedule_name][recipe_category][recipe_name].data > 0:
            # Only add the supplementary yield when it is non-zero, or when at least one recipe specification is present.
            # If there are no recipe specifications and the supplementary yield is 0, then the gross yield is 0.
            # In that case, the recipe can be omitted from the schedule since no product is scheduled to be produced.
            ydbapron["schedules"][schedule_name][recipe_category][recipe_name]["supplementary"].value = str(supplementary_yield)

    return
add_schedule() processes form data from the add_schedule.html template and adds it to the database using a YottaDB Key object for database operations.
For each recipe form received from the template, add_schedule() iterates over each product specification and records how many of that product to produce, along with some other details.
Also, a supplementary_yield is recorded for each recipe, when present.
These database updates are done by setting the .value attribute of Key objects yielded by indexing the ydbapron Key variable.
delete_schedule()
Finally, add the delete_schedule() function:
def delete_schedule(name: AnyStr):
    yottadb.delete_tree("^YDBApron", ("schedules", name))

    return
Like delete_recipe(), delete_schedule() is a simple wrapper around the delete_tree() YottaDB API function. The call simply deletes all subtrees and nodes for the production schedule specified by name.
6. Fill out application routes
Now that you've got the core application logic together, you can fill out the route stubs you wrote earlier so that they perform their intended functions.
However, before you do that, move each of the stubs you previously wrote in __init__.py to their appropriate file, e.g. ingredient routes should be moved to ingredients.py, recipe routes to recipes.py, etc. Your __init__.py file should now look like __init__.py.
Then, add these lines to ingredients.py after the import section:
from flask import Blueprint, render_template, request, redirect

blueprint = Blueprint("ingredients", __name__, url_prefix="/ingredients")
And, these lines to recipes.py after the import section:
from flask import Blueprint, render_template, request, redirect

blueprint = Blueprint("recipes", __name__, url_prefix="/recipes")
And, these lines to schedules.py after the import section:
from flask import Blueprint, render_template, request, redirect

blueprint = Blueprint("schedules", __name__, url_prefix="/schedules")
Each of these lines groups all the routes in its respective file together under a single URL prefix, i.e. /ingredients, /recipes, or /schedules. This means that these prefixes will must now be omitted from the route decorators you defined previously.
Next, revise __init__.py, to include these lines:
# ... other imports
from flask import render_template
from . import recipes, ingredients, schedules

# ... other code

# Application routes
@app.route('/')
def home():
    return render_template('index.html')
# Recipes
app.register_blueprint(recipes.blueprint)
# Ingredients
app.register_blueprint(ingredients.blueprint)
# Production Schedules
app.register_blueprint(schedules.blueprint)
These lines register the blueprints and route groupings you just created with the Flask application instance, making the URLs they define accessible when the application is run.
Finally, download testdata.zwr and run the following shell commands to load some test data into YottaDB:
source $(pkg-config --variable=prefix yottadb)/ydb_env_set
mupip load -ignorechset testdata.zwr
Now, you can begin filling out the application routes proper and test them as you go.
ingredients.py
Let's start again with ingredients.py, which has four route functions to update. First, add the following import line:
from YDBApron.globals import MAX_INGREDIENTS
Then, update the /list route to look like this:
@blueprint.route("/list", methods=("GET",))
def list():
    ingredients = list_ingredients()

    return render_template('ingredients.html', ingredients=ingredients)
/list now just gets the full list of ingredients and passes them to the ingredients.html template using the Flask render_template() function.
Next, revise the /add route to look like the following:
@blueprint.route("/add", methods=("GET", "POST"))
def add():
    form = IngredientForm(request.form)
    num_ingredients = total_ingredients()
    entries_available = num_ingredients < MAX_INGREDIENTS
    if request.method == "POST" and form.validate():
        if entries_available:
            save_ingredient(form)
            return redirect("/ingredients/list")
        else:
            return render_template('add_ingredient.html', ingredient_form=form, operation="Add", entries_available=entries_available, num_ingredients=num_ingredients)
    else:
        return render_template('add_ingredient.html', ingredient_form=form, operation="Add", entries_available=entries_available, num_ingredients=num_ingredients)
/add will behave differently depending on what type of request it receives. If it receives a GET request, then it will render a form for the user to complete using render_template with the add_ingredient.html template.
If, on the other hand, a POST request is received, then /add will process the POSTed form with save_ingredient() then redirect the browser to the ingredient list page.
However, if there's not more ingredient entries available in the database, then the browser is redirected back to the add_ingredient.html page, albeit this time with an error message generated by the template.
In each of these cases, an IngredientForm and the number of ingredients is passed to the rendered template, along with a string indicating that the operation to be performed on the page is to "Add" opposed to "Edit".
Now, refactor the /edit route:
@blueprint.route("/edit/<category>/<ingredient_name>", methods=("GET", "POST"))
def edit(category: AnyStr, ingredient_name: AnyStr):
    form = IngredientForm(request.form)
    if request.method == "POST" and form.validate():
        delete_ingredient(category, ingredient_name)
        save_ingredient(form)
        return redirect("/ingredients/list")
    else:
        ingredient = get_ingredient(category, ingredient_name)
        form.ingredient_name.data = ingredient_name
        form.ingredient_category.data = category
        form.ingredient_amount.data = float(ingredient["amount"])
        form.ingredient_unit.data = ingredient["unit"]
        form.ingredient_price.data = float(ingredient["cost"])
        form.ingredient_manufacturer.data = ingredient["manufacturer"]
        form.ingredient_vendor.data = ingredient["vendor"]

        return render_template('add_ingredient.html', ingredient_form=form, operation="Edit")
The /edit route also behaves differently, depending on the request method.
In the case of a GET request, /edit pulls the information for the specified ingredient from the database using get_ingredient(), then uses it to prepopulate an IngredientForm.
This form is then passed to the add_ingredient.html template, with an operation of "Edit", signalling that the add_ingedient.html template will be used for editing, rather than adding an ingredient.
In the case of a POST request, /edit will delete the specified ingredient then add the revised ingredient information to the database using save_ingredient(). Then, it redirects to the ingredients list page.
Finally, revise the /delete route:
@blueprint.route("/delete", methods=("POST",))
def delete():
    form = request.form
    delete_ingredient(form["deleteCategory"], form["deleteIngredient"])
    return redirect("/ingredients/list")
/delete now just processes a simple POSTed form with an ingredient category and ingredient name, deletes that ingredient from the database, and redirects to the ingredient list page.
Now, your ingredients.py file should look like ingredients.py.
recipes.py
Now, on to the routes in recipes.py. First, add the following import lines:
from YDBApron.globals import MAX_RECIPES
from YDBApron.ingredients import get_ingredients
Then, update /list:
@blueprint.route("/list", methods=("GET", "POST"))
def list():
    recipes = list_recipes()

    return render_template('recipes.html', recipes=recipes)
/list simply retrieves a list of recipes with list_recipe() then passes it to the recipes.html template used the Flask render_template function.
Next, revise the single recipe route:
@blueprint.route("/<category>/<recipe_name>", methods=("GET", "POST"))
def recipe(category: AnyStr, recipe_name: AnyStr):
    recipe = get_recipe(category, recipe_name.replace("-", " "))

    return render_template('recipe.html', recipe=recipe)
/recipe now just retrieves the information for the specified recipe from the database using get_recipe(), then passes it to the recipe.html template using render_template().
Now, refactor the /add route:
@blueprint.route("/add", methods=("GET", "POST"))
def add():

    form = RecipeForm(request.form)
    num_recipes = total_recipes()
    entries_available = num_recipes < MAX_RECIPES
    if request.method == "POST":
        if entries_available:
            add_recipe(form)
            # Redirect browser to the recipe page for the newly added recipe. The URL directs to the recipe() route.
            return redirect(f"/recipes/{form.recipe_category.data.replace(' ', '-')}/{form.recipe_name.data.replace(' ', '-')}")
        else:
            return render_template('add_recipe.html', recipe_form=form, ingredients=get_ingredients(form), operation="Add", entries_available=entries_available, num_recipes=num_recipes)
    else:
        form.procedure.data = ""
        return render_template('add_recipe.html', recipe_form=form, ingredients=get_ingredients(form), operation="Add", entries_available=entries_available, num_recipes=num_recipes)
/add behaves differently, depending on whether a GET or POST request is received.
In the case of a GET request, the total number of recipes along with a RecipeForm is passed to the add_recipe.html template via the render_template() function.
Also, an operation of "Add" is specified to distinguish the rendering from /edit, and the number of available recipe entries is passed as well.
In the case of a POST request, /add processes the received form if there are recipe entries available in the database, and stores the recipe with add_recipe(). Then, the browser is redirected to the recipe page for the newly added recipe.
If no entries are available, then the add_recipe.html template is again rendered, albeit this time with an error message saying that the recipe cannot be added due to insufficient entries being available in the database. This error message will be generated within the template itself, which contains the relevant code for it.
Next, revise the /edit route:
@blueprint.route("/edit/<category>/<recipe_name>", methods=("GET", "POST"))
def edit(category: AnyStr, recipe_name: AnyStr):
    form = RecipeForm(request.form)
    if request.method == "POST":
        delete_recipe(category, recipe_name)
        add_recipe(form)
        return redirect(f"/recipes/{category}/{recipe_name}")
    else:
        recipe = get_recipe(category, recipe_name.replace("-", " "))
        ingredients = get_ingredients(form)
        # Pre-populate form with recipe information from database
        form.recipe_name.data = recipe["name"]
        form.recipe_category.data = recipe["category"]
        form.procedure.data = recipe["procedure"] if recipe["procedure"] is not None else ""
        # Pre-populate ingredient information
        for ingredient_category in recipe["ingredients"]:
            for ingredient in recipe["ingredients"][ingredient_category]:
                ingredients[ingredient_category][ingredient]["form"].ingredient_amount.data = recipe["ingredients"][ingredient_category][ingredient]["amount"]
                ingredients[ingredient_category][ingredient]["form"].ingredient_unit.data = recipe["ingredients"][ingredient_category][ingredient]["unit"]
        # Pre-populate product specification information
        specification_forms = iter(form.specifications)
        for product_format in recipe["specifications"]:
            for product_size in recipe["specifications"][product_format]:
                specification_form = next(specification_forms)
                specification_form.specification_format.data = product_format
                specification_form.specification_format_size.data = product_size
                specification_form.specification_size.data = recipe["specifications"][product_format][product_size]["amount"]
                specification_form.specification_unit.data = recipe["specifications"][product_format][product_size]["unit"]
        return render_template('add_recipe.html', recipe_form=form, ingredients=ingredients, operation="Edit", entries_available=True)
The /edit route also handles GET and POST requests differently.
In the case of a GET request, the /edit route prepopulates a RecipeForm with recipe and ingredient data retrieved by get_recipe() and get_ingredient(), respectively.
The RecipeForm is populated using two pairs of nested loops: the first populates the form with all ingredient information, while the second populates it with all product specification information.
The prepopulated form is then passed to the add_recipe.html template via render_template() with an operation of "Edit" to signal that an entry is being edited rather than added.
In the case of a POST request, the /edit route deletes the existing recipe entry and stores the revised entry in its place using add_recipe().
Finally, add the /delete route:
@blueprint.route("/delete", methods=("POST",))
def delete():
    form = request.form
    delete_recipe(form["deleteCategory"], form["deleteRecipe"])

    return redirect("/recipes/list")
/delete simply calls delete_recipe() using a recipe category and name from a simple form received from the client. After deleting the recipe entry, the browser is redirected to the recipe list page.
Now, your recipes.py file should look like recipes.py.
schedules.py
Finally, update the schedule routes in schedules.py. First, add the following import line:
from YDBApron.recipes import get_recipes
Then, update the /list route:
@blueprint.route("/list", methods=("GET", "POST"))
def list():
    schedules = list_schedules()

    return render_template('schedules.html', schedules=schedules)
/list just retrieves a list of schedules with list_schedules() then passes the result to schedules.html using the Flask render_template() function.
Then, revise the single schedule route:
@blueprint.route("/<schedule_name>", methods=("GET", "POST"))
def schedule(schedule_name: AnyStr):
    recipe_schedule = get_schedule(schedule_name)

    return render_template('schedule.html', schedule=recipe_schedule)
This route retrieves all the information for the production schedule specified by schedule_name with get_schedule(), then passes the result to the schedule.html template to display it to the user.
Next, fill out the /add route:
@blueprint.route("/add", methods=("GET", "POST"))
def add():
    form = ScheduleForm(request.form)
    if request.method == "POST":
        add_schedule(form)
        # Replace spaces with dashes to construct a valid URL, which cannot contain spaces
        return redirect(f"/schedules/{form.schedule_name.data.replace(' ', '-')}")
    else:
        recipes = get_recipes(form)
        return render_template('add_schedule.html', schedule_form=form, recipes=recipes, operation="Add")
/add handles GET and POST requests differently. In the case of a POST request, the received form is passed to add_schedule(), which adds the schedule to the database.
In the case of a GET request, the full list of recipes is retrieved using get_recipe(). That list is then passed to add_schedule.html via render_template() with an operation of "Add" to signal the template to construct the page for adding rather than editing a schedule.
Then, refactor the /edit route:
@blueprint.route("/edit/<schedule_name>", methods=("GET", "POST"))
def edit(schedule_name: AnyStr):
    form = ScheduleForm(request.form)
    if request.method == "POST":
        delete_schedule(schedule_name)
        add_schedule(form)
        return redirect(f"/schedules/{form.schedule_name.data.replace(' ', '-')}")
    else:
        schedule = get_schedule(schedule_name)
        recipes = get_recipes(form)
        # Pre-populate form with schedule information from database
        form.schedule_name.data = schedule_name
        # Pre-populate recipe information
        for recipe_category in recipes:
            for recipe in recipes[recipe_category]:
                recipes[recipe_category][recipe]["form"].recipe_name.data = recipe
                recipes[recipe_category][recipe]["form"].recipe_category.data = recipe_category
                recipes[recipe_category][recipe]["form"].supplementary_yield.data = schedule["recipes"][recipe_category][recipe]["supplementary_yield"]
                recipes[recipe_category][recipe]["form"].gross_yield.data = schedule["recipes"][recipe_category][recipe]["gross_yield"]
                recipes[recipe_category][recipe]["form"].gross_cost.data = schedule["recipes"][recipe_category][recipe]["gross_cost"]
                for product_format in recipes[recipe_category][recipe]["specifications"]:
                    for product_size in recipes[recipe_category][recipe]["specifications"][product_format]:
                        recipes[recipe_category][recipe]["specifications"][product_format][product_size]["form"].specification_name.data = product_format
                        recipes[recipe_category][recipe]["specifications"][product_format][product_size]["form"].specification_size.data = product_size
                        try:
                            recipes[recipe_category][recipe]["specifications"][product_format][product_size]["form"].specification_volume.data = schedule["recipes"][recipe_category][recipe][product_format][product_size]
                        except KeyError:
                            recipes[recipe_category][recipe]["specifications"][product_format][product_size]["form"].specification_volume.data = 0

        return render_template('add_schedule.html', schedule_form=form, recipes=recipes, operation="Edit")
/edit also handles POST and GET requests differently.
In the case of a POST request, the existing version of the schedule is simply deleted with delete_schedule(), then the revised version is saved with add_schedule(). Finally, the browser is redirected to the schedule page for the newly added schedule.
In the case of a GET request, a ScheduleForm is prepopulated using schedule data retrieved by get_schedule() and recipe data retrieved by get_recipes().
This is done by looping over the fields of the Python dictionaries returned by each function and storing their values in the corresponding fields of a ScheduleForm object.
The prepopulated form and recipe data are then passed to add_schedule.html via render_template(), along with an operation of "Edit" to distinguish the template from that generated by the /add route.
Finally, update the /delete route:
@blueprint.route("/delete", methods=("POST",))
def delete():
    form = request.form
    delete_schedule(form["deleteSchedule"])

    return redirect("/schedules/list")
/delete simply extracts a schedule name from a POSTed web form and passes it to delete_schedule(), which then deletes the specified schedule. The browser is then redirected to the schedule list page.
Now, your schedules.py file should look like schedules.py.
7. Add HTML templates to view data
Each page of the application has a matching HTML template. All the application templates are stored in the templates directory under the YDBApron module directory:
YDBApron
└── YDBApron
    └── templates
        ├── add_ingredient.html
        ├── add_recipe.html
        ├── add_schedule.html
        ├── base.html
        ├── index.html
        ├── ingredients.html
        ├── recipe.html
        ├── recipes.html
        ├── schedule.html
        └── schedules.html
The base.html template is shared by all other templates, so let's start there. To create it, open a new base.html file and add the following code to it:
<!doctype html>
<html lang="en">
<head>
    <meta charset="UTF-8">
    <meta name="viewport" content="width=device-width, initial-scale=1">
    <title>{% block title %} {% endblock %} | YDBApron</title>
    <link href="https://cdn.jsdelivr.net/npm/bootstrap@5.3.0/dist/css/bootstrap.min.css" rel="stylesheet" integrity="sha384-9ndCyUaIbzAi2FUVXJi0CjmCapSmO7SnpJef0486qhLnuZ2cdeRhO02iuK6FUUVM" crossorigin="anonymous">
</head>
<body>
    <div class="container text-center min-vw-100">
        <div class="row">
                <nav class="navbar navbar-expand-lg bg-body-tertiary">
                    <div class="container-fluid d-flex justify-content-between">
                        <a class="navbar-brand" href="/">YDBApron</a>
                        <ul class="navbar-nav mb-2 mb-lg-0 d-print-none">
                            <li class="nav-item"><a class="nav-link" href="{{ url_for('recipes.list') }}">Recipes</a></li>
                            <li class="nav-item"><a class="nav-link" href="{{ url_for('ingredients.list') }}">Ingredients</a></li>
                            <li class="nav-item"><a class="nav-link" href="{{ url_for('schedules.list') }}">Schedules</a></li>
                        </ul>
                    </div>
                </nav>
            </header>
        </div>
        <div class="row">
            <section class="section col">
                {% block section %} {% endblock %}
            </section>
        </div>
    </div>
    <script src="https://cdn.jsdelivr.net/npm/bootstrap@5.3.0/dist/js/bootstrap.bundle.min.js" integrity="sha384-geWF76RCwLtnZ8qwWowPQNguL3RmwHVBC9FhGdlKrxdiJJigb/j/68SIy3Te4Bkz" crossorigin="anonymous"></script>
</body>
</html>
As you can see, base.html contains the code for the navigation bar as well as the links that pull in Bootstrap styles and scripts for use by all templates, as well as some helpful <meta> tags. And that's all there is to it for base.html.
Next, create a new index.html for the homepage and add the following code:
{% extends 'base.html' %}

{% block section %}
    <h1 class="mt-5 mb-5">{% block title %} Home {% endblock %}</h1>
    <h2>Welcome to YDBApron!</h2>
{% endblock %}
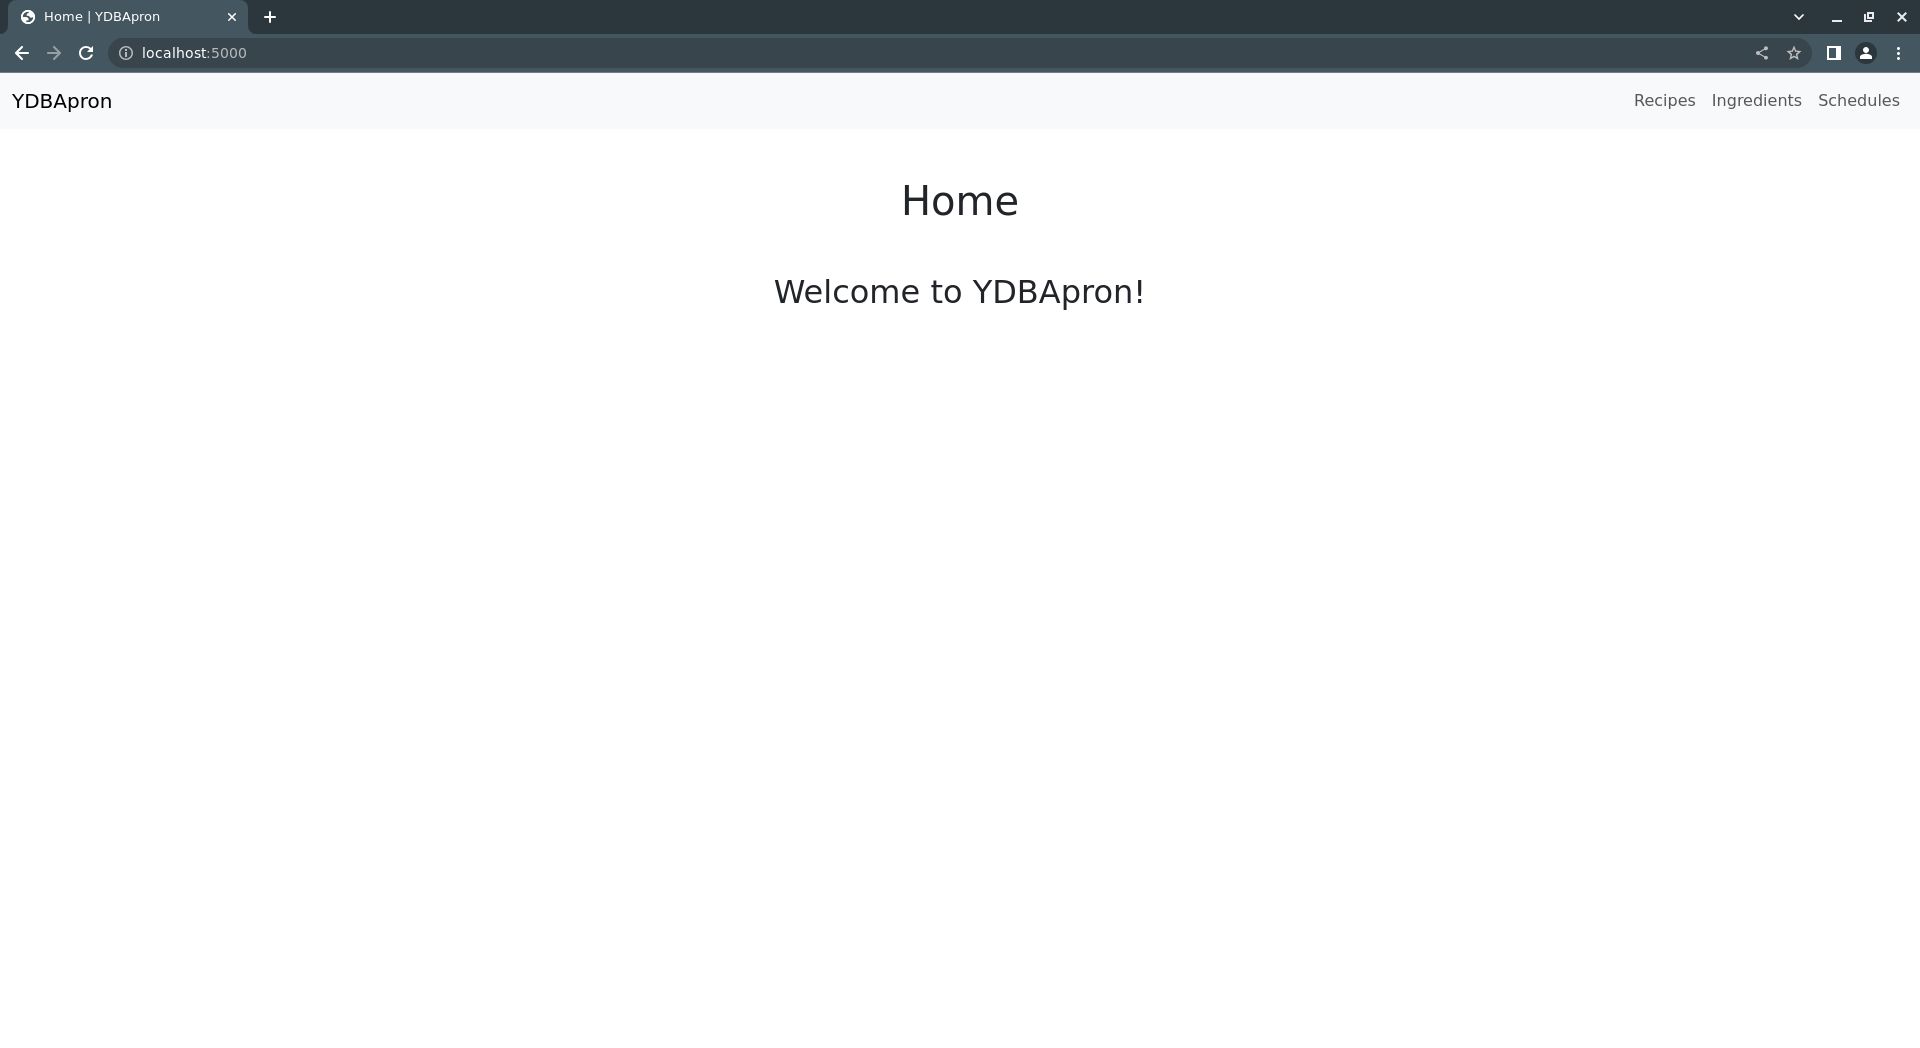
That's it for the homepage: just a couple of headings introducing the application. Now, let's move on to some more sophisticated templates: those for viewing ingredients, recipes, and production schedules.
Views for ingredients, recipes, and schedules
Ingredient views
Since ingredients are the most basic data objects in YDBPython, let's go start with the view for ingredients, ingredients.html.
Start by adding a couple of headings and a table to a new ingredients.html in the templates directory.
{% extends 'base.html' %}

{% block section %}
    <h1 class="mt-3 mb-5">{% block title %}Ingredients{% endblock %}</h1>
    {% for category in ingredients %}
        <article class="ingredient-category">
            <h2 class="mb-3">{{ category.title() }}</h2>
            <table class="ingredient-info table table-light table-striped table-hover align-middle mb-5">
                <thead>
                    <tr>
                        <th scope="col">Ingredient</th>
                        <th scope="col">Amount</th>
                        <th scope="col">Unit</th>
                        <th scope="col">Price</th>
                        <th scope="col">Manufacturer</th>
                        <th scope="col">Vendor</th>
                        <th scope="col"></th>
                    </tr>
                </thead>
                <tbody>
                    {% for ingredient in ingredients[category] %}
                        <tr>
                            <th scope="row">{{ ingredient.title() }}</th>
                            <td class="font-monospace">{{ ingredients[category][ingredient]["amount"] }}</td>
                            <td>{{ ingredients[category][ingredient]["unit"] }}</td>
                            <td  class="font-monospace">{{ ingredients[category][ingredient]["price"] }}</td>
                            <td>{{ ingredients[category][ingredient]["manufacturer"] }}</td>
                            <td>{{ ingredients[category][ingredient]["vendor"] }}</td>
                        </tr>
                    {% endfor %}
                </tbody>
            </table>
        </article>
    {% endfor %}
{% endblock %}
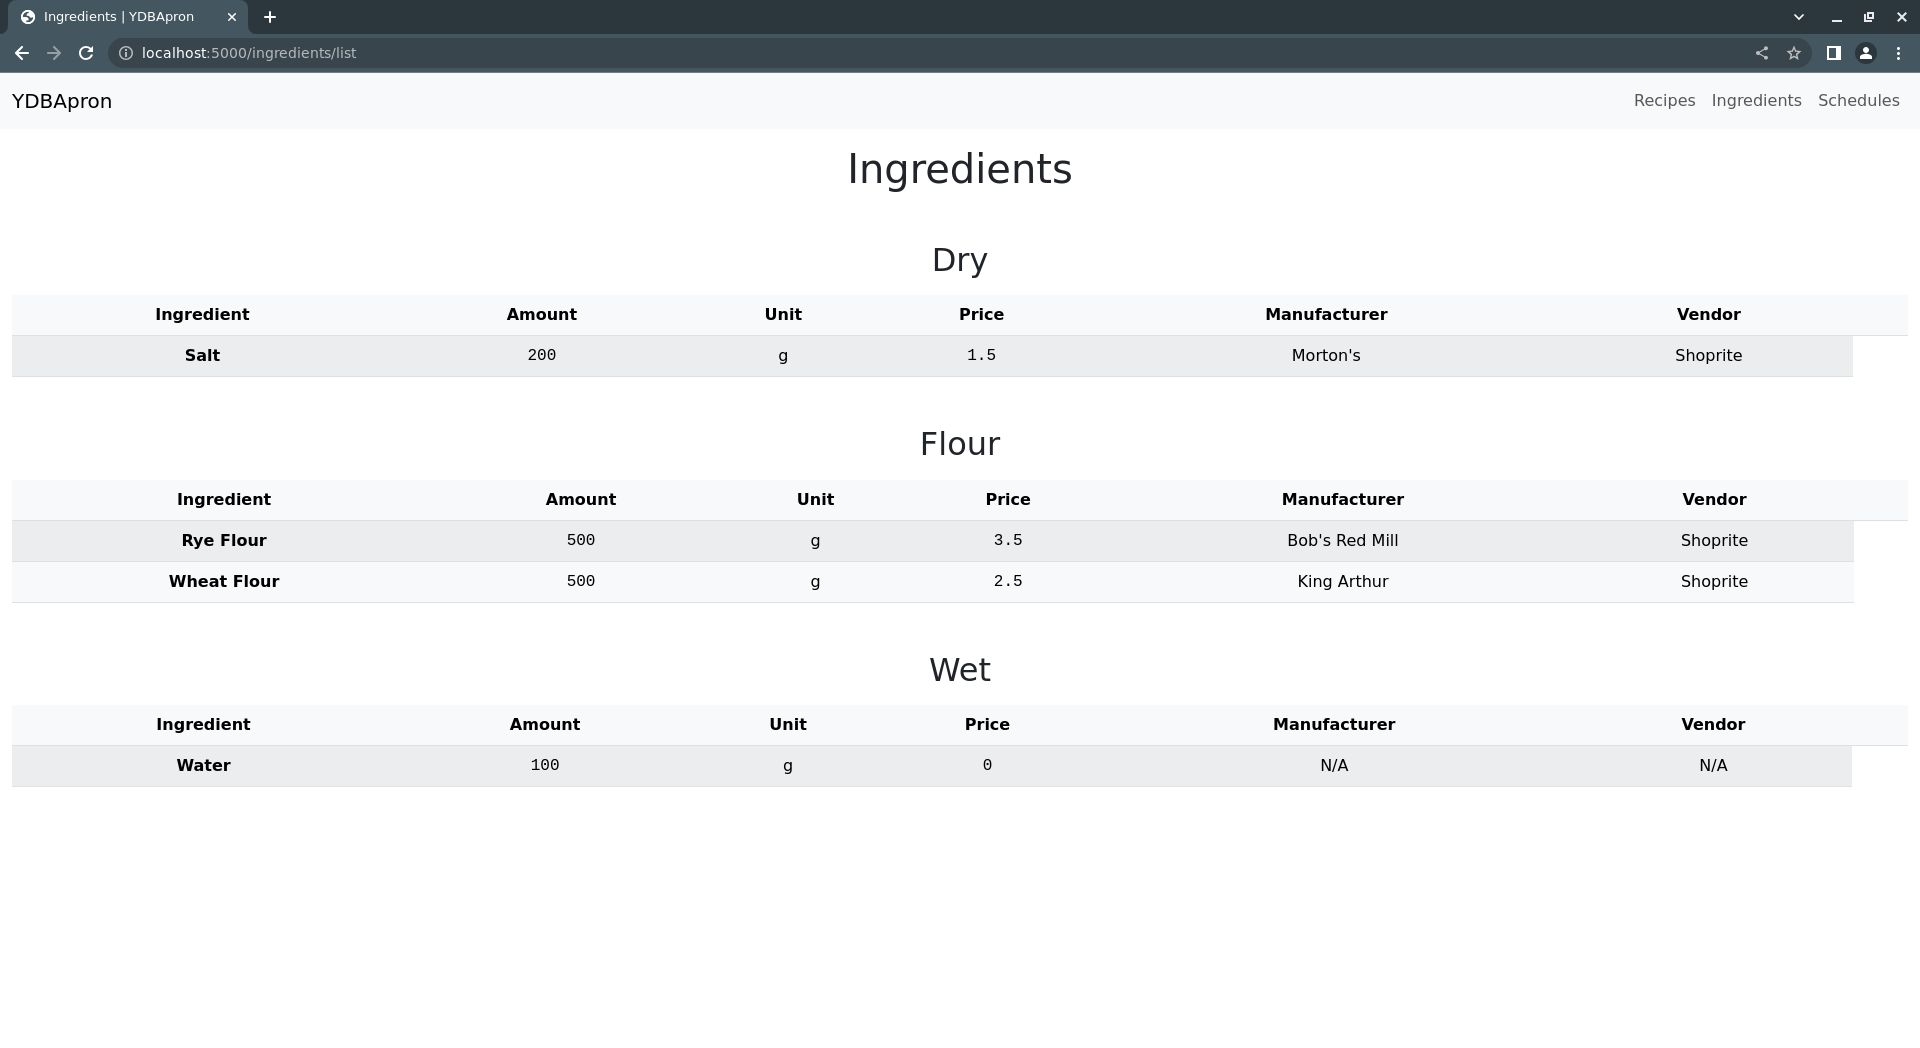
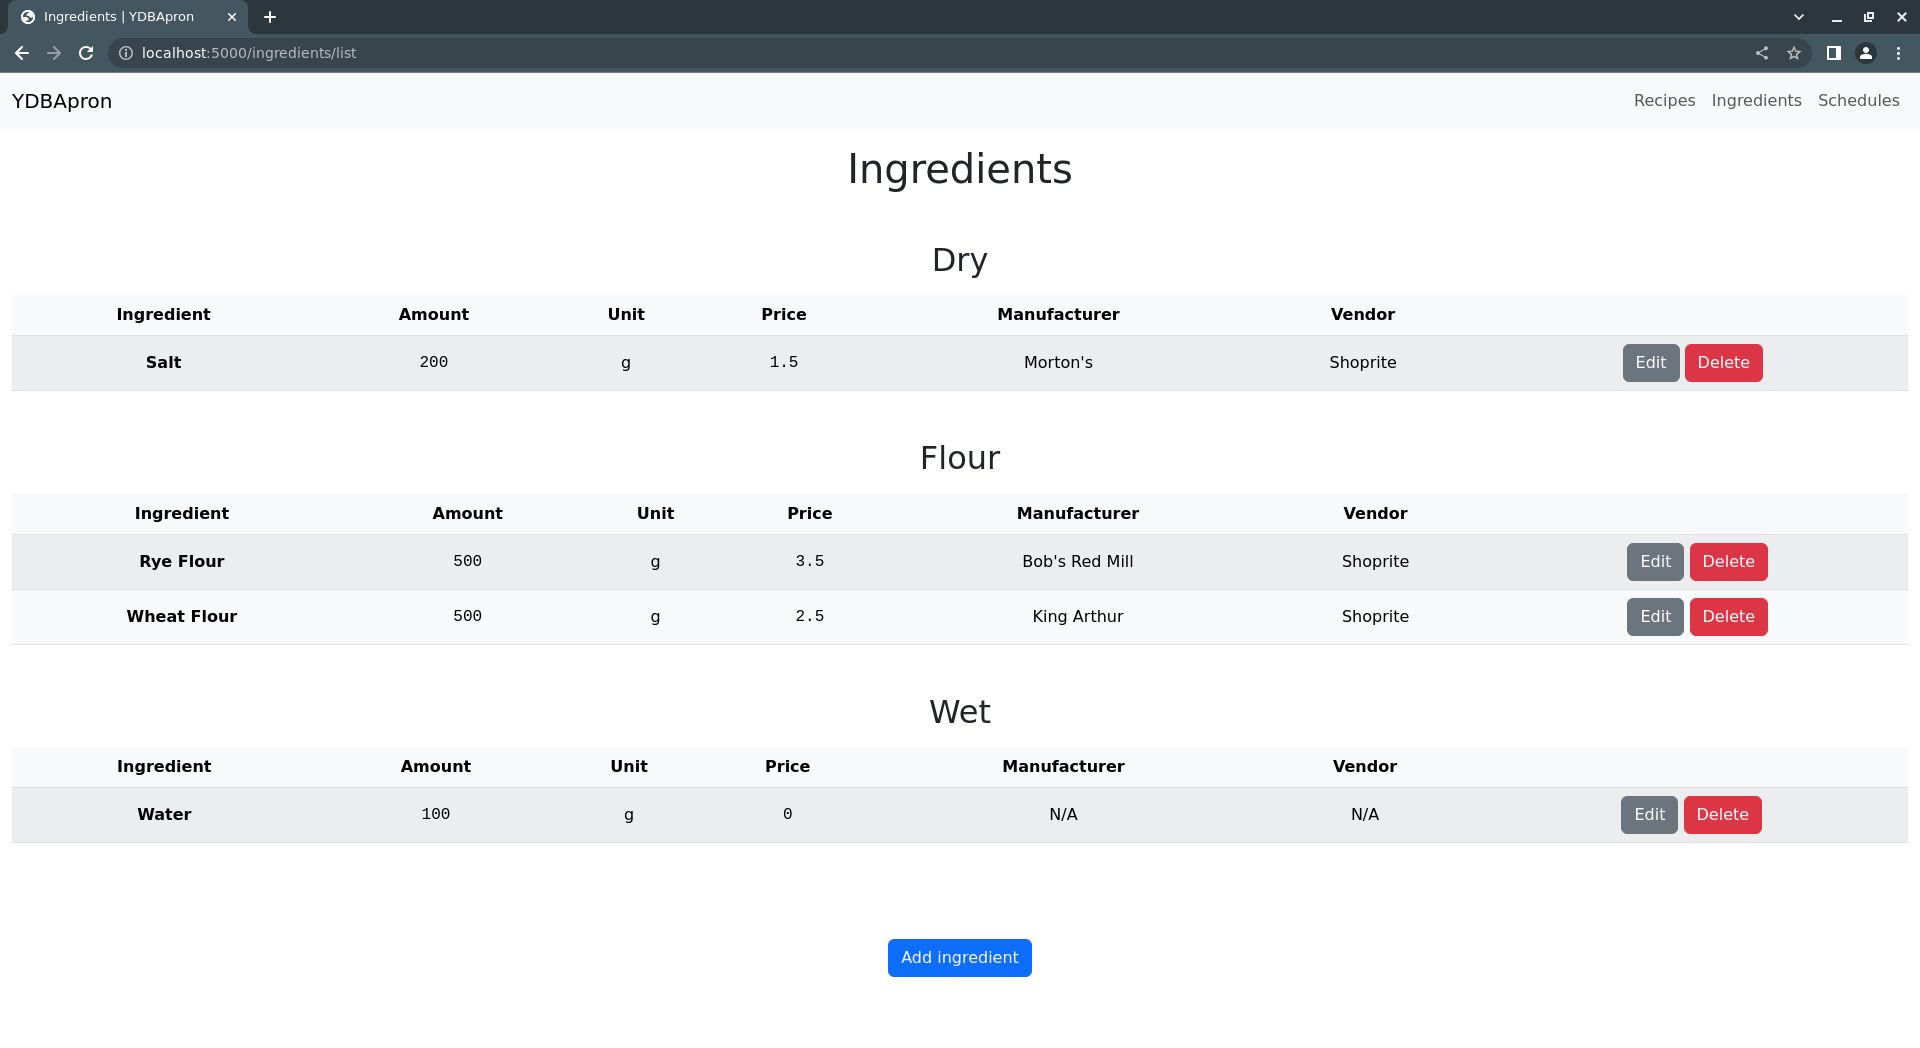
This code creates a table that lists ingredients, one per row. Columns are added for each field of that makes up an ingredient entry.
Don't mind the empty column header after the Vendor column - this just creates a column to hold the edit and delete buttons for each ingredient. You'll add these buttons a bit later when we revisit the templates to build them out fully.
For now, this is enough to at least all us to see what ingredients are in the database. Next, recipe views.
Recipe views
There are two recipe views: one for a single recipe, and another for multiple recipes.
First, create the recipe list page template by opening a new recipes.html file in the templates directory and adding this code:
{% extends 'base.html' %}

{% block section %}
    <h1 class="mt-3 mb-5">{% block title %}Recipes{% endblock %}</h1>
    {% for category in recipes %}
        <section class="recipe-category">
            <h2 class="mb-4 mt-5">{{ category.title() }}</h2>
            <div class="list-group">
                {% for recipe in recipes[category] %}
                    <a href="{{ url_for('recipes.recipe', category=category, recipe_name=recipe.replace(" ", "-")) }}" class="list-group-item list-group-item-action fs-4 w-50 m-auto">{{ recipe }}</a>
                {% endfor %}
            </div>
        </section>
    {% endfor %}
    <!-- Add recipe button... -->
{% endblock %}
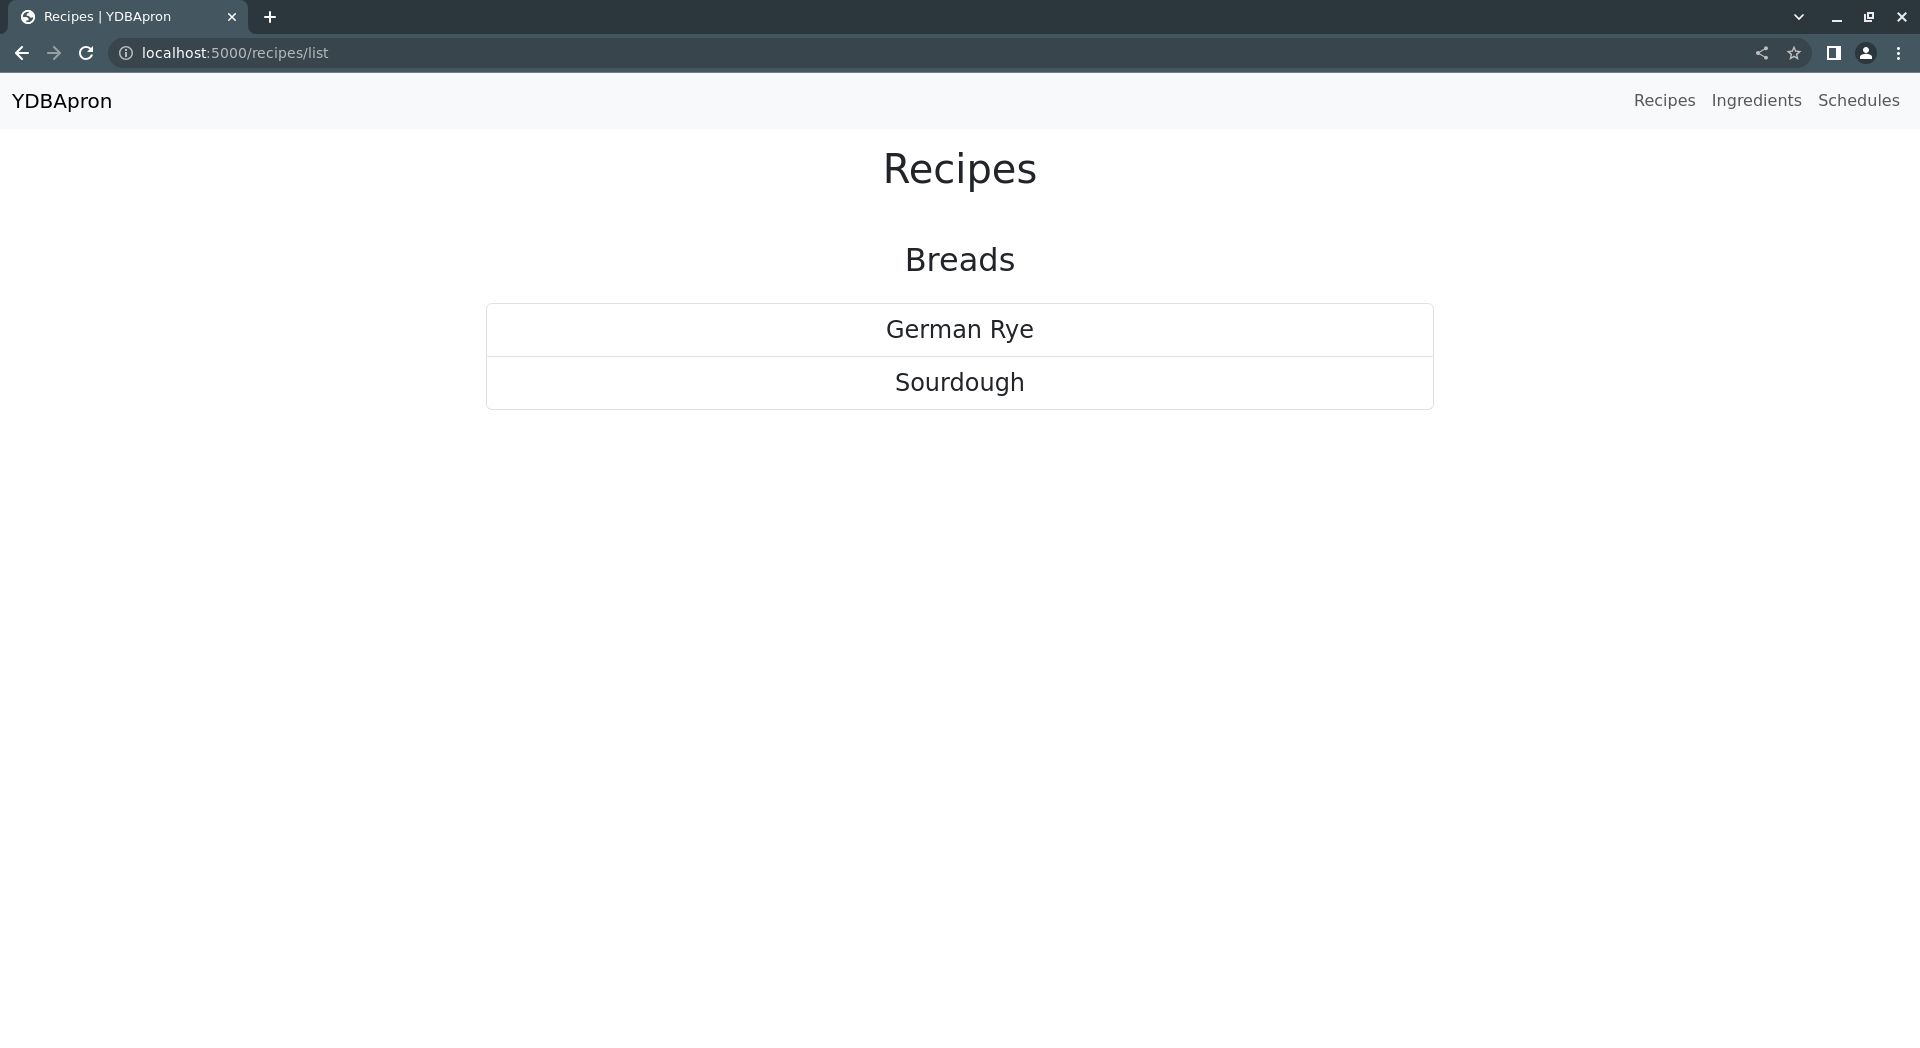
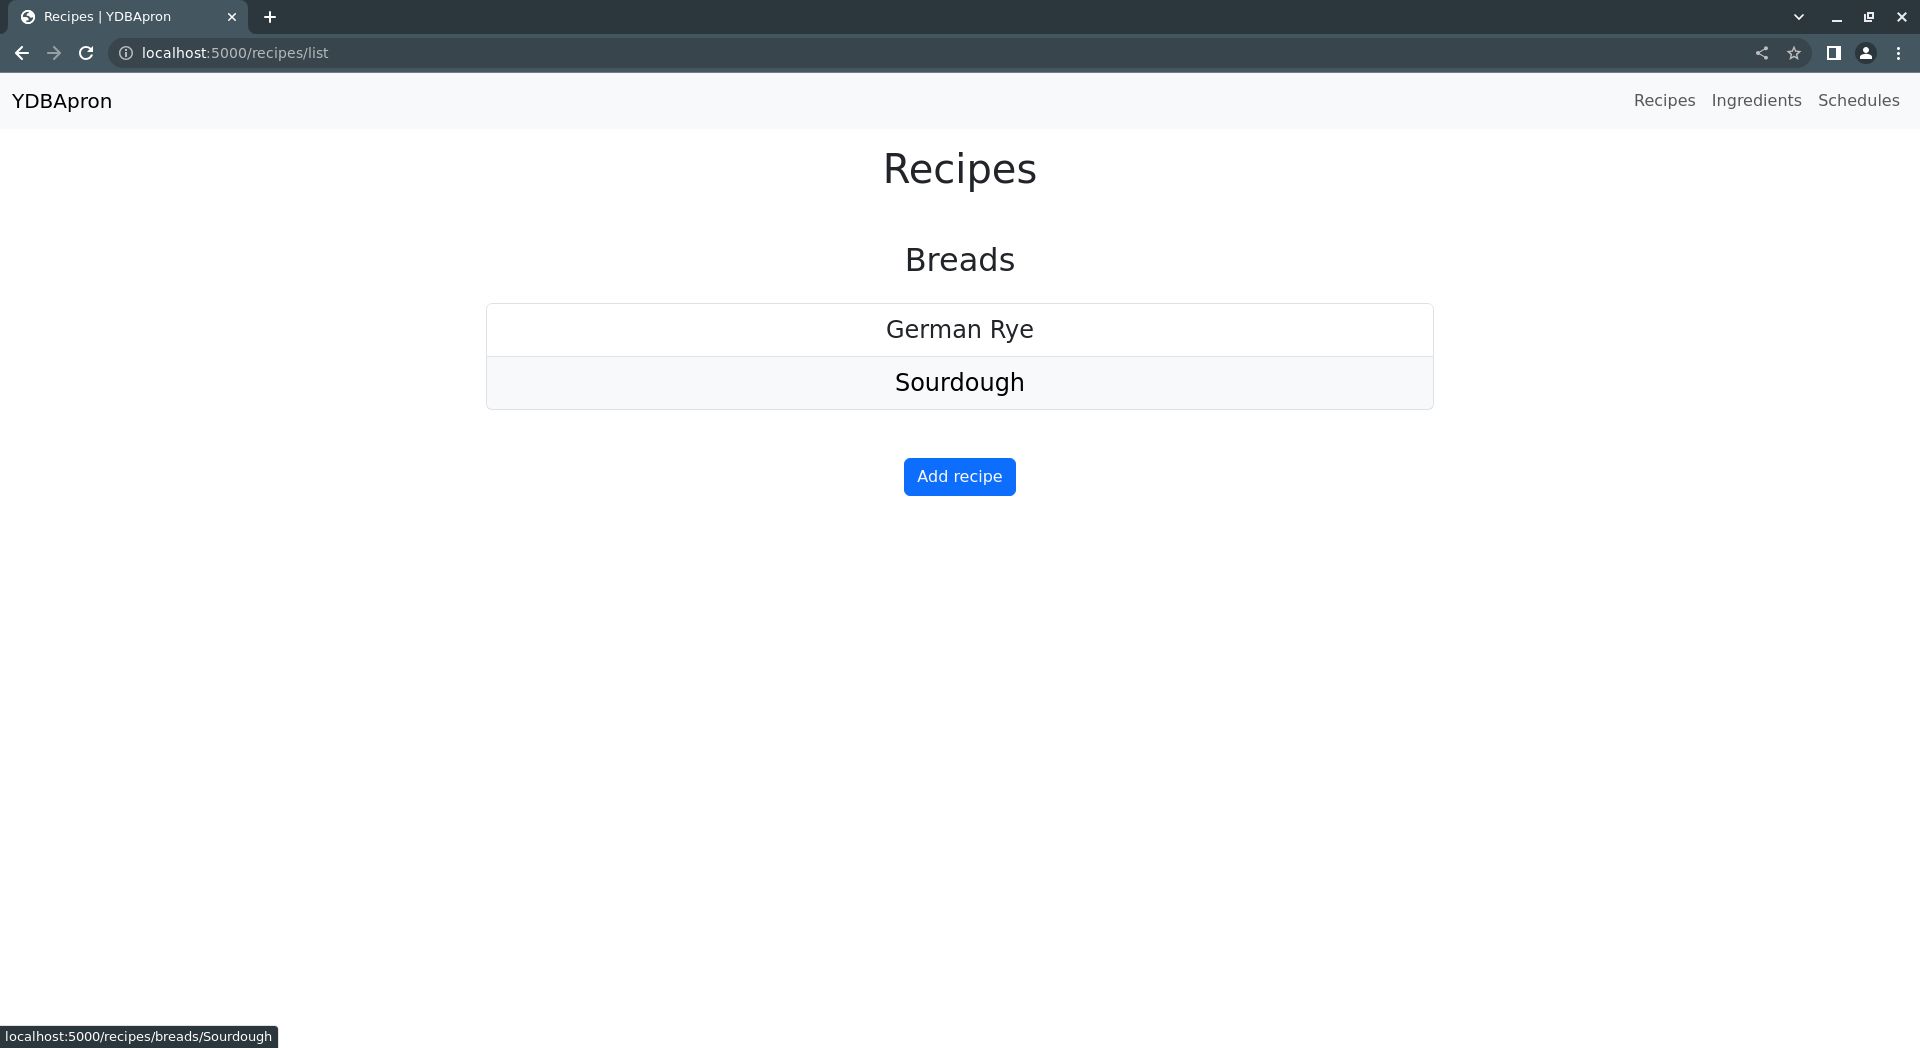
This code uses a pair of nested loops create a list a recipes, grouped by categories. Each recipe name links to the recipe page for the given recipe.
There's also a button for adding a new recipe, but you'll add that later when you add buttons to the rest of the view pages.
Next, create the single-recipe view by opening a new file named recipe.html in the templates directory, and adding the following code to it:
{% extends 'base.html' %}

{% block section %}
<h1>{% block title %} {{ recipe["name"] }} {% endblock %}</h1>
    <article class="recipe">
        <section class="mb-5">
            <h2 class="mb-3">Ingredients</h2>
                <table class="ingredient-list table table-light table-striped table-hover">
                    <thead>
                        <tr>
                            <th scope="col">Ingredient</th>
                            <th scope="col">Amount</th>
                            <th scope="col">Unit</th>
                            <th scope="col">Cost</th>
                        </tr>
                    </thead>
                    <tbody>
                        {% for category in recipe["ingredients"] %}
                            {% for ingredient in recipe["ingredients"][category] %}
                                <tr>
                                    <th scope="row">{{ ingredient }}</th>
                                    <td class="font-monospace">{{ recipe["ingredients"][category][ingredient]["amount"] }}</td>
                                    <td>{{ recipe["ingredients"][category][ingredient]["unit"] }}</td>
                                    <td class="font-monospace">{{ "${:.2f}".format(recipe["ingredients"][category][ingredient]["cost"]) }}</td>
                                </tr>
                            {% endfor %}
                        {% endfor %}
                    </tbody>
                </table>
        </section>
        <section class="mb-5">
            <h2 class="mb-3">Product Specifications</h2>
            <table class="product-specification table table-light table-striped table-hover">
                <thead>
                    <tr>
                        <th scope="col">Format</th>
                        <th scope="col">Size</th>
                        <th scope="col">Amount</th>
                        <th scope="col">Unit</th>
                        <th scope="col">Cost</th>
                    </tr>
                </thead>
                <tbody>
                    {% for product_format in recipe["specifications"] %}
                        {% for product_size in recipe["specifications"][product_format] %}
                            <tr>
                                <th scope="row">{{ product_format }}</th>
                                <td>{{ product_size }}</td>
                                <td class="font-monospace">{{ recipe["specifications"][product_format][product_size]["amount"] }}</td>
                                <td>{{ recipe["specifications"][product_format][product_size]["unit"] }}</td>
                                <td class="font-monospace">{{ "${:.2f}".format(recipe["specifications"][product_format][product_size]["cost"]) }}</td>
                            </tr>
                        {% endfor %}
                    {% endfor %}
                </tbody>
            </table>
        </section>
        <section class="container w-75 mb-3">
            <h2 class="row justify-content-center">Procedure</h2>
            <div class="row input-group justify-content-center">
                <textarea class="form-control h-100" rows={{ recipe["procedure"].count('\n') + 1 }} disabled>{{ recipe["procedure"] }}</textarea>
            </div>
        </section>
    </article>
{% endblock %}
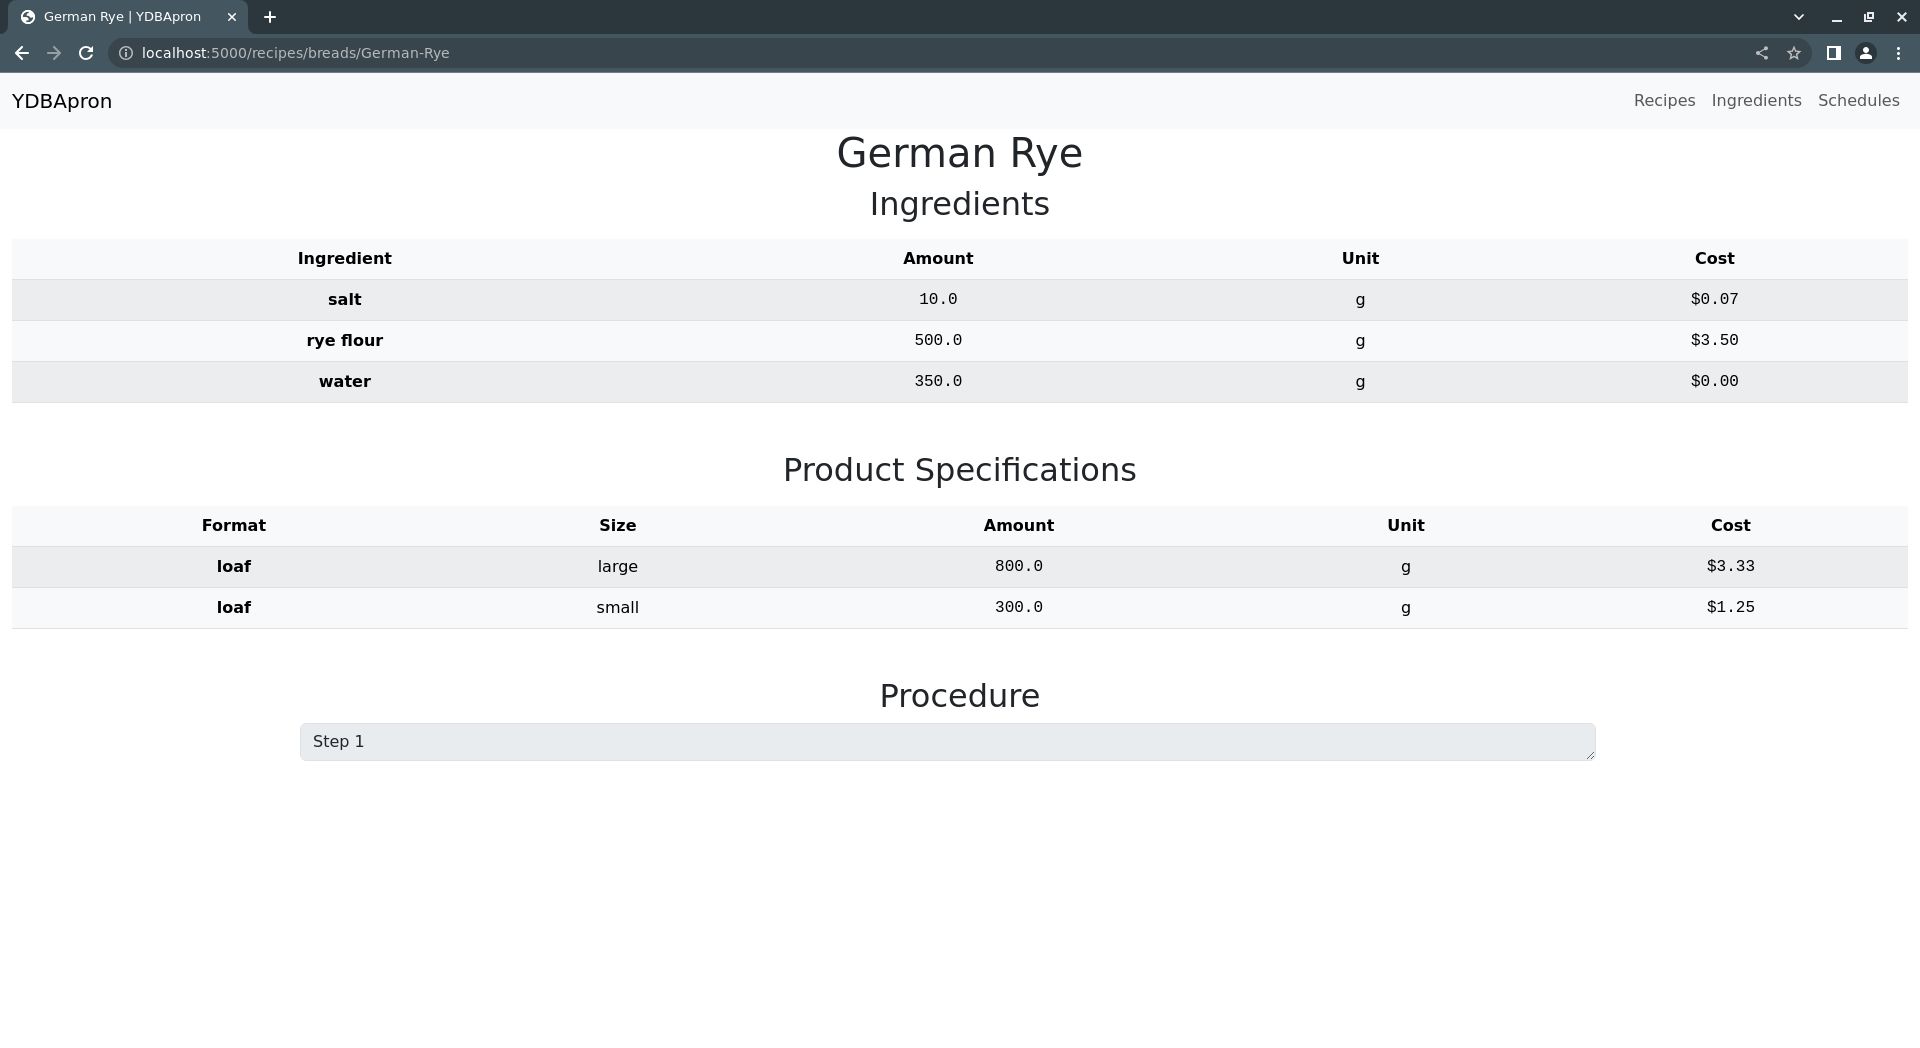
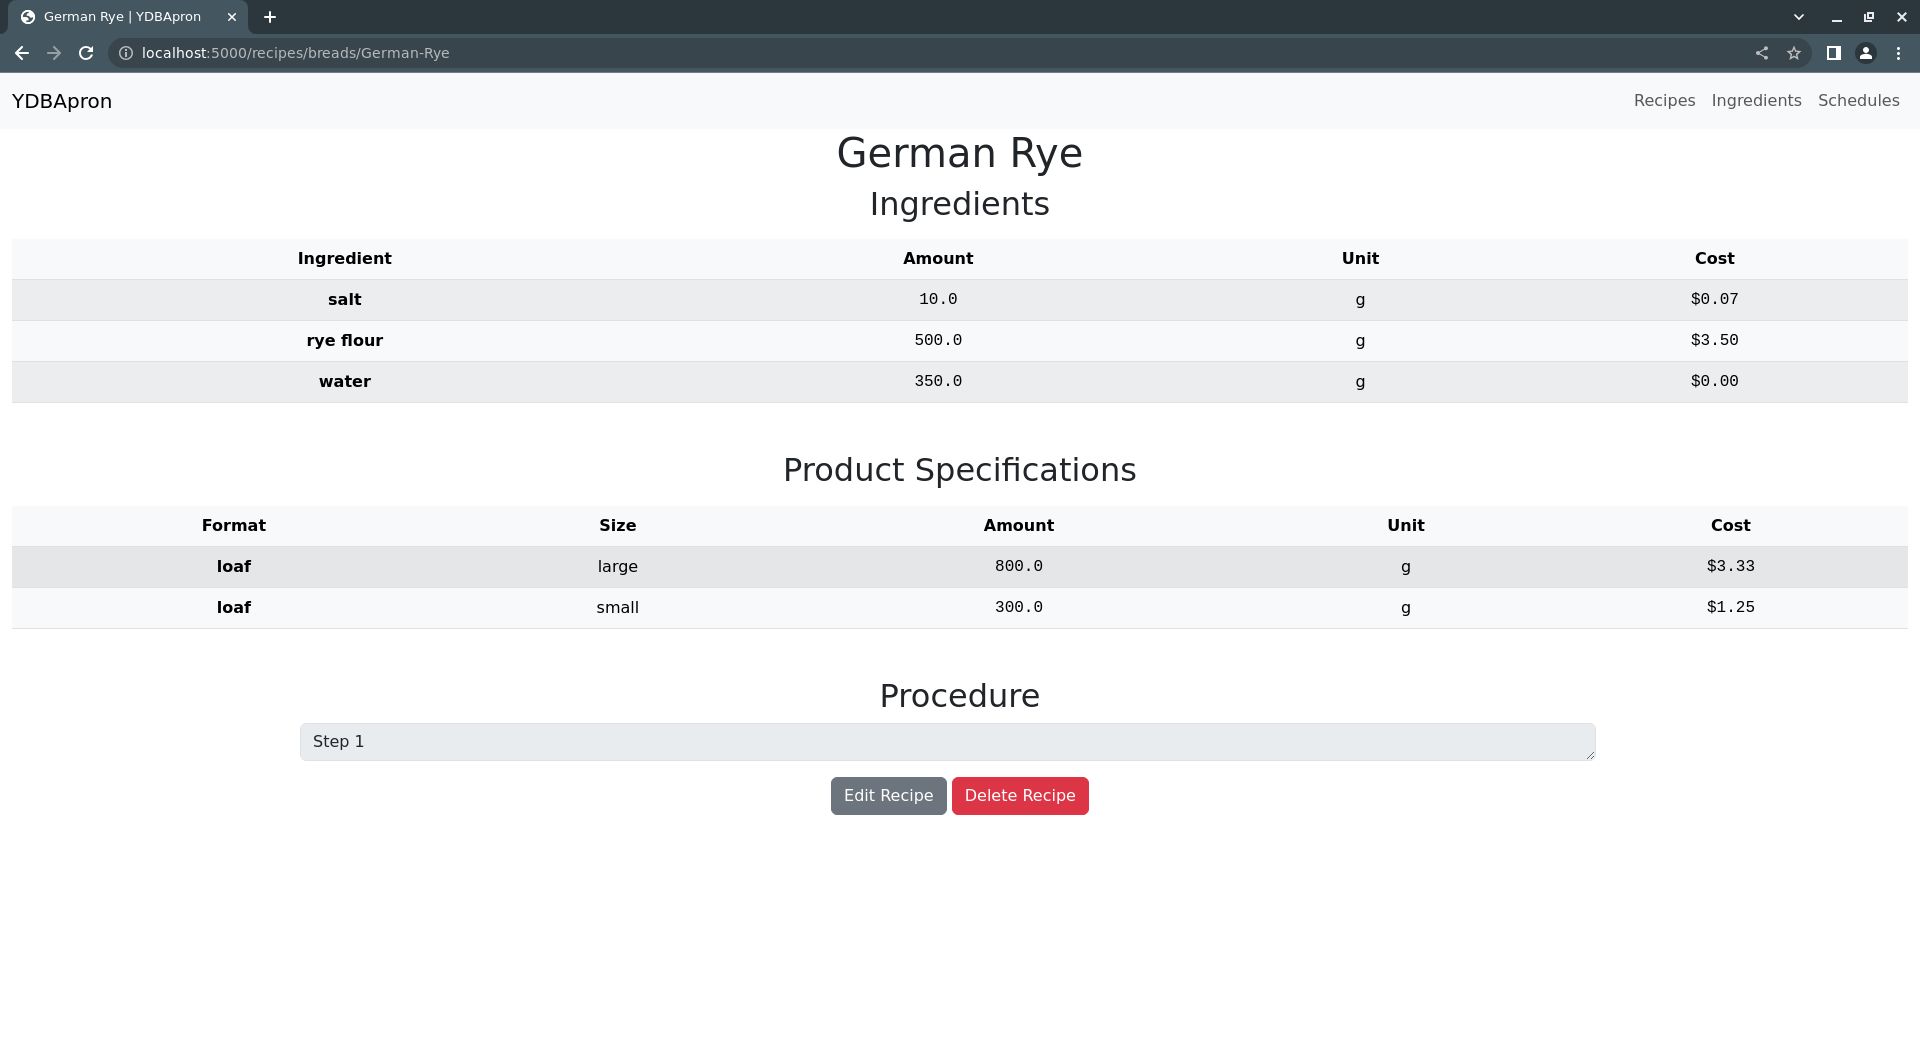
There are three <h2> tags that head off three different sections of the recipe page: an ingredient list, a list of product specifications, and a description of the procedure used to produce the recipe.
The ingredients list is a simple table consisting of rows representing ingredients. Each row contains information on how much of the ingredient to use, how much it costs, etc.
Rows are added to the ingredients table by doing a loop through a Python dictionary containing ingredient data received from the calling route, i.e. /recipe in recipes.py.
Similarly, the product specification list is a table whose rows represent different products. Each row shows the product format, format size, amount (i.e. weight/volume), and cost.
Rows are added to the specifications table by doing a loop through another Python dictionary received from the calling route.
Finally, there is a section containing a <textarea> field for defining the recipe's production procedure.
Now, on to production schedule views.
Production schedule views
There are also two production schedule views: one for a single schedule, and one listing all schedules.
Start by creating the the schedule list view by opening a new schedules.html file in the templates directory and adding this code to it:
{% extends 'base.html' %}

{% block section %}
    <h1 class="mt-3 mb-5">{% block title %}Schedules{% endblock %}</h1>
    <div class="list-group">
        {% for schedule in schedules %}
            <a href="{{ url_for('schedules.schedule', schedule_name=schedule.replace(" ", "-")) }}" class="list-group-item list-group-item-action fs-4 w-50 m-auto">{{ schedule.title() }}</a>
        {% endfor %}
    </div>
    <!-- Add schedule button... -->
{% endblock %}
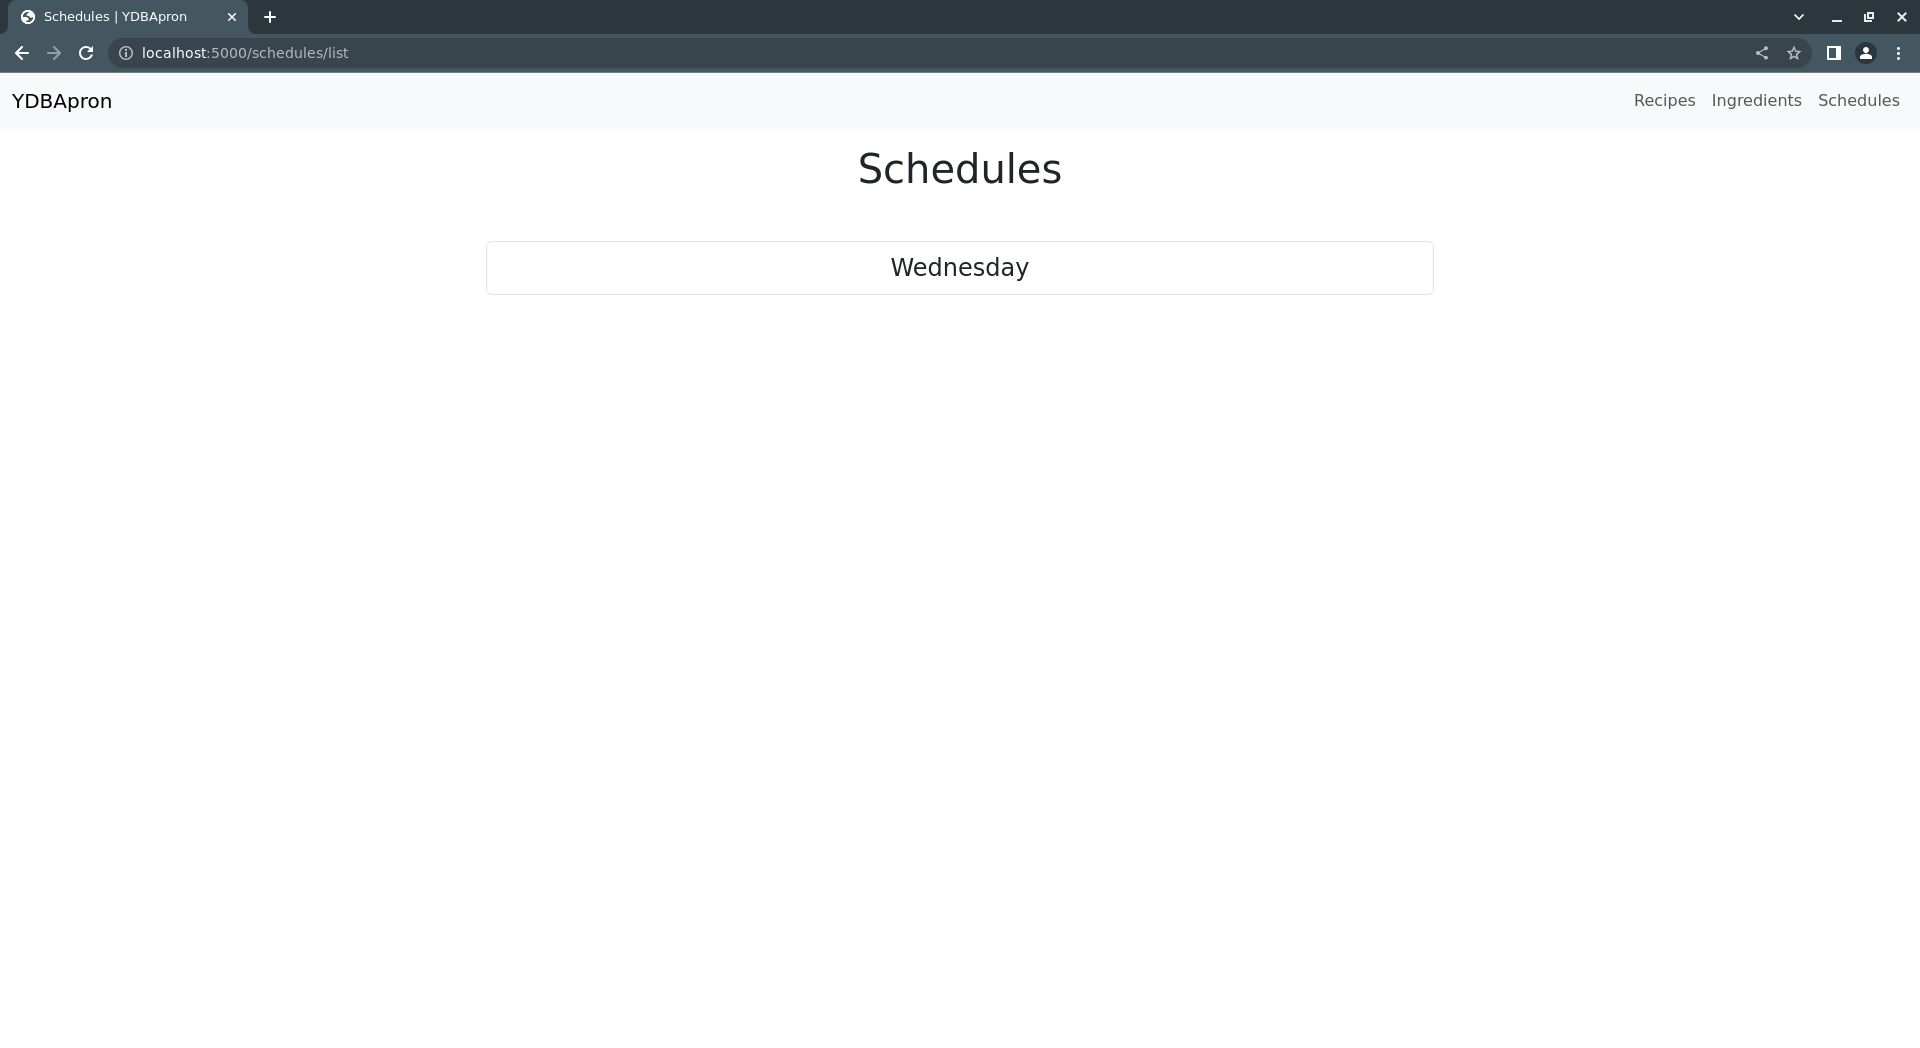
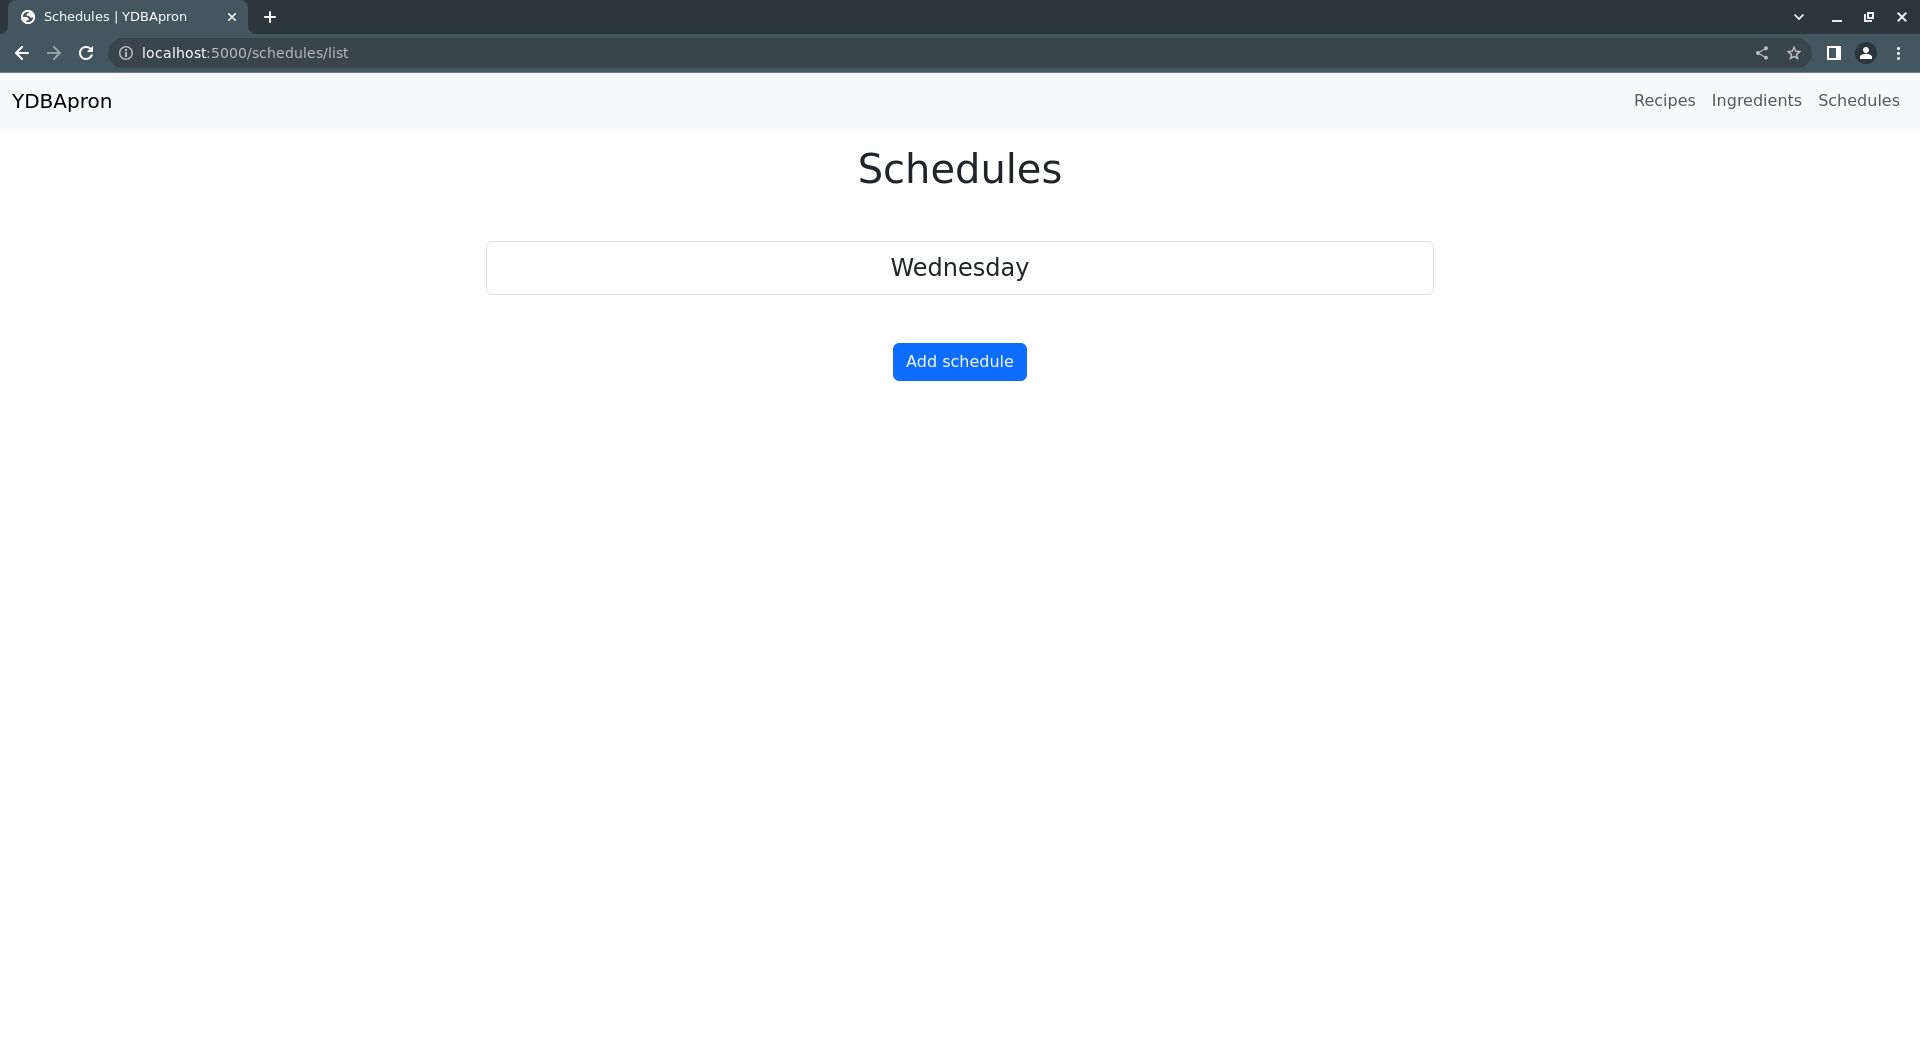
Like recipes.html, schedules.html just creates a list of links to each production schedule stored in the database.
There is also a place for an "Add schedule" button, but you'll add that later along with the rest of the view buttons.
Next, you'll create the single schedule view. However, since the template for this view is more sophisticated than the others, you'll construct in two parts to make it a bit easier to see how it works.
First, add the following code to a new schedule.html file in the templates directory:
{% extends 'base.html' %}

{% block section %}
    <article class="schedule">
        <h1 class="mt-3 mb-5">{% block title %}{{ schedule["name"].title() }} Schedule{% endblock %}</h1>
        {% for category in schedule["recipes"] %}
            <section class="schedule-category">
                <h2 class="mb-5 mt-5">{{ category.title() }}</h2>
                {% for recipe in schedule["recipes"][category] %}
                    {% set recipe_id = (category.title() + recipe.title()).replace(" ", "") %}
                    <section class="schedule-recipe mt-5 mb-5">
                        <h3 class="fs-4 mb-3"><a href="{{ url_for('recipes.recipe', category=category, recipe_name=recipe.replace(" ", "-")) }}" class="link-primary link-offset-2 link-underline-opacity-25 link-underline-opacity-100-hover">{{ recipe.title() }}</a></h3>
                        <table class="recipe-schedule table table-light table-striped table-hover mb-4">
                            <thead>
                                <tr>
                                    <th scope="col">Ingredient</th>
                                    <th scope="col">Amount</th>
                                    <th scope="col">Measure</th>
                                    <th scope="col">Cost</th>
                                </tr>
                            </thead>
                            <tbody>
                                {% for ingredient_category in schedule["recipes"][category][recipe]["ingredients"] %}
                                    {% for ingredient in schedule["recipes"][category][recipe]["ingredients"][ingredient_category] %}
                                        <tr>
                                            <th scope="row">{{ ingredient }}</th>
                                            <td class="font-monospace">{{ "{:.1f}".format(schedule["recipes"][category][recipe]["ingredients"][ingredient_category][ingredient]["amount"]) }}</td>
                                            <td>{{ schedule["recipes"][category][recipe]["ingredients"][ingredient_category][ingredient]["unit"] }}</td>
                                            <td class="font-monospace">{{ "${:.2f}".format(schedule["recipes"][category][recipe]["ingredients"][ingredient_category][ingredient]["cost"]) }}</td>
                                        </tr>
                                    {% endfor %}
                                {% endfor %}
                            </tbody>
                        </table>

                        <!-- Recipe yield section... -->

                    </section>
                    <div style="break-after:page"></div>
                {% endfor %}
            </section>
        {% endfor %}
    </article>
{% endblock %}
This will create list of recipes for the given schedule, grouped by recipe category. This is done by looping over each category in a recipe dictionary received from the calling route, /schedule in schedules.py, then looping over each recipe in the dictionary representing the given category.
Each recipe consists of a table with ingredient amounts, as well the cost of each ingredient. Ingredients are also added by looping through a dictionary received from the calling route.
The break-after:page <div> tag is there simply to improve formatting when printing the production schedule.
Now, add a section for recipe yield information to the template after the table containing ingredient information:
<!-- ... recipe information. -->
 <section class="recipe-yield container">
     <div class="mb-3 row justify-content-between">
         {% for specification in schedule["recipes"][category][recipe]["specifications"] %}
             {% for size in schedule["recipes"][category][recipe]["specifications"][specification] %}
                 {% set recipe_spec_id = recipe_id + "-" + (specification.title() + size.title()).replace(" ", "") %}
                 {% set spec_volume_id = "recipeSpecification-Volume-" + recipe_spec_id %}
                 {% set spec_name_id = "recipeSpecification-Name-" + recipe_spec_id %}
                 {% set spec_size_id = "recipeSpecification-Size-" + recipe_spec_id %}
                 <div class="col-sm-4">
                     <div class="input-group w-auto">
                         <span class="input-group-text"><strong>{{ size.title() }} {{ specification.title() }}</strong></span>
                         <span class="input-group-text font-monospace" id="specificationAmount-{{ recipe_spec_id }}">{{ schedule["recipes"][category][recipe]["specifications"][specification][size]["amount"] }}</span>
                         <span class="input-group-text" id="specificationUnit-{{ recipe_spec_id }}">{{ schedule["recipes"][category][recipe]["specifications"][specification][size]["unit"] }}</span>
                         <input type="number" class="form-control text-end font-monospace" disabled readonly id="{{ spec_volume_id }}" value="{{ schedule["recipes"][category][recipe][specification][size] if schedule["recipes"][category][recipe][specification][size] else 0 }}">
                     </div>
                 </div>
             {% endfor %}
         {% endfor %}
     </div>
     <div class="mb-3 row justify-content-between">
         <div class="col-sm-4">
             <div class="input-group">
                 <span class="input-group-text"><strong>Supplementary Yield</strong></span>
                 <input type="number" class="form-control supplementary-yield text-end font-monospace" disabled readonly id="supplementaryYield-{{ (category.title() + recipe.title()).replace("", "") }}" value="{{ schedule["recipes"][category][recipe]["supplementary_yield"] }}">
                 <span class="input-group-text">{{ schedule["recipes"][category][recipe]["cost_unit"] }}</span>
             </div>
         </div>
         <div class="col-sm-4">
             <div class="input-group">
                 <span class="input-group-text"><strong>Gross Yield</strong></span>
                 <input type="number" class="form-control gross-yield text-end font-monospace" disabled readonly id="grossYield-{{ (category.title() + recipe.title()).replace(" ", "") }}" value="{{ schedule["recipes"][category][recipe]["gross_yield"] }}">
                 <span class="input-group-text">{{ schedule["recipes"][category][recipe]["cost_unit"] }}</span>
             </div>
         </div>
         <div class="col-sm-4">
             <div class="input-group">
                 <span class="input-group-text"><strong>Gross Cost</strong></span>
                 <span class="input-group-text">$</span>
                 <input type="number" class="form-control gross-cost font-monospace text-end" disabled readonly id="grossCost-{{ (category.title() + recipe.title()).replace(" ", "") }}" value="{{ "{:.2f}".format(schedule["recipes"][category][recipe]["gross_cost"]) }}">
             </div>
         </div>
     </div>
 </section>
<!-- ... closing tags. -->
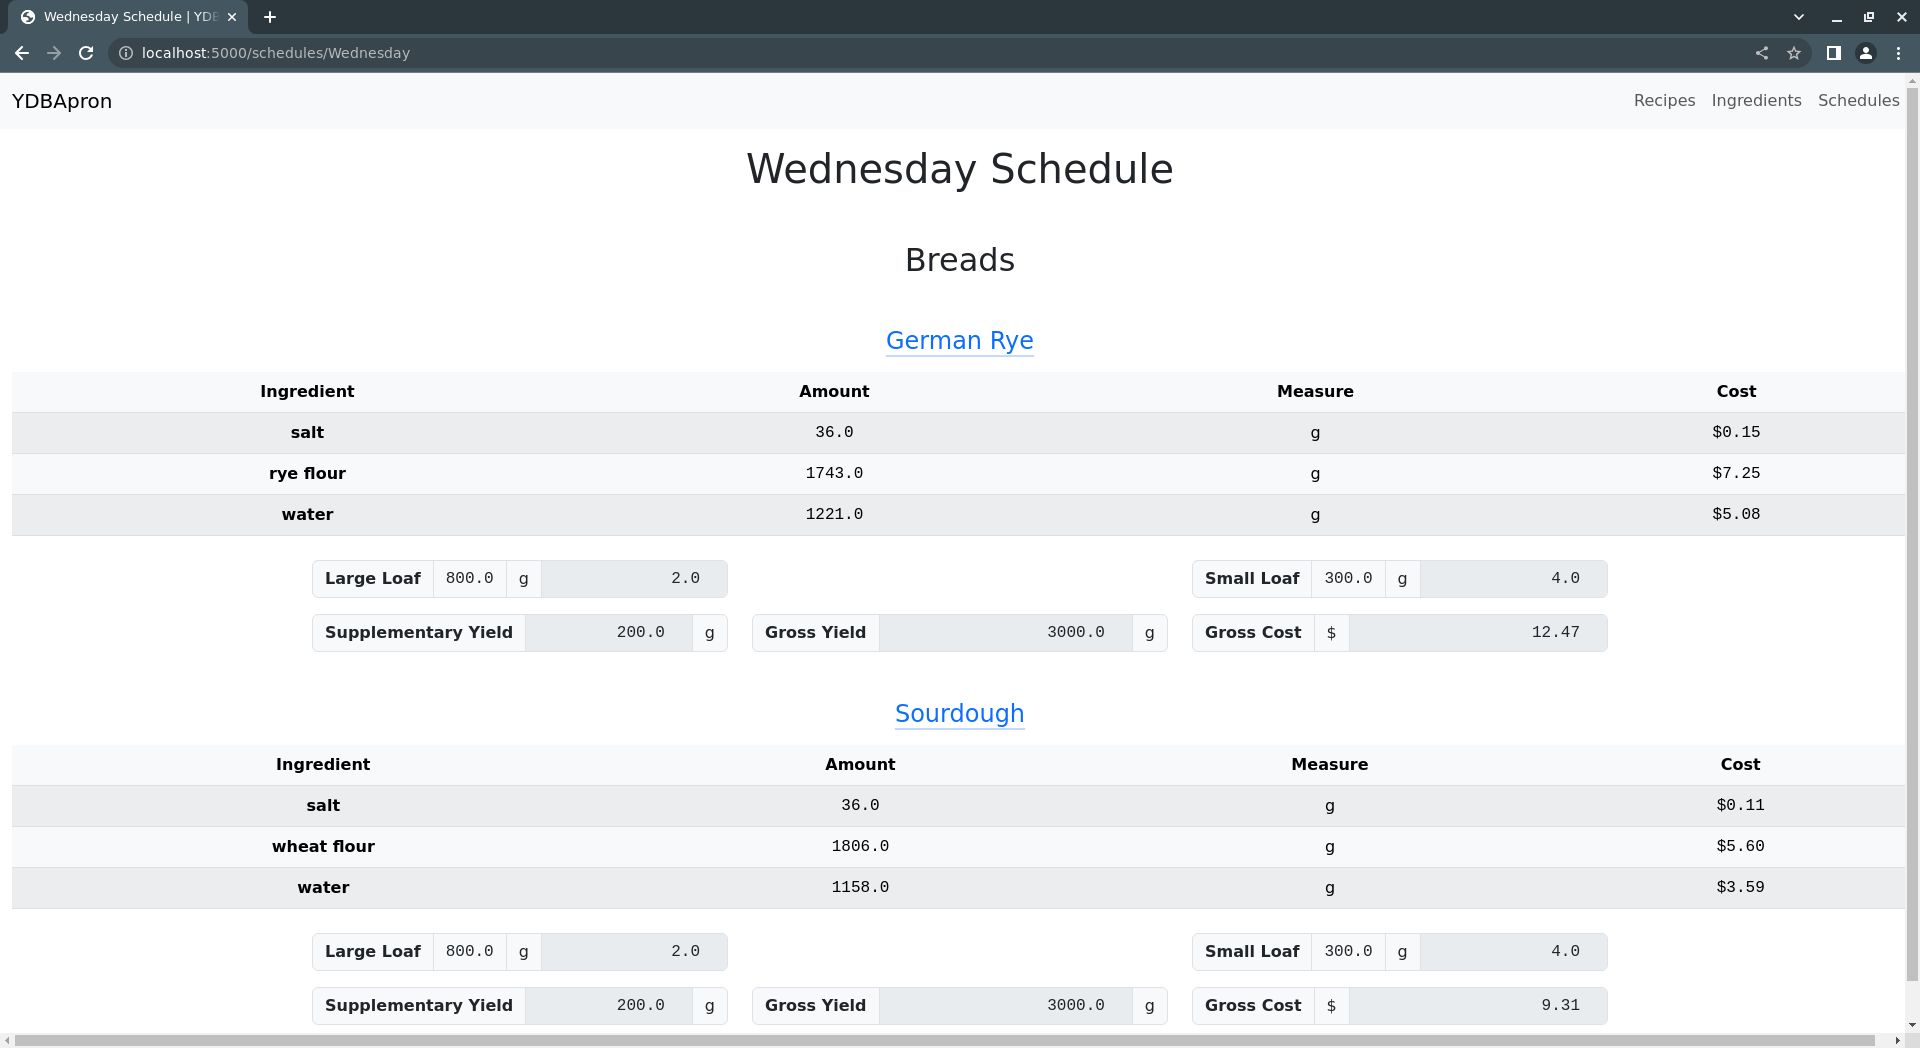
This code creates two rows of data: one that lists the number of each product type to produce, and another that lists the yield and cost information for the whole recipe.
The product type listings are created by looping over each product specification contained in a recipe dictionary received from the calling route, /schedule in schedules.py.
The yield information is derived from the same recipe dictionary, but no loop is required since there is only one set of yield information per recipe.
Later, you'll add edit and delete buttons to the schedule view, but for now it's enough just to view the data.
Before creating template pages for adding and modifying data, you'll need to create some backend form objects to pass to them. So, let's create a few form classes before doing any more templating.
8. Create templates to add and edit data
There are three templates for adding and/or editing data in YDBApron, one each for each type of data: ingredients, recipes, and production schedules.
Again, let's start with the simplest case, ingredients, and work up to the more sophisticated.
add_ingredient.html
Start by creating a new add_ingredient.html file in the templates directory and adding the following code to it:
{% extends 'base.html' %}

{% block section %}
<h1 class="mb-5 mt-3">{% block title %} {{ operation }} ingredient {% endblock %}</h1>
    {% if not entries_available %}
        <div class="alert alert-danger" role="alert">Cannot add ingredient: ingredient limit reached ({{ num_ingredients }})</div>
    {% endif %}
    <form action="{{ url_for('ingredients.add') }}" method="post">
        {{ ingredient_form.csrf_token }}
        <section class="border container mb-5 text-start">
            <div class="mb-3 mt-2 row">
                <div class="col w-50">
                    {% if ingredient_form.ingredient_name.errors %}
                        <div class="is-invalid">
                            <div class="input-group">
                                <div class="input-group-text"><strong>{{ ingredient_form.ingredient_name.label }}</strong></div>
                                {{ ingredient_form.ingredient_name(class_="form-control is-invalid") }}
                            </div>
                            <ul class="errors list-group">
                                {% for error in ingredient_form.ingredient_name.errors %}
                                    <li class="list-group-item form-check text-danger">{{ error }}</li>
                                {% endfor %}
                            </ul>
                        </div>
                    {% else %}
                        <div class="input-group">
                            <div class="input-group-text"><strong>{{ ingredient_form.ingredient_name.label }}</strong></div>
                            {{ ingredient_form.ingredient_name(class_="form-control") }}
                        </div>
                    {% endif %}
                </div>
                <div class="col w-50">
                    {% if ingredient_form.ingredient_category.errors %}
                            <div class="is-invalid">
                            <div class="input-group">
                                <div class="input-group-text"><strong>{{ ingredient_form.ingredient_category.label }}</strong></div>
                                {{ ingredient_form.ingredient_category(class_="form-control is-invalid") }}
                            </div>
                            <ul class="errors list-group">{% for error in ingredient_form.ingredient_category.errors %}<li class="list-group-item form-check text-danger">{{ error }}</li>{% endfor %}</ul>
                        </div>
                    {% else %}
                        <div class="input-group">
                            <div class="input-group-text"><strong>{{ ingredient_form.ingredient_category.label }}</strong></div>
                            {{ ingredient_form.ingredient_category(class_="form-control") }}
                        </div>
                    {% endif %}
                </div>
            </div>
            <!-- More form fields... -->
        </section>
        <button type="button" class="btn btn-secondary" onclick="javascript:history.back()">Cancel</button>
        <button type="submit" class="btn btn-primary">{{ "Add" if operation == "Add" else "Save" }}</button>
    </form>
{% endblock %}
This code sets up the overall structure of the "Add Ingredient" page and defines a section containing the first two form fields, ingredient name and ingredient category. It also includes a couple of buttons for submitting the form or cancelling the addition.
Now, add the remaining ingredient form fields in the space reserved for more form fields:
<!-- ... ingredient name and category fields ... -->
 <div class="mb-3 mt-2 row">
     <div class="mb-3 row">
         <div class="col">
             {% if ingredient_form.ingredient_amount.errors %}
                 <div class="is-invalid">
                     <div class="input-group">
                         <div class="input-group-text font-monospace text-end"><strong>{{ ingredient_form.ingredient_amount.label }}</strong></div>
                         {{ ingredient_form.ingredient_amount(class_="form-control is-invalid font-monospace text-end") }}
                     </div>
                 </div>
                 <ul class="errors list-group">{% for error in ingredient_form.ingredient_amount.errors %}<li class="list-group-item form-check text-danger">{{ error }}</li>{% endfor %}</ul>
         {% else %}
                 <div class="input-group">
                     <div class="input-group-text"><strong>{{ ingredient_form.ingredient_amount.label }}</strong></div>
                     {{ ingredient_form.ingredient_amount(class_="form-control font-monospace text-end") }}
                 </div>
             {% endif %}
         </div>
     <div class="col">
         {% if ingredient_form.ingredient_unit.errors %}
             <div class="is-invalid">
                 <div class="input-group">
                     <div class="input-group-text"><strong>{{ ingredient_form.ingredient_unit.label }}</strong></div>
                     {{ ingredient_form.ingredient_unit(class_="form-control is-invalid col") }}
                 </div>
                 <ul class="errors list-group">{% for error in ingredient_form.ingredient_unit.errors %}
                     <li class="list-group-item"><div class="text-danger">{{ error }}</div></li>{% endfor %}</ul>
             </div>
         {% else %}
             <div class="input-group">
                 <div class="input-group-text"><strong>{{ ingredient_form.ingredient_unit.label }}</strong></div>
                 {{ ingredient_form.ingredient_unit(class_="form-control") }}
             </div>
         {% endif %}
     </div>
     <div class="col">
         {% if ingredient_form.ingredient_price.errors %}
             <div class="is-invalid">
                 <div class="input-group">
                     <div class="input-group-text"><strong>{{ ingredient_form.ingredient_price.label }}</strong></div>
                     <span class="input-group-text">$</span>
                     {{ ingredient_form.ingredient_price(class_="form-control is-invalid font-monospace text-end") }}
                 </div>
                 <ul class="errors list-group">{% for error in ingredient_form.ingredient_price.errors %}<li class="list-group-item form-check text-danger">{{ error }}</li>{% endfor %}</ul>
             </div>
         {% else %}
             <div class="input-group">
                 <div class="input-group-text"><strong>{{ ingredient_form.ingredient_price.label }}</strong></div>
                 <span class="input-group-text">$</span>
                 {{ ingredient_form.ingredient_price(class_="form-control font-monospace text-end") }}
             </div>
         {% endif %}
     </div>
 </div>
 <div class="mb-3 mt-2 row">
     <div class="col">
         {% if ingredient_form.ingredient_manufacturer.errors %}
             <div class="is-invalid">
                 <div class="input-group">
                     <div class="input-group-text"><strong>{{ ingredient_form.ingredient_manufacturer.label }}</strong></div>
                     {{ ingredient_form.ingredient_manufacturer(class_="form-control is-invalid") }}
                 </div>
                 <ul class="errors list-group">{% for error in ingredient_form.ingredient_manufacturer.errors %}<li class="list-group-item form-check text-danger">{{ error }}</li>{% endfor %}</ul>
             </div>
         {% else %}
             <div class="input-group">
                 <div class="input-group-text"><strong>{{ ingredient_form.ingredient_manufacturer.label }}</strong></div>
                 {{ ingredient_form.ingredient_manufacturer(class_="form-control") }}
             </div>
         {% endif %}
     </div>
     <div class="col">
         {% if ingredient_form.ingredient_name.errors %}
             <div class="is-invalid">
                 {{ ingredient_form.ingredient_vendor.label }}
                 {{ ingredient_form.ingredient_vendor(class_="form-control is-invalid") }}
                 <ul class="errors list-group">{% for error in ingredient_form.ingredient_vendor.errors %}<li class="list-group-item form-check text-danger">{{ error }}</li>{% endfor %}</ul>
             </div>
         {% else %}
             <div class="input-group">
                 <div class="input-group-text"><strong>{{ ingredient_form.ingredient_vendor.label }}</strong></div>
                 {{ ingredient_form.ingredient_vendor(class_="form-control") }}
             </div>
         {% endif %}
     </div>
 </div>
<!-- ... buttons and section close ... -->
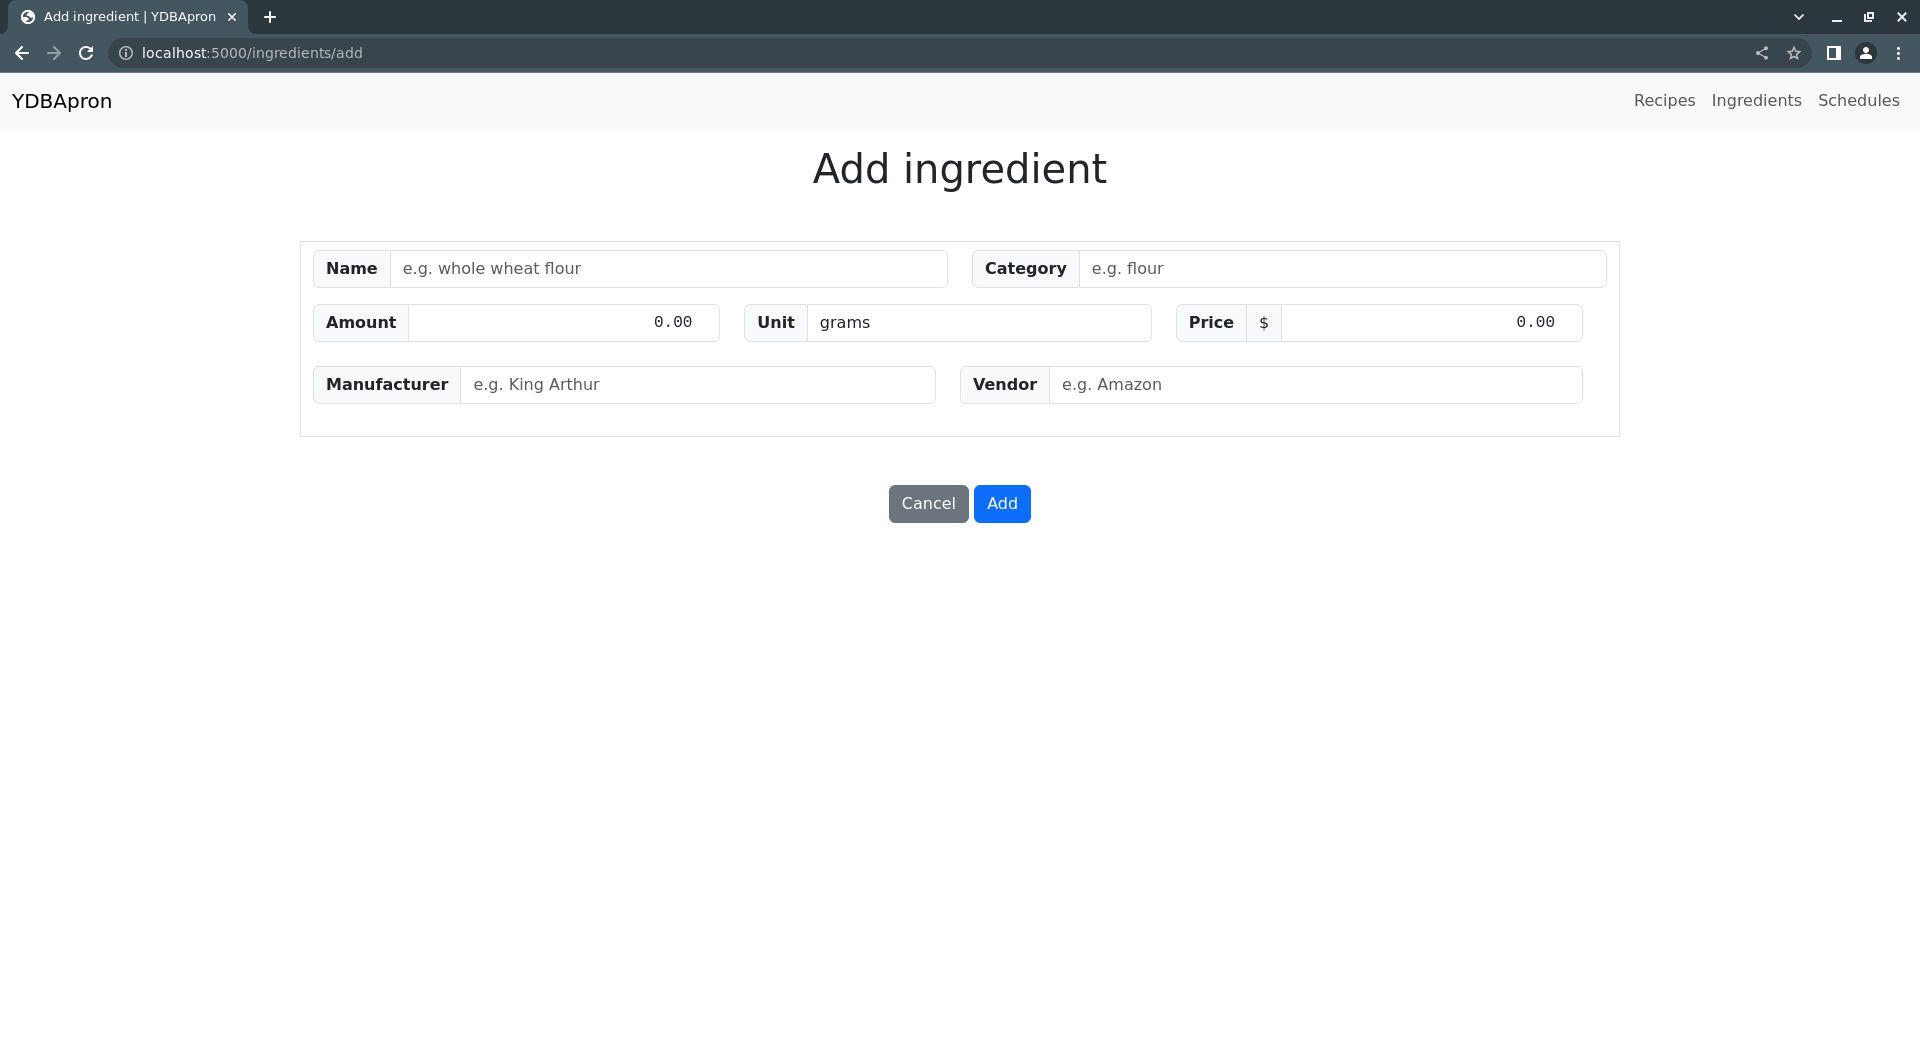
That was a lot of code, but it's all quite simple and repetitive: it just creates stylized markup for each field in the IngredientForm object received from the calling route, /add in ingredients.py.
Now your add_ingredient.html file should look like add_ingredient.html.
Note also that for each field there's an if/else block that conditionally generates different markup depending on whether a previously submitted form, if any, had improperly completed fields.
add_recipe.html
Next, create an add_recipe.html file in the templates directory. This template will have several sections, so you can add them one by one to make it easier to see how it all fits together.
Start by adding this code:
{% extends 'base.html' %}

{% block section %}
    <h1 class="mb-5 mt-3">{% block title %} {{ operation }} recipe {% endblock %}</h1>
    {% if not entries_available %}
        <div class="alert alert-danger" role="alert">Cannot add recipe: recipe limit reached ({{ num_recipes }})</div>
    {% endif %}
    <form action="{{ url_for('recipes.add') if operation == 'Add' else url_for('recipes.edit', category=recipe_form.recipe_category.data, recipe_name=recipe_form.recipe_name.data )}}" method="post">
        {{ recipe_form.csrf_token }}
        <section class="container mb-5 text-start">
            <div class="mb-3 mt-2 row">
                <div class="col">
                    {% if recipe_form.recipe_name.errors %}
                        <div class="is-invalid">
                            <div class="input-group">
                                <div class="input-group-text"><strong>{{ recipe_form.recipe_name.label }}</strong></div>
                                {{ recipe_form.recipe_name(class_="form-control is-invalid") }}
                            </div>
                            <ul class="errors list-group">{% for error in recipe_form.recipe_name.errors %}<li class="list-group-item form-check text-danger">{{ error }}</li>{% endfor %}</ul>
                        </div>
                    {% else %}
                        <div class="input-group">
                            <div class="input-group-text"><strong>{{ recipe_form.recipe_name.label }}</strong></div>
                            {{ recipe_form.recipe_name(class_="form-control") }}
                        </div>
                    {% endif %}
                </div>
                <div class="col">
                    {% if recipe_form.recipe_name.errors %}
                        <div class="is-invalid">
                            <div class="input-group">
                                <div class="input-group-text"><strong>{{ recipe_form.recipe_category.label }}</strong></div>
                                {{ recipe_form.recipe_category(class_="form-control is-invalid") }}
                            </div>
                            <ul class="errors list-group">
                                {% for error in recipe_form.recipe_name.errors %}
                                    <li class="list-group-item form-check text-danger">{{ error }}</li>
                                {% endfor %}
                            </ul>
                        </div>
                    {% else %}
                        <div class="input-group">
                            <div class="input-group-text"><strong>{{ recipe_form.recipe_category.label }}</strong></div>
                            {{ recipe_form.recipe_category(class_="form-control") }}
                        </div>
                    {% endif %}
                </div>
            </div>
        </section>
        <!-- ... Ingredients form section ... -->
        <!-- ... Product specifications form section ... -->
        <!-- ... Procedure form section ... -->
        <button type="button" class="btn btn-secondary" onclick="javascript:history.back()">Cancel</button>
        <button type="submit" class="btn btn-primary">{{ "Add" if operation == "Add" else "Save" }}</button>
    </form>
{% endblock %}
This code structures the page and defines the first section, which contains the form fields for the recipe name and category. It also contains buttons for submitting the form or cancelling it.
Now, add the code for generating the ingredients form:
<!-- ... Recipe name and category fields ... -->
<section class="ingredients container mb-5">
    <h2 class="mb-4">Ingredients</h2>
    {% for category in ingredients %}
        <h3 class="mb-5 mt-3">{{ category.title() }}</h3>
        <section class="ingredient-category row">
            {% for ingredient in ingredients[category] %}
                    {% set ingredient_id = (category.title() + ingredient.title()).replace(" ", "") %}
                    {{ ingredients[category][ingredient]["form"].ingredient_name(type="hidden", readonly=True, value=ingredient) }}
                    {{ ingredients[category][ingredient]["form"].ingredient_category(type="hidden", readonly=True, value=category) }}
                    <section class="ingredient col">
                            <span><strong>{{ ingredient.title() }}</strong></span>
                            <div class="input-group">
                                {% if ingredients[category][ingredient]["form"].ingredient_amount.errors %}
                                    <div class="is-invalid">
                                        <div class="input-group">
                                            <div class="input-group-text w-50"><strong>{{ ingredients[category][ingredient]["form"].ingredient_amount.label }}</strong></div>
                                            {{ ingredients[category][ingredient]["form"].ingredient_amount(class_="form-control ingredient-amount font-monospace text-end", id=("ingredientAmount-" + ingredient_id)) }}
                                        </div>
                                        <ul class="errors list-group">{% for error in ingredients[category][ingredient]["form"].ingredient_amount.errors %}<li class="list-group-item form-check text-danger">{{ error }}</li>{% endfor %}</ul>
                                    </div>
                                {% else %}
                                    <div class="input-group">
                                        <div class="input-group-text w-50"><strong>{{ ingredients[category][ingredient]["form"].ingredient_amount.label }}</strong></div>
                                        {{ ingredients[category][ingredient]["form"].ingredient_amount(class_="form-control ingredient-amount font-monospace text-end", id=("ingredientAmount-" + ingredient_id)) }}
                                    </div>
                                {% endif %}
                                {% if ingredients[category][ingredient]["form"].ingredient_unit.errors %}
                                    <div class="is-invalid">
                                        <div class="input-group">
                                            <div class="input-group-text w-50"><strong>{{ ingredients[category][ingredient]["form"].ingredient_unit.label }}</strong></div>
                                            {{ ingredients[category][ingredient]["form"].ingredient_unit(class_="form-control ingredient-unit", id=("ingredientUnit-" + ingredient_id)) }}
                                        </div>
                                        <ul class="errors list-group">{% for error in ingredients[category][ingredient]["form"].ingredient_unit.errors %}<li class="list-group-item form-check text-danger">{{ error }}</li>{% endfor %}</ul>
                                    </div>
                                {% else %}
                                    <div class="input-group">
                                        <div class="input-group-text w-50"><strong>{{ ingredients[category][ingredient]["form"].ingredient_unit.label }}</strong></div>
                                        {{ ingredients[category][ingredient]["form"].ingredient_unit(class_="form-control ingredient-unit", id=("ingredientUnit-" + ingredient_id)) }}
                                    </div>
                                {% endif %}
                            </div>
                    </section>
            {% endfor %}
        </section>
    {% endfor %}
</section>
<!-- ... More fields ... -->
This section loops over each ingredient category and ingredient name to generate a list of ingredients, grouped by category.
Each entry in the list gets a field for specifying the amount of the ingredient to include in the recipe, along with a disabled field specifying the unit of measure for the ingredient amount.
Now, add the product specification form:
<!-- ... Ingredients form ... -->
<section class="product-specifications container">
    <h2 class="mb-5">Product Specifications</h2>
    {% for specification_form in recipe_form.specifications %}
        <section class="specification border-bottom row pb-4 mb-4">
            <div class="col">
                <div class="input-group">
                    <span class="input-group-text"><strong>Format</strong></span>
                    {{ specification_form.specification_format(class_="form-control specification-format") }}
                </div>
            </div>
            <div class="col">
                <div class="input-group">
                    <span class="input-group-text"><strong>Format Size</strong></span>
                    {{ specification_form.specification_format_size(class_="form-control specification-format-size") }}
                </div>
            </div>
            <div class="col">
                <div class="input-group">
                    <span class="input-group-text"><strong>Size</strong></span>
                    {{ specification_form.specification_size(class_="form-control specification-size font-monospace text-end") }}
                    {{ specification_form.specification_unit(class_="form-control specification-unit") }}
                </div>
            </div>
        </section>
    {% endfor %}
</section>
<!-- ... More forms ... -->
Like the last block of code, this one also defines a form that contains a list of fields.
This time, the code loops over each product specification and creates four form fields for each: format, format size, specification size (a.k.a amount), and the unit measure of the specification size.
Finally, add the procedure form field:
<!-- ... Product specification forms ... -->
<section class="procedure container mb-5 mt-3">
    <h2 class="mb-3">Procedure</h2>
    <div class="input-group">
        {{ recipe_form.procedure(class_="form-control", rows=(recipe_form.procedure.data.count('\n') + 1)) }}
    </div>
</section>
<!-- ... Buttons and form end ... -->
This block defines a simple section with a single field for entering arbitrary text describing the procedure for producing the recipe.
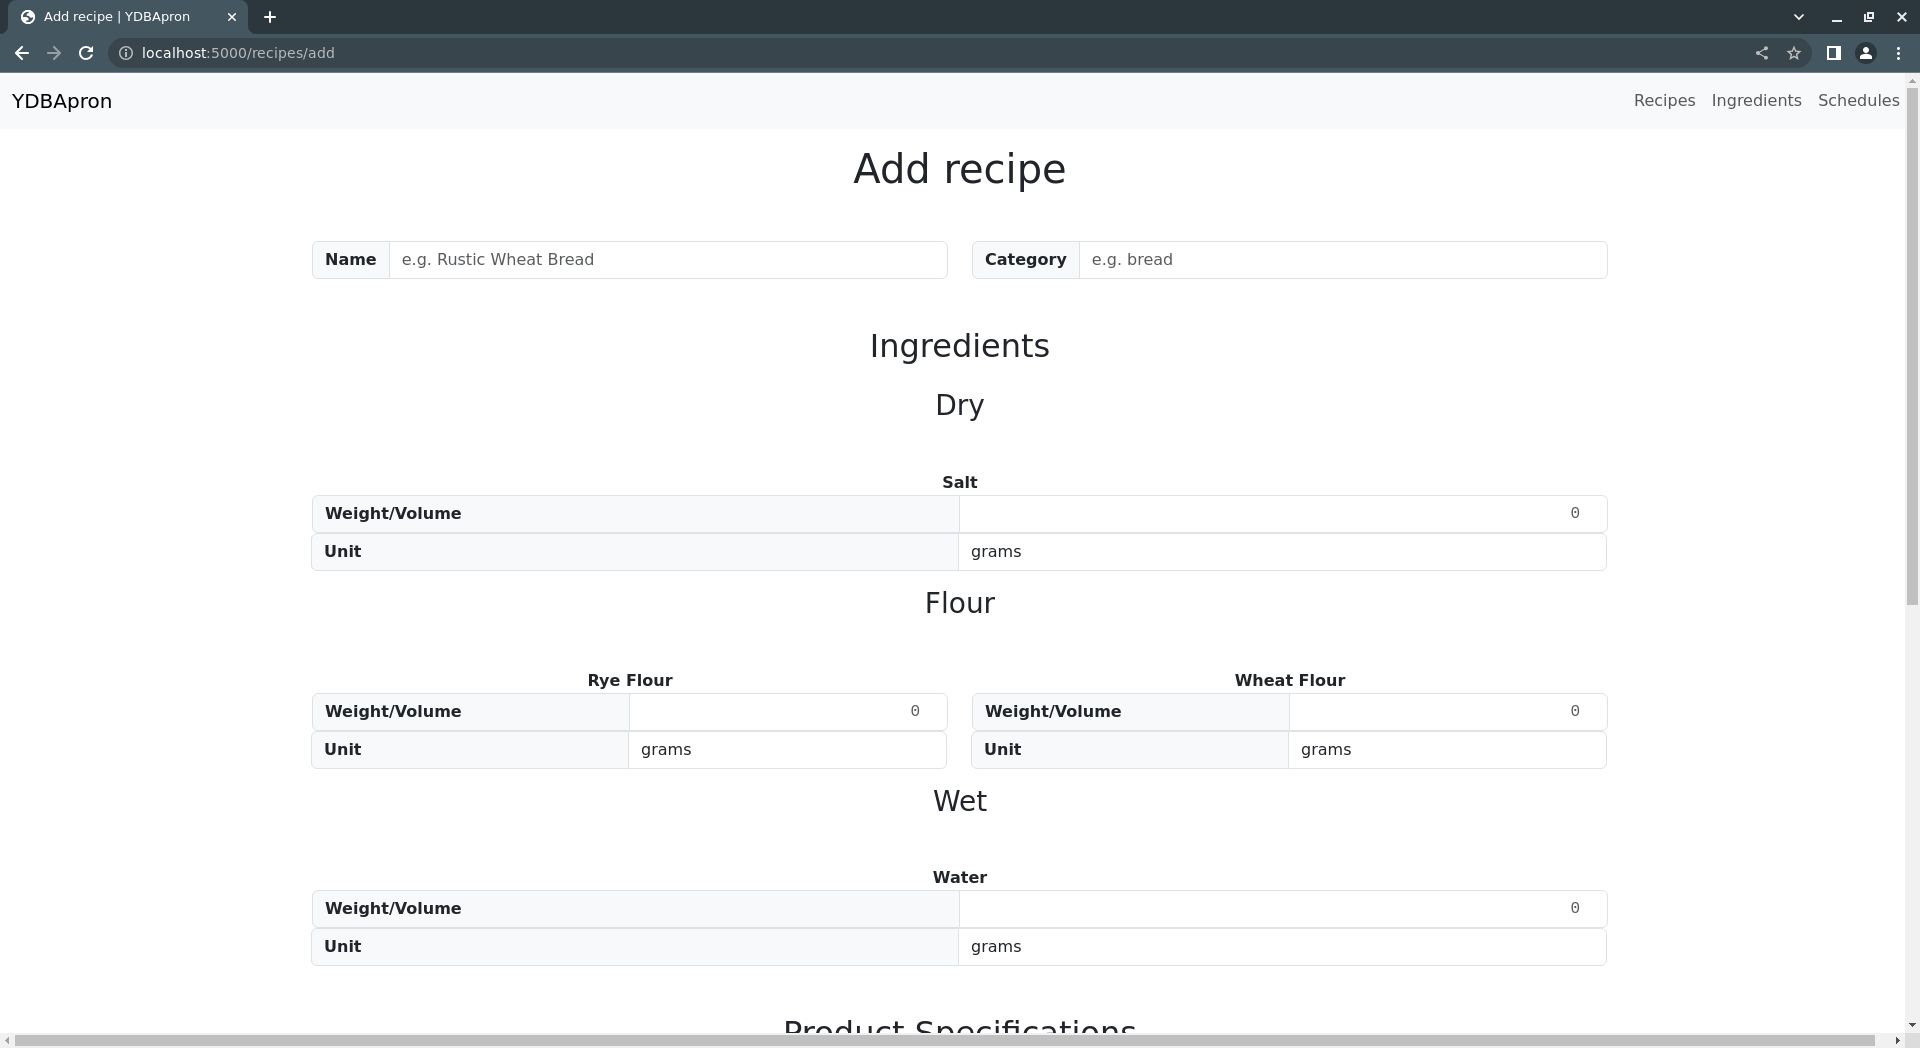
Now your add_recipe.html file should look like add_recipe.html.
That's it for adding recipes. Now on to adding schedules.
add_schedule.html
The core of the add_schedule.html template is a list of recipes, each with form fields for specifying how much of each product specification to produce for that recipe.
However, before adding this logic, start by creating the new add_schedule.html file in the templates directory with this code:
{% extends 'base.html' %}

{% block section %}
    <h1 class="mt-3 mb-5">{% block title %} {{ operation }} Schedule{% endblock %}</h1>
    <form action="{{ url_for('schedules.add') if operation == 'Add' else url_for('schedules.edit', schedule_name=schedule_form.schedule_name.data )}}" method="post">
        {{ schedule_form.csrf_token }}
        <div class="mx-auto w-50">
            {% if schedule_form.schedule_name.errors %}
                <div class="is-invalid">
                    <div class="input-group">
                        <span class="input-group-text"><strong>{{ schedule_form.schedule_name.label }}</strong></span>
                        {{ schedule_form.schedule_name(class_="form-control is-invalid") }}
                    </div>
                    <ul class="errors list-group">
                        {% for error in schedule_form.schedule_name.errors %}
                            <li class="list-group-item form-check text-danger">{{ error }}</li>
                        {% endfor %}
                    </ul>
                </div>
            {% else %}
                <div class="input-group">
                    <span class="input-group-text"><strong>{{ schedule_form.schedule_name.label }}</strong></span>
                    {{ schedule_form.schedule_name(class_="form-control") }}
                </div>
            {% endif %}
        </div>
        <!-- ... Recipe scaling forms ... -->
        <button type="button" class="btn btn-secondary" onclick="javascript:history.back()">Cancel</button>
        <button type="submit" class="btn btn-primary">{{ "Add" if operation == "Add" else "Save" }}</button>
    </form>
    <!-- ... Yield calculation script ... -->
{% endblock %}
This code structures the page, creates the main form, adds a field for accepting the schedule name, and adds buttons to submit or cancel the form.
With this in place, add a section the recipe field generation logic:
<!-- ... Schedule name field -->
<section class="schedule-add-recipes">
    {% for category in recipes %}
        <section class="recipe-category container">
            <h2 class="mb-5 mt-5">{{ category.title() }}</h2>
            {% for recipe in recipes[category] %}
                {% set recipe_id = (category.title() + recipe.title()).replace(" ", "") %}
                {{ recipes[category][recipe]["form"].recipe_name(type="hidden", readonly=True, value=recipe) }}
                {{ recipes[category][recipe]["form"].recipe_category(type="hidden", readonly=True, value=category) }}
                <!-- ... Recipe form -->
            {% endfor %}
        </section>
    {% endfor %}
</section>
<!-- ... Buttons, script, etc. -->
This code creates a new section that holds the recipe subforms, one for each recipe in the database. These subforms are created by first looping through each recipe category and recipe name in the recipes dictionary received from the calling route, i.e. /add in schedules.py.
Then, for each recipe, a recipe_id string is created for uniquely identifying each recipe for reference by the JavaScript you'll write below.
Also, two hidden form fields are added, containing the recipe name and recipe category. These hidden fields are used by the application logic in schedules.py to help store the schedule's recipe data in the database.
With these elements in place, now add section for holding the specification and yield subforms:
<!-- .. Recipe category and name loops, etc. ... -->
<section class="recipe row mb-5">
    <h3 class="fs-4 mb-3"><a href="{{ url_for('recipes.recipe', category=category, recipe_name=recipe.replace(" ", "-")) }}" class="link-primary link-offset-2 link-underline-opacity-25 link-underline-opacity-100-hover">{{ recipe }}</a></h3>
    <!-- ... Specification subform ... -->
    <!-- ... Yield subform ... -->
</section>
<!-- ... End of recipe category and name loops ...  -->
Next, add a <div> tag containing the specification form fields:
<!-- ... Recipe heading ... -->
<div class="mb-3 row">
    {% for specification in recipes[category][recipe]["specifications"] %}
        {% for size in recipes[category][recipe]["specifications"][specification] %}
            {% set recipe_spec_id = recipe_id + "-" + (specification.title() + size.title()).replace(" ", "") %}
            {% set spec_volume_id = "recipeSpecification-Volume-" + recipe_spec_id %}
            {% set spec_name_id = "recipeSpecification-Name-" + recipe_spec_id %}
            {% set spec_size_id = "recipeSpecification-Size-" + recipe_spec_id %}
            <div class="col">
                <div class="input-group">
                    <span class="input-group-text"><strong>{{ size.title() }} {{ specification.title() }}</strong></span>
                    <span class="input-group-text font-monospace text-end" id="specificationAmount-{{ recipe_spec_id }}">{{ recipes[category][recipe]["specifications"][specification][size]["amount"] }}</span>
                    <span class="input-group-text" id="specificationUnit-{{ recipe_spec_id }}">{{ recipes[category][recipe]["specifications"][specification][size]["unit"] }}</span>
                    {{ recipes[category][recipe]["specifications"][specification][size]["form"].specification_volume(class_="form-control recipe-specification font-monospace text-end", id=spec_volume_id) }}
                </div>
            </div>
            {{ recipes[category][recipe]["specifications"][specification][size]["form"].specification_name(id=spec_name_id, type="hidden", readonly=True, value=specification) }}
            {{ recipes[category][recipe]["specifications"][specification][size]["form"].specification_size(id=spec_size_id, type="hidden", readonly=True, value=size) }}
        {% endfor %}
    {% endfor %}
</div>
<!-- ... Yield subform ... -->
This code will add a subform for each product specification defined for the given recipe.
The subform consists of the specification format name, format size, amount of product, and unit of measure for the amount. Each of these fields is read-only and is for informational purposes only.
The sole editable field is the field for the specification volume. This field records the number of the specified product to produce. This is identified with a spec_volume_id for targeting by the JavaScript code you'll write below.
Finally, there are two more hidden fields, identifying the specification format name and format size. These fields are to help the application logic store the recipe specification information in the database.
Now, add the yield subform:
<!-- ... Specification subform ... -->
<div class="mb-3 row">
    <div class="col">
        <div class="input-group">
            <span class="input-group-text"><strong>Supplementary Yield</strong></span>
            {{ recipes[category][recipe]["form"].supplementary_yield(class_="form-control supplementary-yield font-monospace text-end", id=("recipeSpecification-supplementaryYield-" + recipe_id)) }}
            <span class="input-group-text">g</span>
        </div>
    </div>
    <div class="col">
        <div class="input-group">
            <span class="input-group-text"><strong>Gross Yield</strong></span>
            {{ recipes[category][recipe]["form"].gross_yield(class_="form-control gross-yield font-monospace text-end", id=("grossYield-" + recipe_id), disabled=True, readonly=True) }}
            <span class="input-group-text">g</span>
        </div>
    </div>
    <div class="col">
        <div class="input-group">
            <span class="input-group-text"><strong>Gross Cost</strong></span>
            <span class="input-group-text">$</span>
            {{ recipes[category][recipe]["form"].gross_cost(class_="form-control gross-cost font-monospace text-end", id=("grossCost-" + recipe_id), disabled=True, readonly=True) }}
        </div>
    </div>
</div>
<!-- End of the recipe form section, buttons, etc. -->
This <div> adds three fields that store the supplementary yield, gross yield, and gross cost of the recipe.
The supplementary yield field allows the user to specify an amount of product for production beyond the number of products specified in the previous form. It's basically just extra product.
The gross yield and gross cost fields are read-only, and are updated automatically using JavaScript based on the supplementary yield field and the product specification fields.
Finally, add that JavaScript by adding a <script></script> block just below the end of the form (after </form>) with this code:
function update_yield(event) {
        let gross_yield_value = 0
        let recipe_id = event.target.id.split("-")[2];
        let recipe_supplementary_yield = document.getElementById("recipeSpecification-supplementaryYield-" + recipe_id);
        let recipe_gross_yield = document.getElementById("grossYield-" + recipe_id);
        let product_specs = document.querySelectorAll(`[id^="recipeSpecification-Volume-${recipe_id}"]`);

        for (const product_spec of product_specs) {
            let spec_suffix = product_spec.id.split("-")[3];
            let spec_amount = document.getElementById("specificationAmount-" + recipe_id + "-" + spec_suffix).innerHTML;
            gross_yield_value += (parseInt(product_spec.value || 0) * parseInt(spec_amount))
        }
        gross_yield_value += parseInt(recipe_supplementary_yield.value || 0)
        recipe_gross_yield.value = gross_yield_value
}
const recipe_specifications = document.getElementsByClassName("recipe-specification");
for (let recipe_specification of recipe_specifications) {
    recipe_specification.addEventListener("change", update_yield)
}
const supplementary_yields = document.getElementsByClassName("supplementary-yield");
for (let supplementary_yield of supplementary_yields) {
    supplementary_yield.addEventListener("change", update_yield)
}
This code adds JavaScript event listeners for each product specification and supplementary yield field. The, whenever these fields are changed, it updates the gross cost and gross yield accordingly using the update_yield() function.
update_yield() simply takes the value of each product specification field sums them, and adds them to the value of the supplementary yield field.
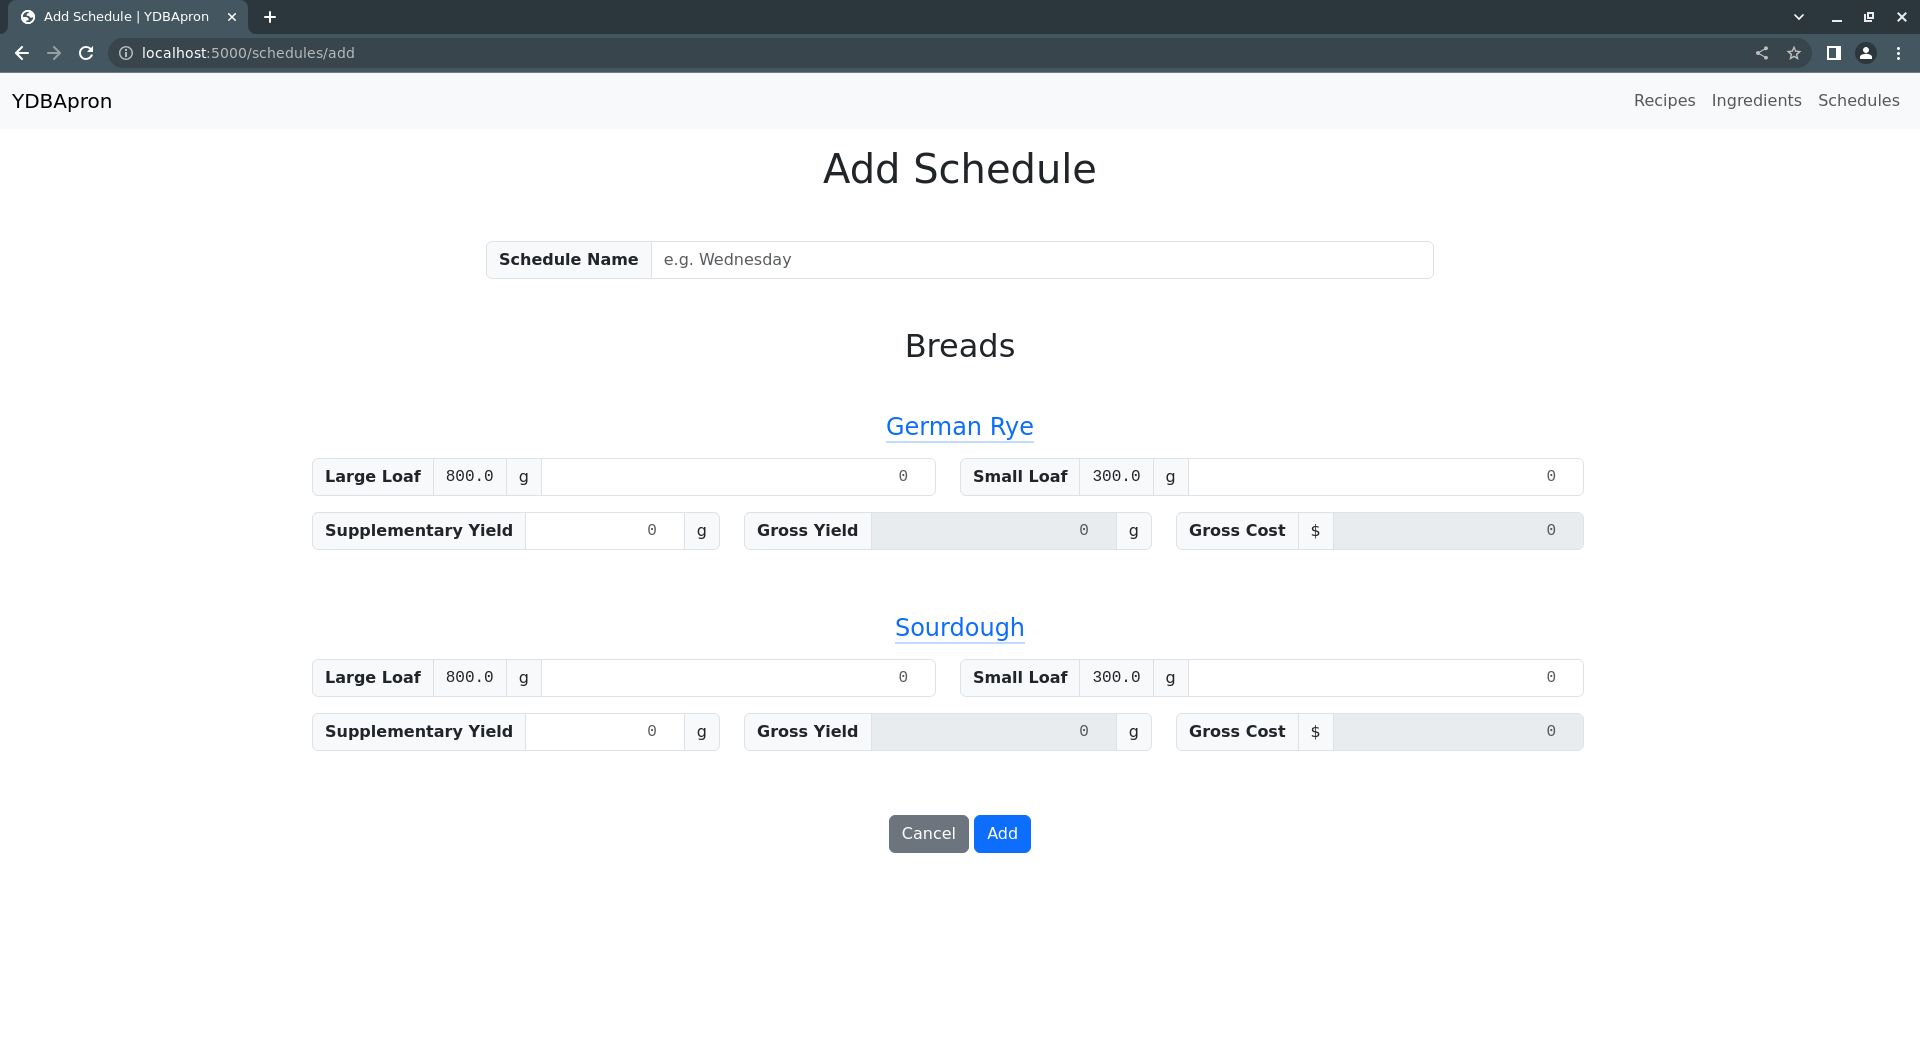
Now your add_schedule.html file should look like add_schedule.html.
Whew, that's it for the add and edit templates.
Summary and Review
Now that you've worked through the tutorial and built the full YDBApron, let's break down its application structure and data model to drive home the fundamentals of application development with YDBPython.
Application Structure
In a nutshell, YDBApron is a simple Model-View-Controller (MVC) application that uses a conventional Flask application layout:
├── COPYING
├── LICENSE
├── README.md
├── YDBApron
│   ├── __init__.py
│   ├── forms.py
│   ├── globals.py
│   ├── ingredients.py
│   ├── recipes.py
│   ├── schedules.py
│   └── templates
│       ├── add_ingredient.html
│       ├── add_recipe.html
│       ├── add_schedule.html
│       ├── base.html
│       ├── index.html
│       ├── ingredients.html
│       ├── recipe.html
│       ├── recipes.html
│       ├── schedule.html
│       └── schedules.html
├── setup.py
└── tests
    └── testdata.zwr
Note in particular the YDBApron directory under the top-level project directory. This directory represents the YDBApron Python module and contains all the application logic and HTML templates.
The YDBApron directory contains the following files:
__init__.py: Logic to create and initialize a Flask application.forms.py: Class definitions for various web formsglobals.py: Definitions for Python global variables used in other modulesingredients.py: Logic for adding, editing, and deleting ingredient information from the database.recipes.py: Logic for adding, editing, and deleting recipe information from the database.schedules.py: Logic for adding, editing, and deleting production schedule information from the database.
Together, these files represent the controller portion of this application.
Additionally, the YDBApron directory contains a templates directory with all the Jinja2 HTML templates used to generate the application web interface. This directory contains the following files:
add_ingredient.html: Template logic to display a form for adding and editing ingredientsadd_recipe.html: Template logic to display a form for adding and editing recipesadd_schedule.html: Template logic to display a form for adding and editing production schedulesbase.html: Template logic used across all other template pagesindex.html: Homepage templateingredients.html: Ingredient list page templaterecipe.html: Individual recipe page templaterecipes.html: Recipe list page templateschedule.html: Individual schedule page templateschedules.html: Schedule list page template
These templates represent the application views on the database, and so rely on the data structures and functions defined in the application controller files listed above.
The application data model itself is discussed in the following section.
The setup.py file contains basic application setup logic required for running YDBApron as a Python module.
The tests directory contains sample application data in testdata.zwr, as well as a simple unit testing infrastructure.
Throughout the tutorial, the testdata.zwr file can be used to populate a YottaDB database with YDBApron application data for demonstration and testing. This can done by running the following shell command:
ydb_chset=M mupip load tests/testdata.zwr
Application Data Model
The YDBApron data model uses simple tree structure to organize data, with some recipe and ingredient information fields stored in a delimited list format.
Specifically, YDBApron uses the native YottaDB tree model to categorize various data object types, e.g. recipes, ingredients, etc. For example, YDBApron defines a "recipes" node whose child branches represent recipe categories. Each recipe category branch has child branches that represent recipes, and so on.
testdata.zwr contains sample data that demonstrates the tree structure throughout YDBApron:
^YDBApron("recipes","breads","German Rye","ingredients","flour","rye flour")="500|g|0.581"
^YDBApron("recipes","breads","German Rye","ingredients","wet","water")="350|g|0.407"
^YDBApron("recipes","breads","German Rye","ingredients","dry","salt")="10|g|0.012"
^YDBApron("recipes","breads","German Rye","specifications","loaf","large")="800|g"
^YDBApron("recipes","breads","German Rye","specifications","loaf","small")="300|g"
^YDBApron("recipes","breads","German Rye","procedure")="Step 1"
^YDBApron("recipes","breads","Sourdough","ingredients","flour","wheat flour")="500|g|0.602"
^YDBApron("recipes","breads","Sourdough","ingredients","wet","water")="320|g|0.386"
^YDBApron("recipes","breads","Sourdough","ingredients","dry","salt")="10|g|0.012"
^YDBApron("recipes","breads","Sourdough","specifications","loaf","large")="800|g"
^YDBApron("recipes","breads","Sourdough","specifications","loaf","small")="300|g"
^YDBApron("recipes","breads","Sourdough","procedure")="Step 1"
^YDBApron("ingredients","flour","rye flour")="500|g|3.5|Bob's Red Mill|Shoprite"
^YDBApron("ingredients","flour","wheat flour")="500|g|2.5|King Arthur|Shoprite"
^YDBApron("ingredients","wet","water")="100|g|0|N/A|N/A"
^YDBApron("ingredients","dry","salt")="200|g|1.5|Morton's|Shoprite"
^YDBApron("schedules","Wednesday","breads","German Rye","specifications","loaf","large")=2
^YDBApron("schedules","Wednesday","breads","German Rye","specifications","loaf","small")=4
^YDBApron("schedules","Wednesday","breads","German Rye","supplementary")=200
^YDBApron("schedules","Wednesday","breads","Sourdough","specifications","loaf","large")=2
^YDBApron("schedules","Wednesday","breads","Sourdough","specifications","loaf","small")=4
^YDBApron("schedules","Wednesday","breads","Sourdough","supplementary")=200
Here's a diagram representing the same data as a tree:
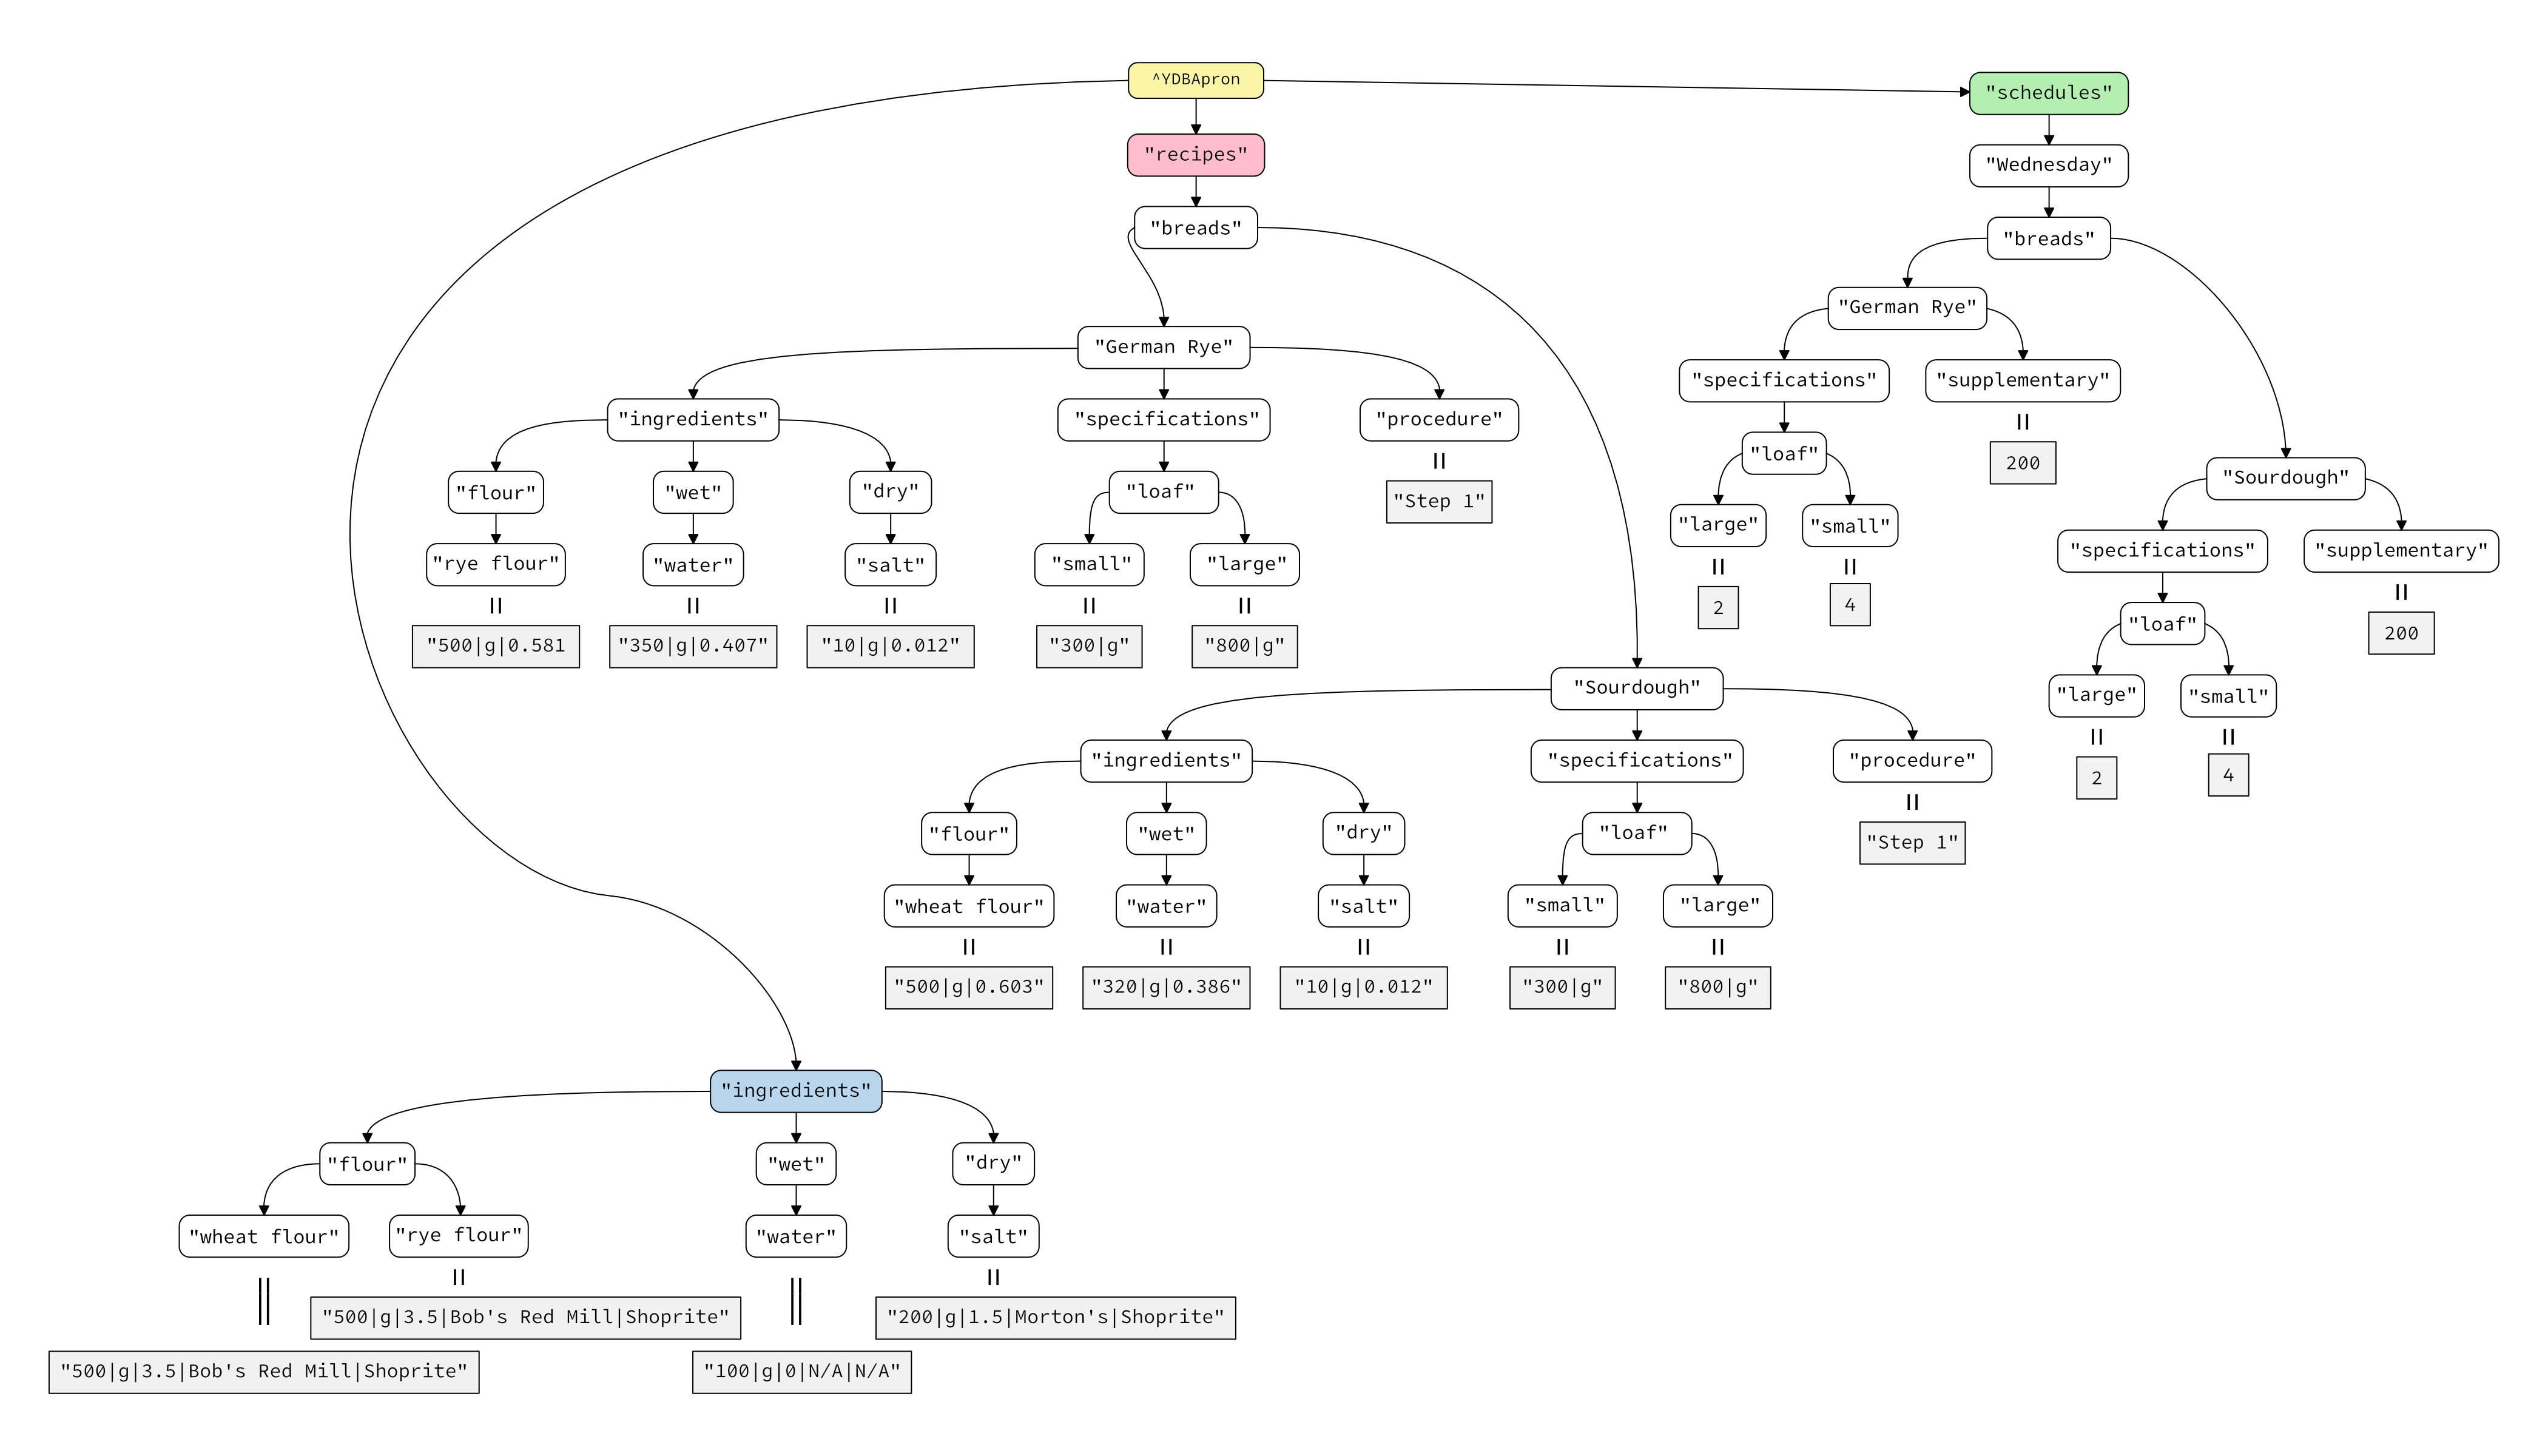
These nodes collectively represent a combination of recipes, ingredients, and production schedules. The following items are represented:
Two recipes: "German Rye" and "Sourdough"
Four ingredients: "rye flour", "wheat flour", "water", and "salt"
One product schedule: "Wednesday"
Note that some data is stored in a delimited format as YottaDB node values. For example, consider the ingredient information for the "German Rye" bread recipe in testdata.zwr:
^YDBApron("recipes","breads","German Rye","ingredients","flour","rye flour")="500|g|0.581"
^YDBApron("recipes","breads","German Rye","ingredients","wet","water")="350|g|0.407"
^YDBApron("recipes","breads","German Rye","ingredients","dry","salt")="10|g|0.012"
The details for each ingredient are stored in a list of fields that is delimited by pipe (|) characters. The meaning of these fields is discussed in more detail in the sections below.
Recipe data model
Each recipe is stored across multiple nodes representing a combination of ingredient and product specification information. Each ingredient gets its own node in the sub-tree for the given recipe. Each node is referenced using a series of keys of the following format:
^YDBApron("recipes",recipe_category,recipe_name,"ingredients",ingredient_category,ingredient_name)="weight|weight_unit|proportion"
For example:
^YDBApron("recipes","breads","German Rye","ingredients","flour","rye flour")="500|g|0.581"
^YDBApron("recipes","breads","German Rye","ingredients","wet","water")="350|g|0.407"
^YDBApron("recipes","breads","German Rye","ingredients","dry","salt")="10|g|0.012"
Together, these nodes contain all recipe details for the following ingredients of the "German Rye" recipe: rye flour, water, and salt.
Note in particular that both recipe and ingredient information is stored in these keys. Each node value itself contains the following information about an ingredient in the "German Rye" recipe:
Total weight
Weight unit, e.g. grams
Proportion of total recipe yield
Similarly, each product specification is stored using the following key layout:
^YDBApron("recipes",recipe_category,recipe_name,"specifications",specification_format,specification_size)="weight|weight_unit"
For example:
^YDBApron("recipes","breads","German Rye","specifications","loaf","large")="800|g"
^YDBApron("recipes","breads","German Rye","specifications","loaf","small")="300|g"
Each product specification node value contains the following information about a product specification defined for the "German Rye" recipe:
Total weight
Weight unit
Ingredient data model
Ingredients are stored in YDBApron using the following key-value layout:
^YDBApron("ingredients",ingredient_category,ingredient_name)="ingredient_weight|weight_unit|price|manufacturer|vendor"
For example:
^YDBApron("ingredients","flour","rye flour")="500|g|3.5|Bob's Red Mill|Shoprite"
^YDBApron("ingredients","flour","wheat flour")="500|g|2.5|King Arthur|Shoprite"
^YDBApron("ingredients","wet","water")="100|g|0|N/A|N/A"
^YDBApron("ingredients","dry","salt")="200|g|1.5|Morton's|Shoprite"
Schedule data model
Production schedules are stored in YDBApron using the following key-value layout:
^YDBApron("schedules",schedule_name,recipe_category,recipe_name,"specifications",specification_format,specification_size)=specification_volume
^YDBApron("schedules",schedule_name,recipe_category,recipe_name,"supplementary")=supplementary_yield
For example:
^YDBApron("schedules","Wednesday","breads","German Rye","specifications","loaf","large")=2
^YDBApron("schedules","Wednesday","breads","German Rye","specifications","loaf","small")=4
^YDBApron("schedules","Wednesday","breads","German Rye","supplementary")=200
^YDBApron("schedules","Wednesday","breads","Sourdough","specifications","loaf","large")=2
^YDBApron("schedules","Wednesday","breads","Sourdough","specifications","loaf","small")=4
^YDBApron("schedules","Wednesday","breads","Sourdough","supplementary")=200
In each case, the specification_volume is the total number of the given specification for the given recipe to be produced. For example, the "Wednesday" schedule calls for 2 large loaves of "German Rye" to be produced and 4 small loaves of "Sourdough" to be produced.
Additionally, each schedule allows for a supplementary yield to be specified for each recipe. This allows users to schedule recipe production that is not allocated to any particular product format.
For example, the "Wednesday" schedule specificies 200g of supplementary yield for the "Sourdough" recipe. So, in addition to the 2 large loaves and 4 small loaves scheduled to be produced, an additional 200g of "Sourdough" dough will also be produced.
Conclusion
The preceding tutorial demonstrated how to build a simple web application, YDBApron, from scratch using YottaDB as the backend data store.
YDBApron is just one example of the kinds of applications that you can build with YottaDB. It shows how to use a variety of the features of the YottaDB Python API, as well a little bit of administration and operations side of YottaDB.
Additionally, the summary sections above included examples of how to structure application data in YottaDB, showcasing how flexible the YottaDB data model can be.
With this, we hope you have come to a better understanding of how YottaDB works, what it can do, and whether it might be a good fit for your next application.

